🎆 Mattia Selicato Sketchbook - Getting back!

Fanart piece I recently made

Hi, I’m happy to write here for the first time! I really needed a place where I can post my daily progress on VFX studies and I think I found it.

I’m a VFX Apprentice student and I’m loving my journey there.

I love discussing everything I make so please feel free to drop any feedback or critic for my EOD progresses, and in general!

Today Sandra Femenía helped me understand functions in UE and since I’ve been a bit scared of them, I thank her a lot.
My first function is about controlling the overall time while panning a texture.

Before, I would do this all the time …boredom

Image from Gyazo

But with this function I packed all together :

And now all I have to do is just recall it like this!

Image from Gyazo
And I can do it because I checked this box here, very important:

A very important thing is this FunctionInput node:

3

In here you can control what shows in the final function node on the left side, basically you choose the name, what values you need to plug in and also you can choose the order in which it appears in the stack!!

Super cool :smile:

Now I can finally control time simply by recalling the function and plugging in a constant 2!
I feel like DIO

That’s all for today friends c:

14 Likes

Hello, Matti!

Glad to see your work in here, you’ve progressed so much in a short period of time. I always forget to tick the “Expose to library” inside the material function, that’s a nice tip to remember. It feels nice to see that you’ve managed to do what you needed with my help. You know where to hit me up if you need anything else.

Looking forward for new updates. Keep it up! :woman_mage:

1 Like

Thank you Saiel :smile: I hope to show you a lot of improvement over time!

Today It has been a slow monday, I had to catch up on a lot of things with my VFX friends Tony Manzi and Narsus since we didn’t hear for a while.

But I didn’t lose the chance to get into collecting some reference in the meanwhile.

I had pre-registered for Pokemon Unite Mobile version so I downloaded and started playing it looking at all the cool vfxs there are!

(The software I’m using to share my Iphone 11 screen is called ApowerMirror, it’s very good and I highly recmond it )

I will be awesome to try to make something looking like Pikachu’s skillset. I’m so in love with lightnings!!

Image from Gyazo

I’m pretty sure there’s a lot of flipbook action going on!

But soon I’ll dive in something very similar… for today it’s all :grin:

6 Likes

Thats awesome. It does look like there is a lot of flipbook and meshes around Pikachu after he lands on the ground. The burn marks are for sure hand drawn.

1 Like

I love how everything stays on screen for a very short amount of time, but just enough to register as cool and make it feel like pikachu stuff.
They did a great job at this!


Today I’ve managed to put all the things I have to do inside Todoist, an awesome desktop app that helps you schedule your days!
Highly recomended!

Apart from this, my main goal today was to come to a good point with my new Asol Ultimate Fanart!

I made myself a little workflow to follow, and i started with making some study of what happens when, and which meshes i was gonna need.
Here it is

A couple days ago I made some flipbooks for the lightnings that happen inside the beam, and here they are, as a rough version.
I’ve done these in animate, I used it very little times, but it seems to be very stable and friendly, apart from some annoying bugs with symbols.

The playback on this gif is a bit choppy but it sells the main idea. In here are anticipation and the actual lightnings.

I had to singularly export each of them because it would give me the chance to work modularly.

Plenty of lightnings!! :sparkles:

Playing with colors, lifetimes, placement and emitter delay, I was able to recreate ALMOST the same timing in the engine.
I’m not 100% with it, but it’s only a starting point, many other things have to be added tomorrow.
This is what it looks like so far.

I think I’ve landed pretty close to a decent start! Tomorrow I’ll continue it and probably finish it

If you can already tell me something from this choppy GIF, it would be appreciated!

See you tomorrow!!

10 Likes

Super focused day! I’ve been working since early morning (9:30) to late afternoon (20:00)!
And I’m very happy of the results, to be able to deeply focus is super important.

I brought the effect to the end of the blockout stage, it’s looking pretty nice, because from here I can tweak a lot of stuff very easily.

I also added the original sound because it makes everything so convincing.

It misses the anticipation, which I’m working on.

Framerate is sloppy tho, I’ll make sure it’s high framerate once the effect is finished.

it’s pretty much going in the direction i wanted it to go, so i’m very happy. Here is an image for reference.

It needs more work to achieve a strong dark “phantom” behind the head of the projectile, and also i have to work the smoke around, but it’s super fun and I can easily throw another day of work on this!

I want to remember all I’m referencing is a work from Walker Paulsen and Shubin Simu at Riot games, so this is just a fanart!!

I’ll update you tomorrow, thanks for following!!

6 Likes


Here it is, finally ready to show the Fanart I was working on for the past days!

If you want a proper video ( WITH SOUND​:grin::joy: ) You can head to yhe post on Artstation . Now let me tell you some interesting stuff I learnt these days from amazing people over VFX Apprentice!

First of all let’s focus on the clouds. I love my clouds dark.

You can see here I am using a handpainted dissolve to make them fade in a swirly fashion c:

Here is a little video because in the effect, they disappear very fast.

Sorry for the offset camera, they like to spawn randomly.

Also, notice I powered the dissolve a little bit, so the cut is “harsh”.

Next on the dissolve list, we have the smokey clouds that dissolve after the beam strikes.
I’ve received a compliment from Kees about it and I wanted to show how it is made.

At the left a simple alpha and then there is the dissolve. Timing is essential here because there are 2 planes on top of each other that dissolve at different timings! Have a look

I also stretch the meshes over their life to give it more life.

VERY IMPORTANT THING IF YOU DON’T WANT TO LOSE SANITY

These little stones here like to collide only when the world is not playing. Once you hit the PLAY button, they will not collide anymore.
It is a known bug apparently, and I hope this will prevent you from going crazy after it!

Now, the real core of the effect is the flipbook I made some days ago but just so you know, the way I plug it in the engine is by placing every frame in an evenly divided matrix.

Also, I had to singluraly export all the lightnings because they wouldn’t work well if I had them all together in 1 flipbook.
This is very important.

Next!

You might have noticed this mesh appearing very quickly, and that’s what it is.
A simple mesh with a panning texture on it!
I gave it an initial push and a constant push so that it goes VERY FAST. (and also I stretch it)

This is what the mesh looks like.

Have a look at the material and the texture, it’s pretty simple.
I originally planned to have some small rock debris flying upward together with the panning texture, but I ended up not using them.


This is a detached node with the debris still plugged in it.

I think that in the “anticipation” part, there’s only one thing worth mentioning where I spent more time

These are little “cloves” meshes. Say you split a sphere in a half, then you take only a section of the sphere, and use it to pan a texture on it.
That’s what happened!

I spawn multiple meshes like that rotating them at spawn. Now let me show you what the material looks like.

these two handpainted textures are multed together while one servers as a mask for the edges, the other is controlled with a dynamic parameter and gives the movement.

The color input is a little bit different instead because I decided to pan diagonally the same texture but lerp the colors so that it has some streaks of flashy energy going almost horizontally!

I multed a little mask at the end (the middle bottom multiply) to help myself with a fade in the back of the mesh.

Phew that was a long week! It took me more than intended because I decided to apply ton of feedback from a lot of people at VFX Apprentice, namely Jason Keyser, Kees, Ben Ferling, Tony Manzi, Sandra Feménia, HarleyQ, ToulPaw, Rubfish Inès Djezzar, Harmonie Duquesne, Narsus, Conrado and some others.
Sorry if I forgot someone, my head is exploding :rofl:
Thank you all guys.

One last thing I wanted to mention HarleyQ and ToulPaw who helped me a ton by sharing knowledge about Blueprint which I never previously used.

This small Blueprint allows you to fire the emitters when the world starts, looping with a delay betwen them, pretty cool!
THanks guys.

One very last thing. if you like the pavement I used in the presentation, you can learn how to make in substance designer from Bruno Afonseca in one of his VFX tutorials over Artstation learning.
This one precisely
https://www.artstation.com/learning/courses/PJo/intro-to-substance-designer-for-vfx/chapters/VxEp/sd-ui-explorer-packages-graphs-resources

I did not follow that course yet, it was Tony Manzi who made it and I’m only using it !

I learnt a lot with this little beam, and I hope that you guys learnt something too!
Please comment if you want me to show you more parts of the effect!

17 Likes

Hi guys!
These weekends have been super packed with plenty of vfx making, and couldn’t really find my eyes at the end of the day.

But today I want to walk you thought some cool parts of the VFXs I made.

Starting with the “portal” fanart from lostark, I think it’s interesting to notice that the original material has a flicker and I tried reproduce it.

Here you can see the original effect

Here instead you can see how mine is flickering (in the final result is not super evident, I liked it a bit nuanced)

flicker

How did I do it?

Let’s go:

SEIZURE WARNING

don’t look at these images if you’re sensible to strobing lights:

Summary

seizure

First of all, we multiply the time value for a crazy amount, be it 200, then we are goin to plug it into a sine, which gives us values from 0 to 1 and then we can ceil the result which basically allows us to from 0 to 1 without passing between all the in between values.

So basically it goes 01010101 infinitely.

now, I clamp it because I don’t want it to go completely black and completely white, and finally multiply it for a very small fraction 0.04, so that i can use this to add it on top of something else.

added

this is what it looks like after i’ve added the “waves” I made by multiplying some textures and panning theirs UV on top of another noise.
These are the textures:

And this is the way I pan a noise on top of an UV coordinates and then plug it into a texture, so that it distorts.
uv

So in the end, the final result is flickering a little bit, but just enought to have that shimmering feel!

giffone

You can see it better on my artstation post.
https://www.artstation.com/artwork/3dAyvv

I think I’m going to stop here for today, but I hope this taught you a cool technique!

CIAO!

4 Likes

Hi VFX Artists!
I’m back with some little more insights on how I did things, which can help someone curios in their effects!
Feel always free to reference my works and feel free to copy my shaders whenever I share them!
It would make me very happy to see where you used it and what you came up with!

Those “chords” I’ve done was really something fun to make.
Nothing is done in cascade, it’s all shader based, and put onto a mesh.

Let’s dive right into it!
Do you like spaghetti? I sure do, I’m italian!

Nightmare Fuel :smiley:

THIS MATERIAL IS OLD AND UNNECESSARILY LONG

I could basically summarize it into these 3 things:
Multiply panning Texture 1 on top of slower panning Texture 2 and color the output.


Repeat this 2-3 times and pan at different speeds and slightly different directions.

Then you mask the result:

Nicolas Marschall made me discover this mathermatical way of making a mask, rather than painting it yourself!
Then, do the same again but pan it in the opposite direction and mask the inverse of what you masked before.

Now add and color everything at the end.


aa

If you want to, mask the top!
jk

Last thing, the mesh is very simple.


Take a plane, divide it horizontally 5 to 1 ratio, stretch it vertically, then delete 3 columns of faces, leave one column and delete 3 again.

Done!

I hope this was cool and you learnt something!

Smol update on little “happy accident”.
Moving around in the world I looked at something I liked and took a record of it, enojy!

THanks guys :smile:

4 Likes

Hi guys, today I started the blockout of a personal piece for my reel!
It’s a holy explosion, and it has many steps, which will take me roughly 3 days to blockout and 1-2 more to polish.

But I’m pretty sure it’s worth it.

Here is the concept:

The first part of the blockout took me the entire morning, I was able to get to a point where I like the timing.
The elements are very rough, and I also need an animation, a sword that raises, but other than that, timing is alrght.

Here is my planning for the meshes of the first part!

Since the blockout phase is mostly for timing, I’m going to make custom meshes for this effect later down the road.

More on this tomorrow!

CIAO!

9 Likes

Incredible work, really love the breakdowns and explanations. Thank you for posting these!

2 Likes

I totally agree with Azeros. Thanks for sharing your knowledge, Matti!

Keep it up :sparkles:

1 Like

Your welcome! Come back for more :smile:

I’m only imitating the best :heart:

Was the reflection on the floor part of the program? Also how did you add the blue glow? Thnx

Hi PonyD,
I’m not sure to which effect you’re refering to, because I’ve done a lot of blue glows on a reflective floor :rofl:

The reflection is part of the program meaning it was put there willingly, if that is what you mean.
The tiling floor uses a bit of reflections and low roughness.
For the glow, it’s mostly just a big quad with a soft sphere on it. If you see complex glows it’s just more quads on top of each other concentrically.

If none of these, it’s emissive cranked up, together with a little bloom in a post process volume.

Let me know if I nailed it!


I won.

Against who? Myself.

Hi guys! It’s been a while now from my latest update. But things got stormy in my life, there are winds of change, and they’re pretty strong!!

But I wanted to make a little reflection, just like @Saiel does!

Reflection

At the end of April 2021 I finally got my Master’s Degree in Graphic and Web Design at Fine Art Academy in my hometown, Foggia, Italy.

Some people like to chill and start having parties with friends with their renewed freedom, but I sat down with a dear friend Tony Manzi and started plotting what to do to actually start working in the gaming industry.

I started out thinking Illustration for cards (like Hearthstone) would work for me, but quickly understood how saturated the field is and how hard it is to get better at it.

From there I moved to environment and props art where I found my love for stylized props.
I also met some good frens on twitter Michele W Hung is one of them, she makes beautifully stylized props in Hearthstone style and also loves Harry Potter.

But here we go again, props and environment is a very saturated field too.

But more than that, I didn’t like taking a lonely pathway, I was literally studying by myself and it wasn’t really encouraging…because Tony instead started studying VFX in real time.
He started a course I was totally oblivious about at the start: VFX Apprentice.
But along the way he showed me some of his works, he also talked to me about Jason and shared with me a lot of GDC talks and I slowly got convinced that walking a lonely way for props and environment isn’t really my thing.

The epiphany came: What if I start studying VFX too?

I took again a deep breath and dove into a new domain, but this time I was together with Tony;
This is what changed everything.

From there I purchased VFX Apprentice course and studied shoulder by shoulder with Tony, watched talks together, practiced together, almost all the time!

It was hard, don’t get me wrong, we have VERY different approach to study, but we managed to make it work somehow!

At the start of my journey I said myself I was going to land a job at 3D Clouds, a small italian game developer company, but today I’m in contact with multiple companies that work for super famous titles and I would have never thought I could actually make it up until here.

I challenged myself at the start, I aimed low, but secretly wished I could land higher.
Maybe this isn’t the best lesson to teach but don’t overshoot, because you might feel disappointed if you don’t land where you expect.

On the other hand, you’ll feel like a champ if you land higher than expected!

So, did I win?
YES,I won against myself but it wouldn’t have been possible without letting myself loose to a new experience (studying VFX ) and without a friend like Tony.

So if there’s only one thing you take from this post, please be it the fact you need a partner to find motivation, to challenge, to get comforted and to push you when you feel down.

Hopefully in the next month or so I will be able to comunicate to you guys which company I will be working with!

Until then, take care!

My first VFX Real-time Reel

8 Likes

Meanwhile I wait on companies I want to get back doing what I love: sharing my findings and cool things with you!
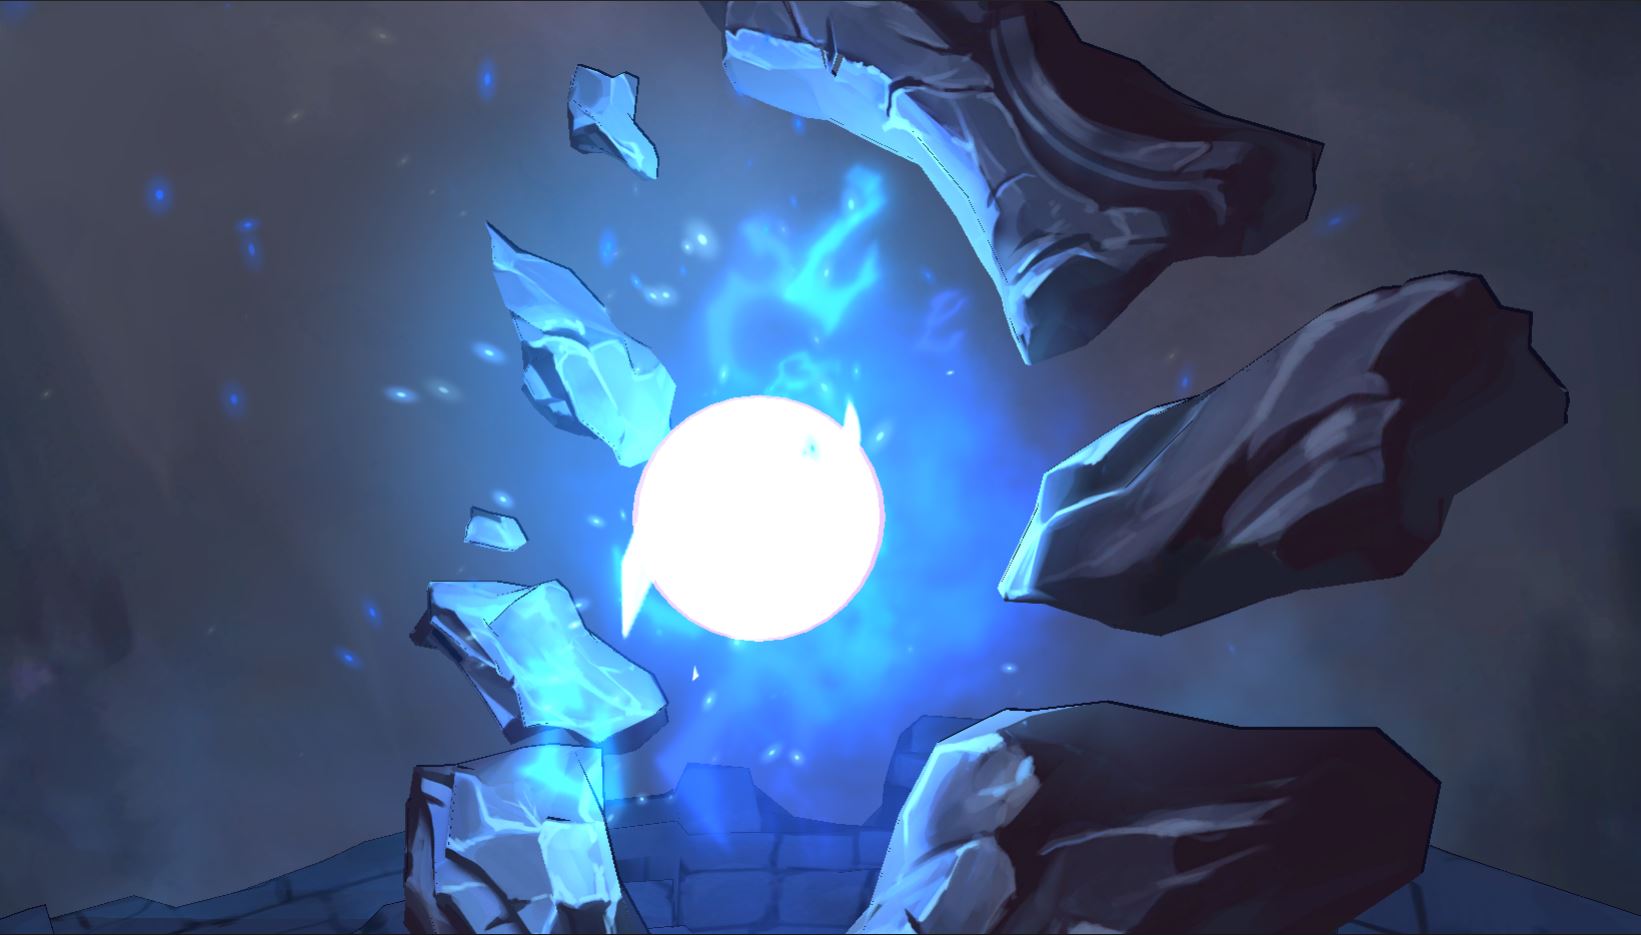
Today I want to share a shader (material) I created for my reel effects, and I love it so much because it looks like simulated holy fire!


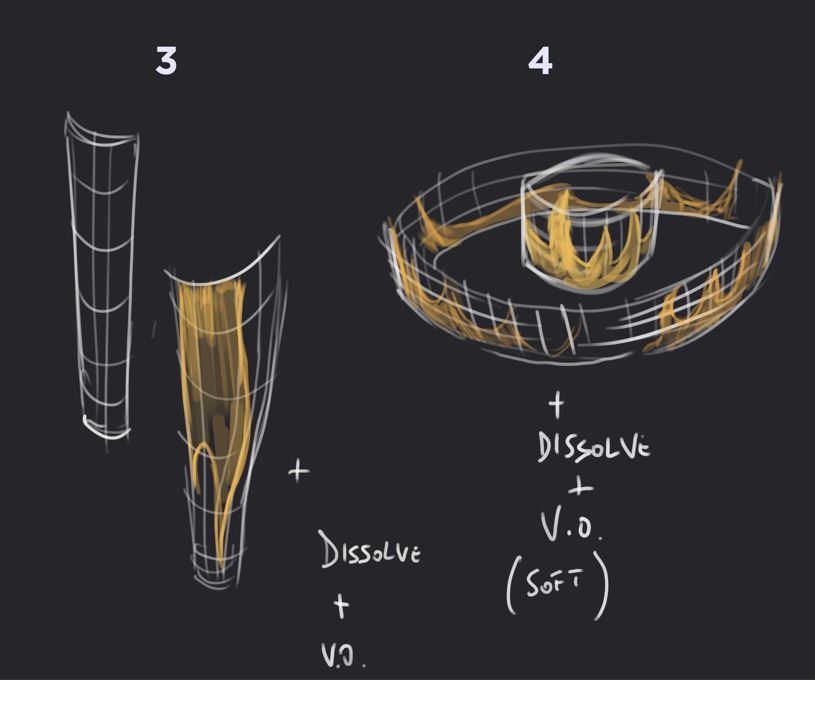
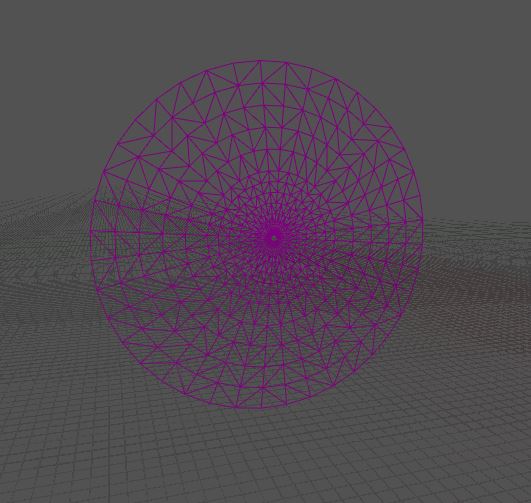
This is the material applied on a flattened cilinder.

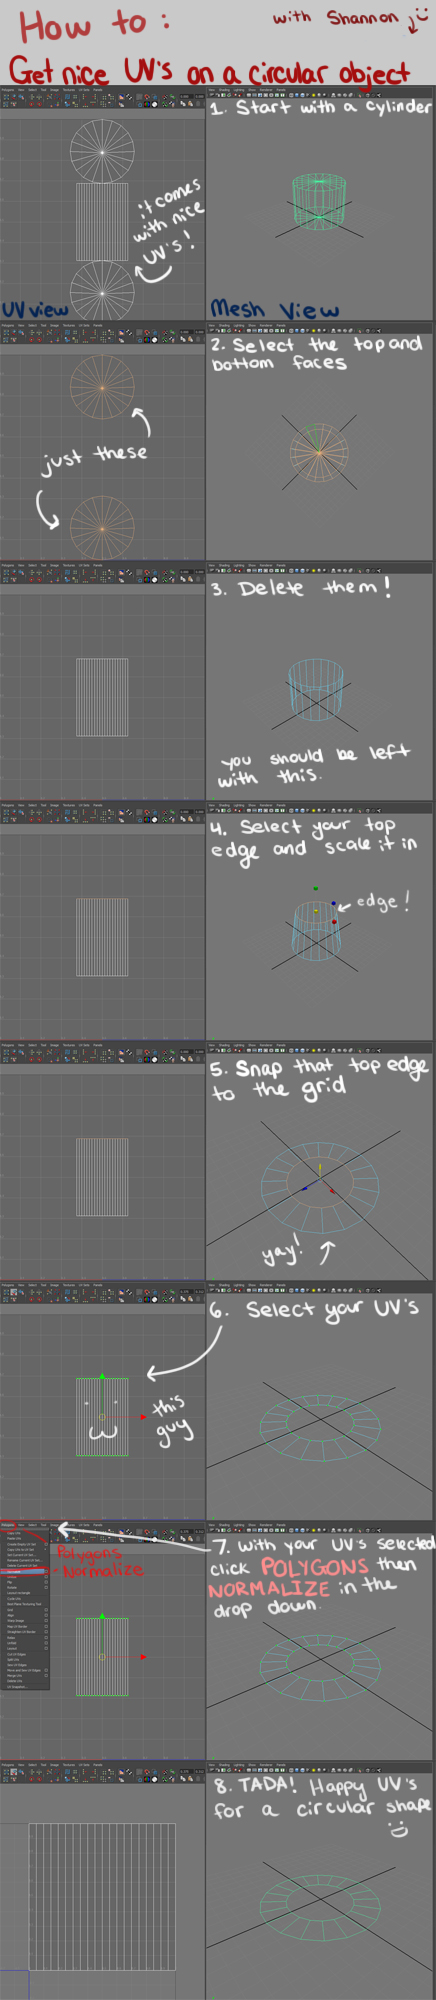
I’m going to show you the mesh just for the sake of completion, but you can find a pretty good tutorial on it from Shannon Berke!
My mesh

Here is the Shannon tutorial (If anyone has a link to her article, please give me cause I lost it)

FIRST PART - Textures :paintbrush:


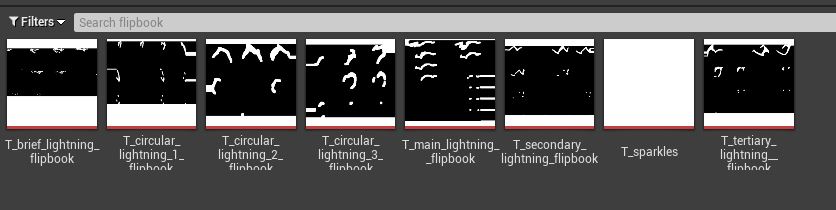
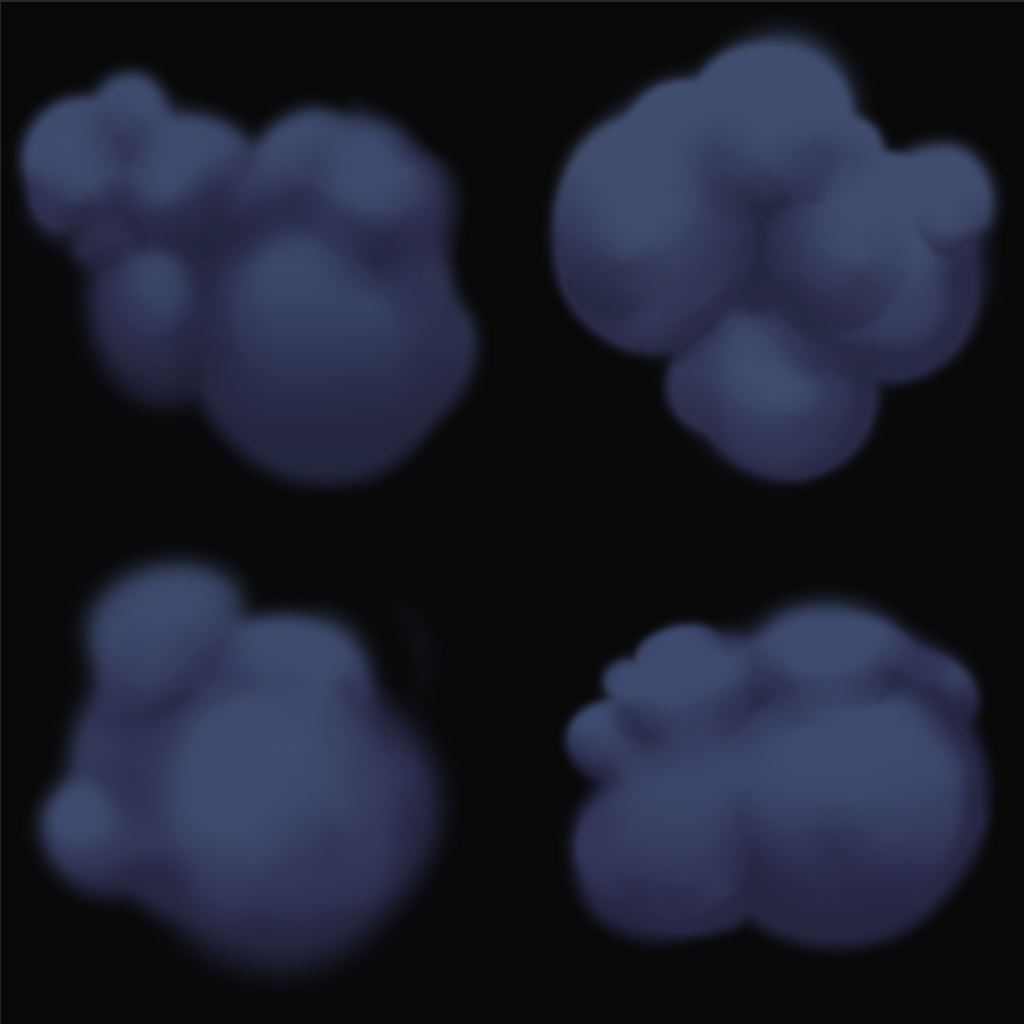
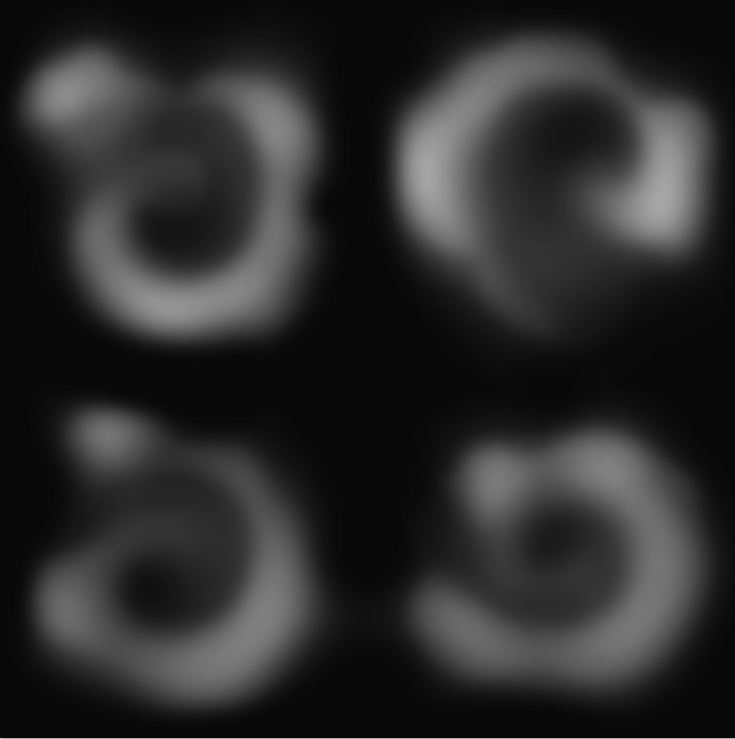
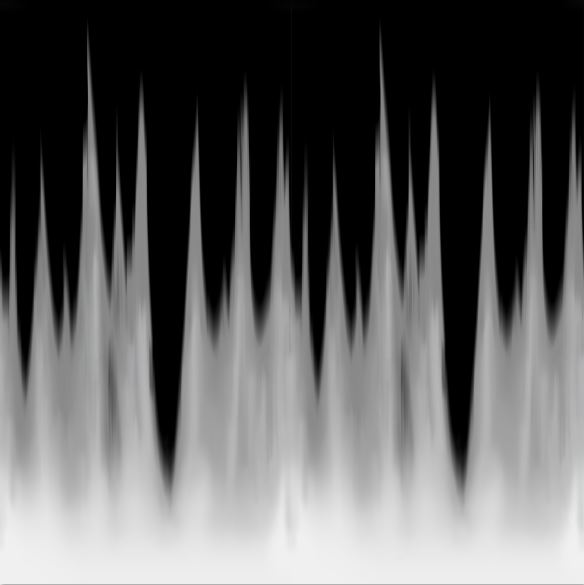
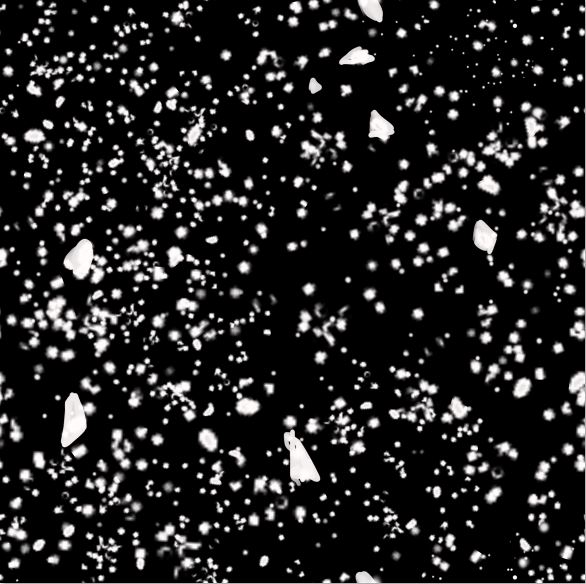
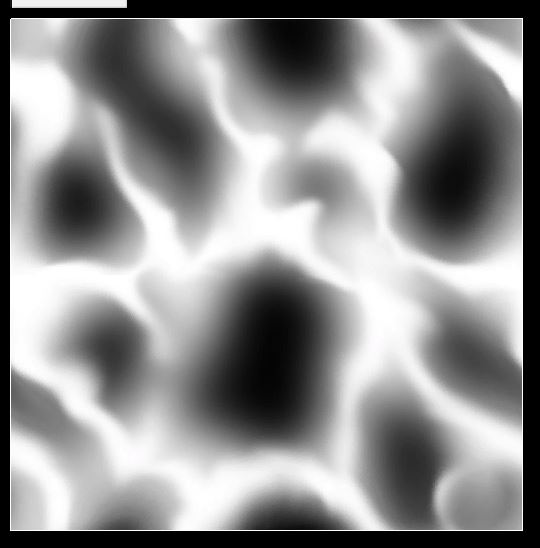
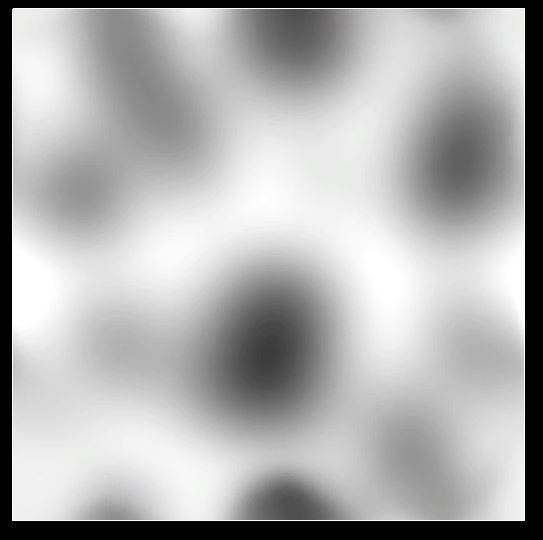
Noise - Blurred Noise

These two noises come as part of the VFX Apprentice package shipped with the course.

[Shameless promotion here]

The course offers a wide array of noises to work with and I think it’s wide enough so you can dive into effects without worrying about making textures for a LONG time.
It’r really worth the money!

But if you wanted to do this in Photoshop, I suggest you use this new option called “pattern preview”
that allows you to paint in tiling mode. (only available in the 11 version)

You find it here:

(Krita had this function from AGES but shh…)

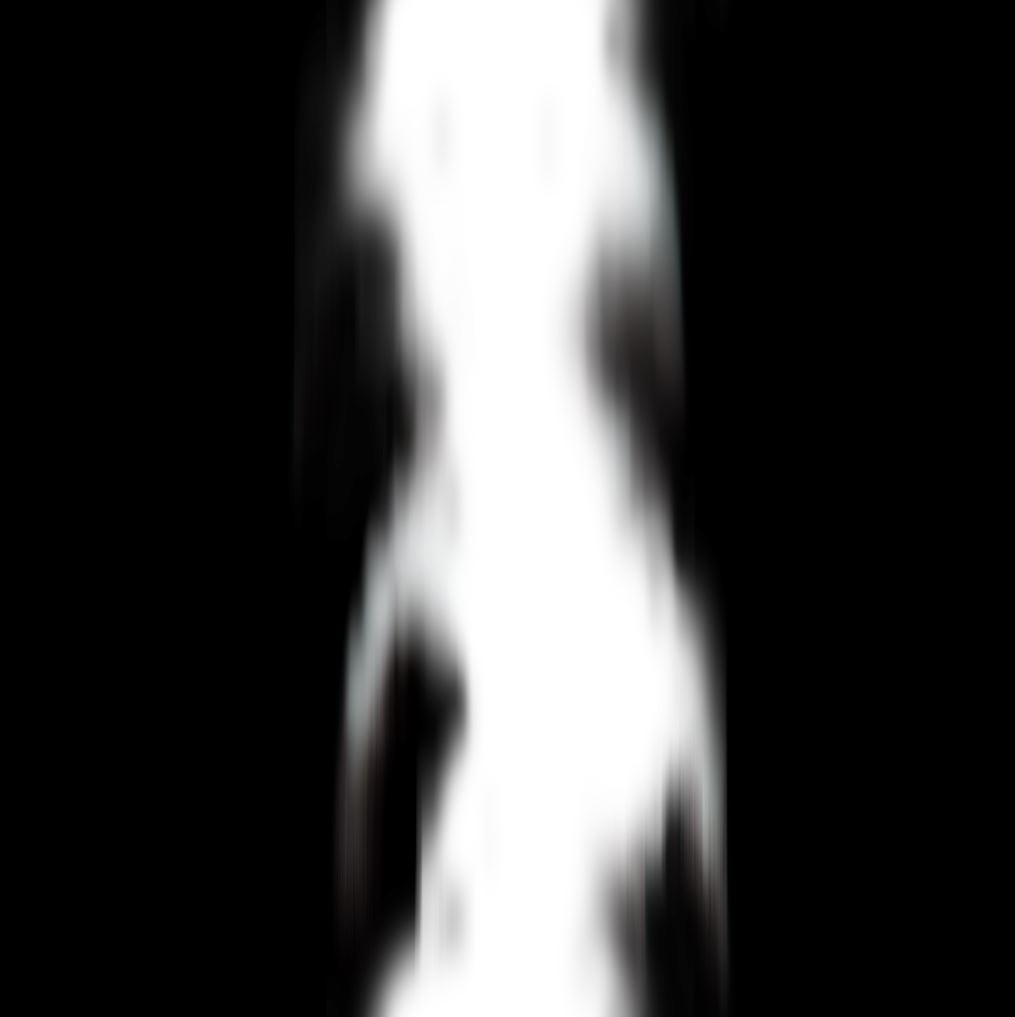
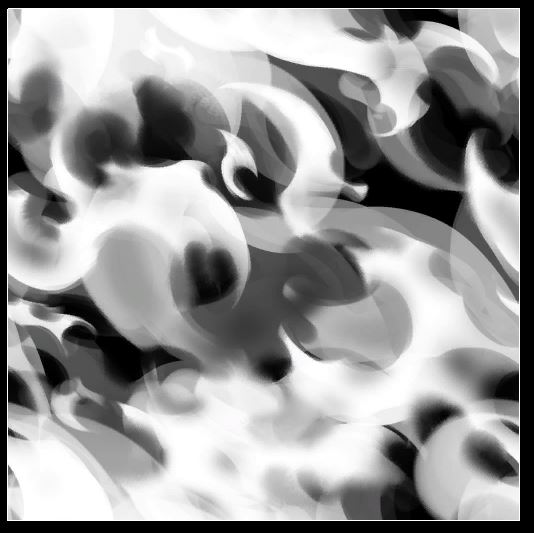
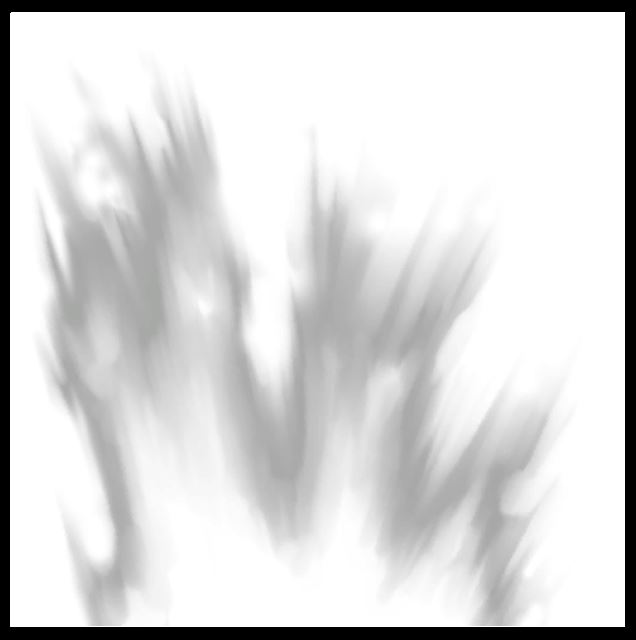
The last texture here, I painted it myself because I’m very much into fiery textures!


You can have the TGA and Normal map files here
Mind you, this texture is only used to distort UVs.

I think it’s a beautiful texture to use as an alpha to LERP some colors on it, like this:

SECOND PART - Build the Material (Shader)
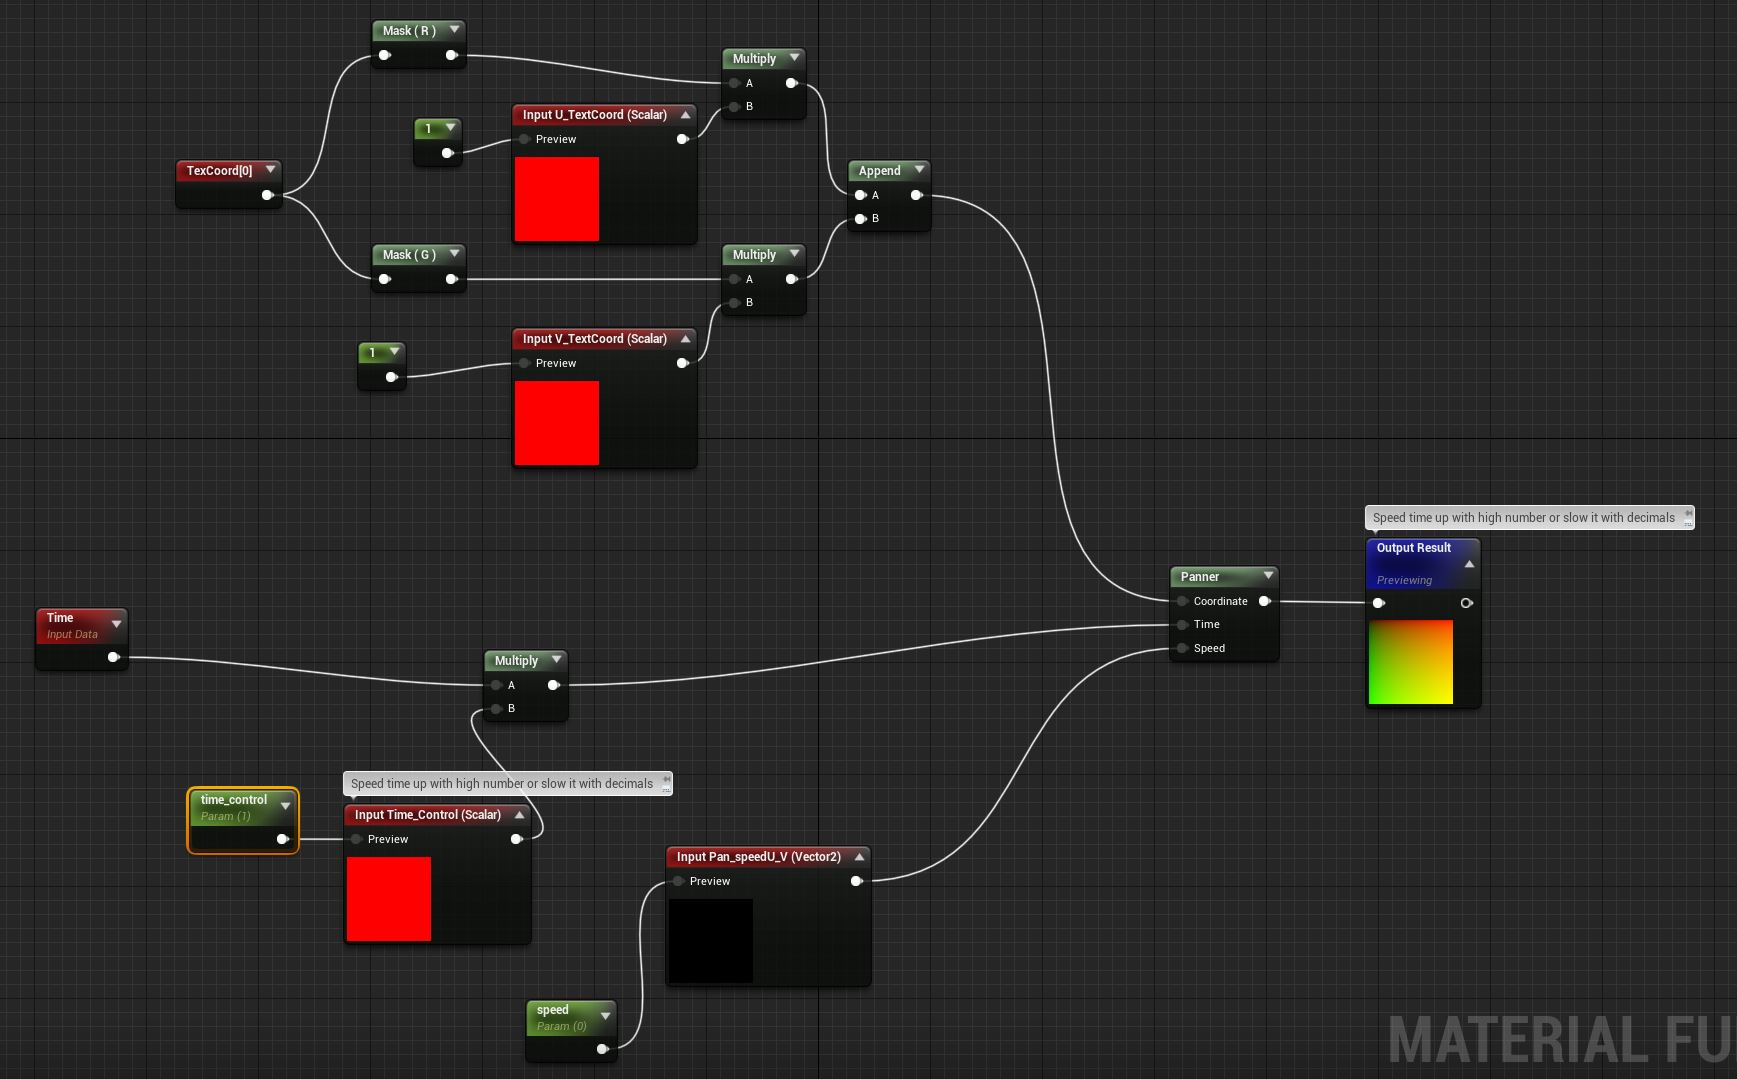
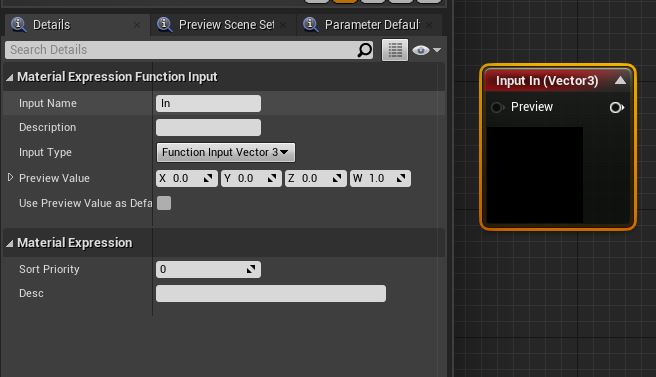
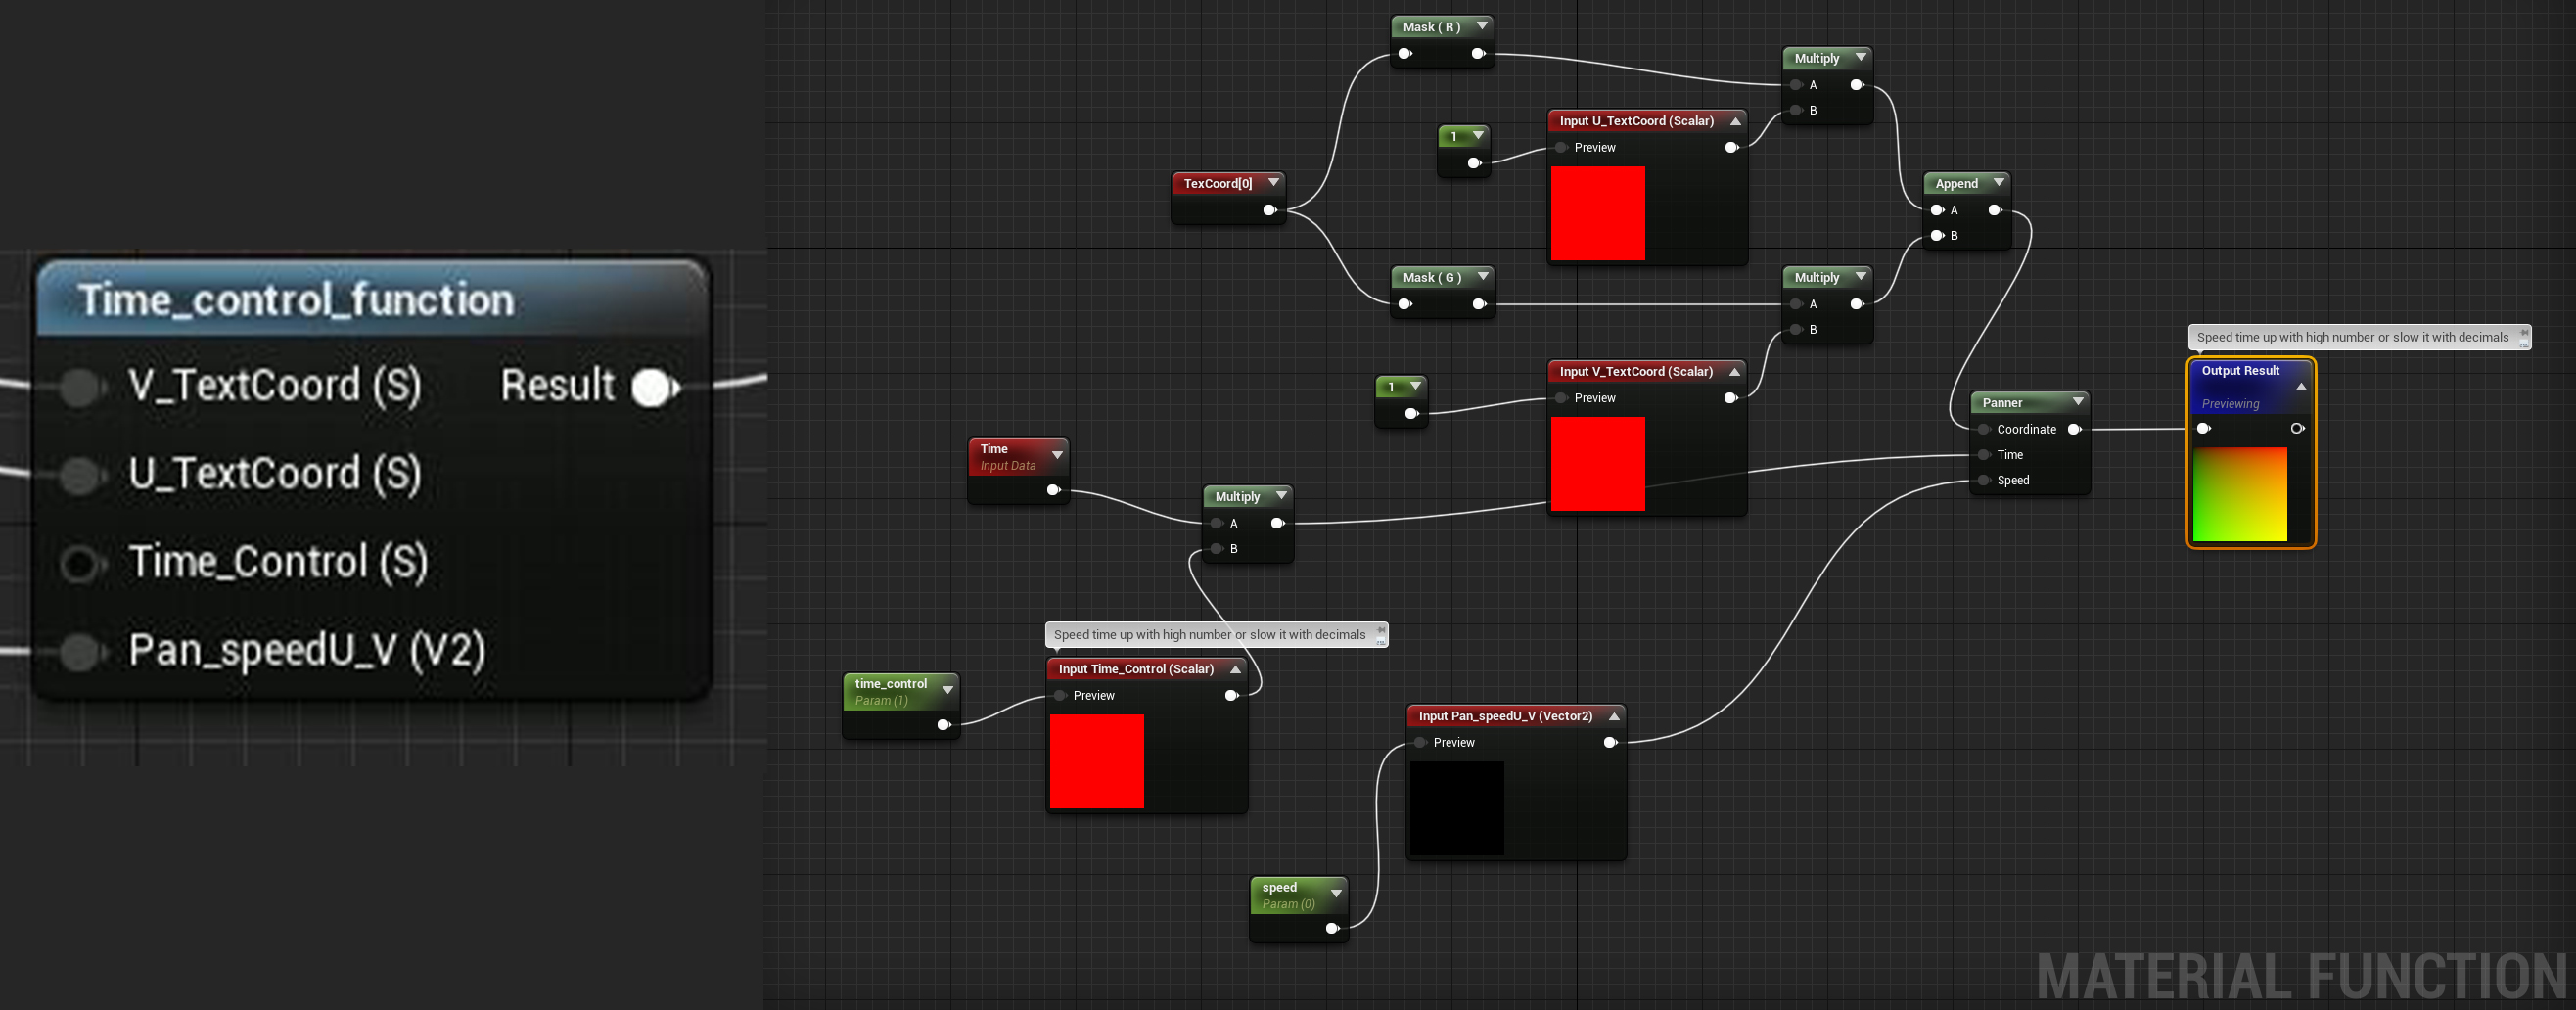
Before I show you the material, I want to back off a little and tell you I built a function to take care of panning, tiling and time for the UVs.
It’s very simple, take a look at it yourself.

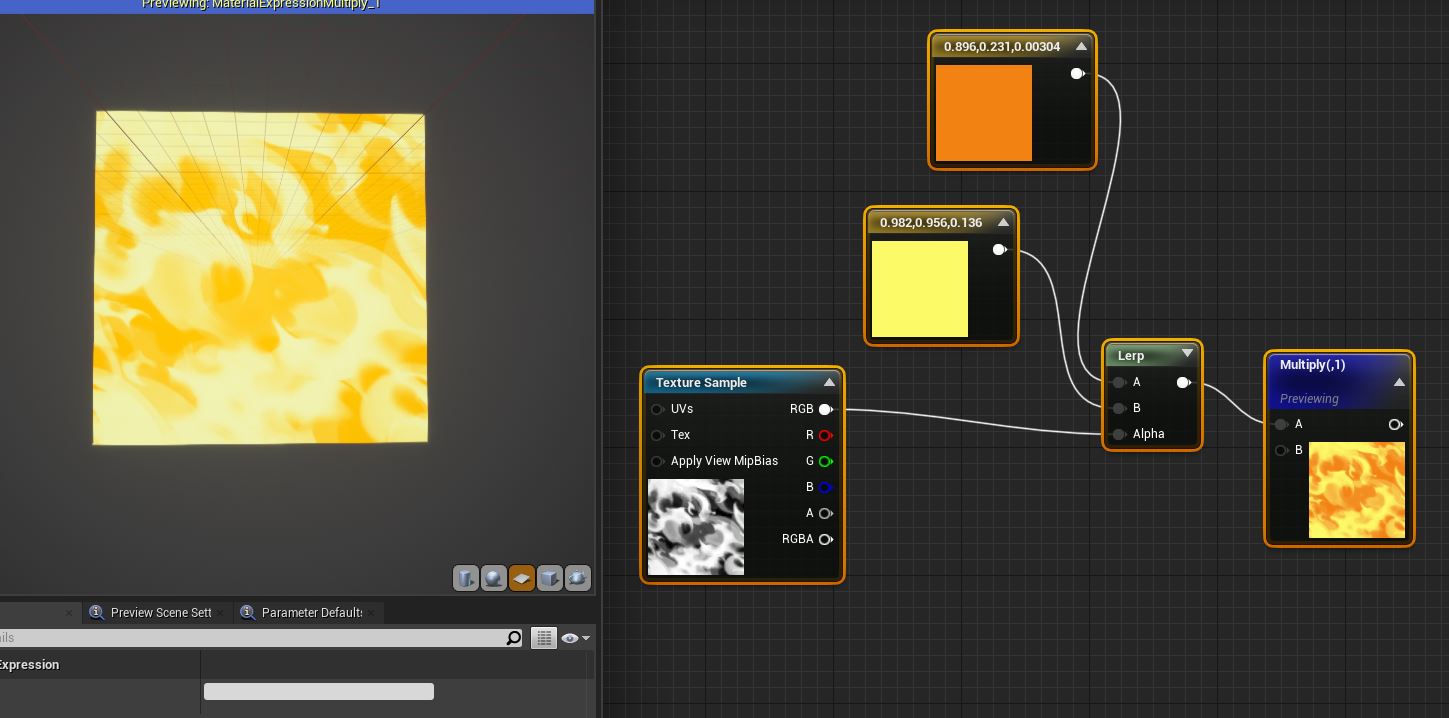
Now moving on to the Material itself, the core principle is: multiply a panning texture on top of a slower panning texture with different tiling and distort its UVs.

Let’s see what that looks like in the editor:

Planning ahead, I stretch Vertically the main texture because the mesh that I’m going to use (flattened cylinder) is going to stretch it Horizontally, so I do it to counterbalance it.

In UE saturate is a free operation that works like Clamp, but has no cost. I clamp values so I don’t over blow anything along the way.

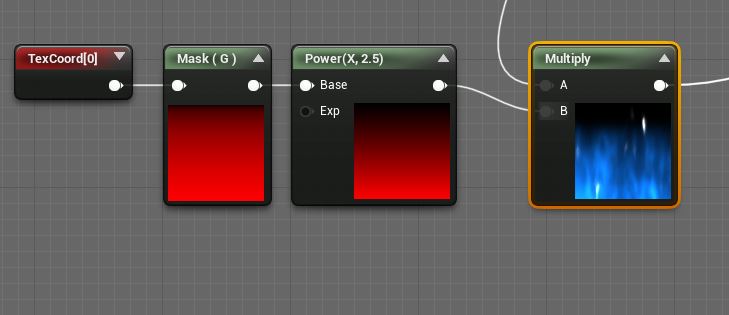
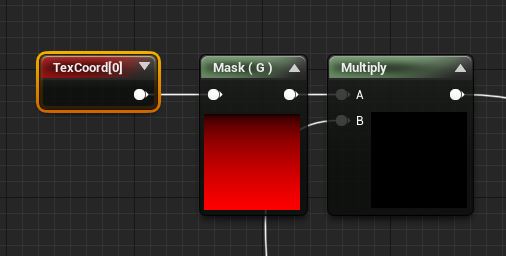
Now that we’got the main motion, let’s take a look at how to distort UVs:

Principle: Mask 2 channels from a texture you want to use as a distortion, lower its intensity, add it on TexCoord and hook up the result in UVs of the texture you want to distort.

Note: I needed a CustomRotator node to slightly rotate the orientation of my tiling fire texture, but it’s not nevessary normally.

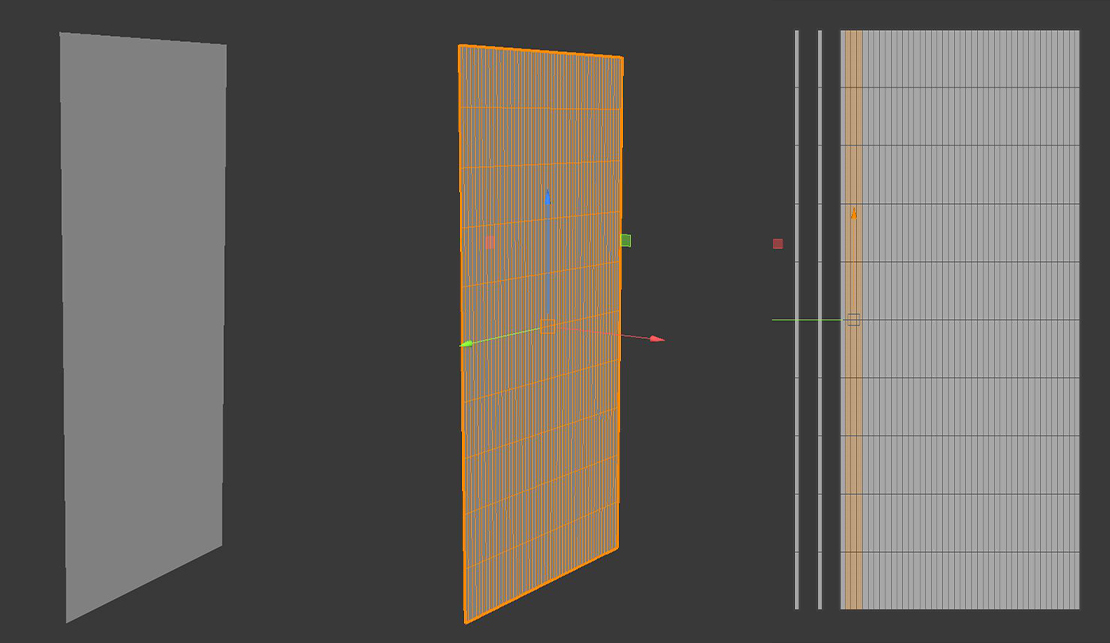
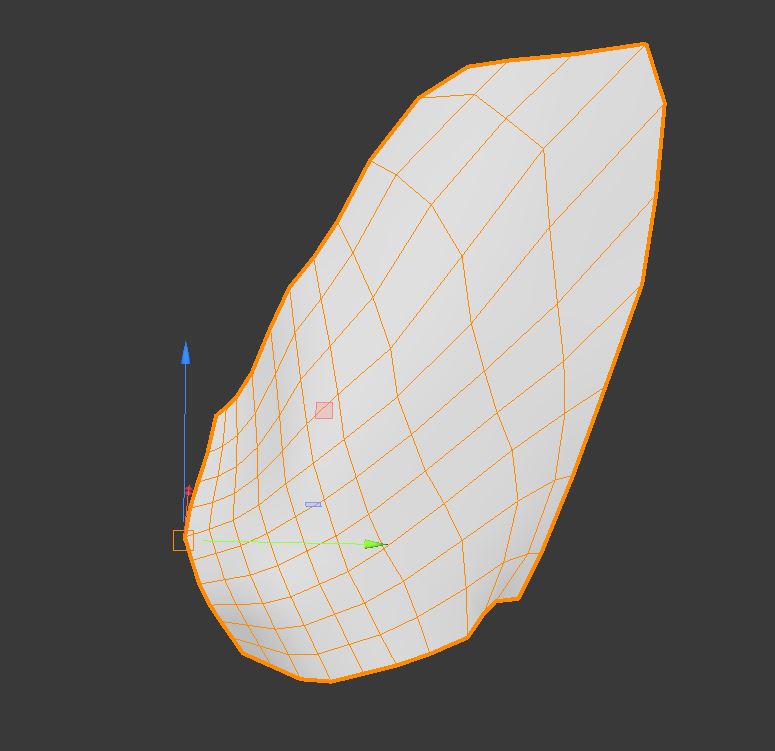
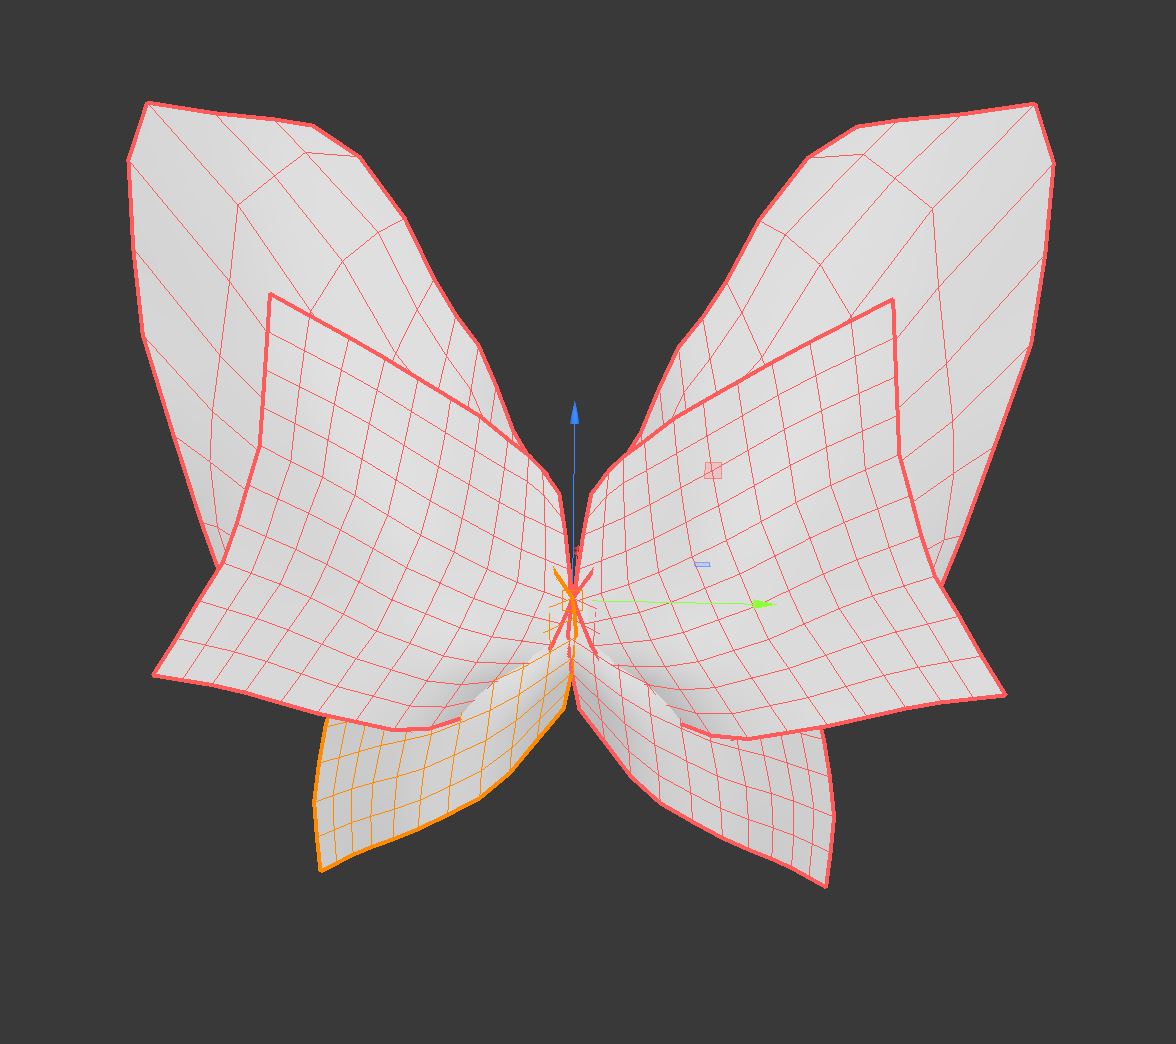
The texture I’m distorting was painted in Substamce Painter starting from a mesh I made in Maya.
I did because I wanted it to fit perfectly on the wings this material was made for.
Let me show you the meshes and the texture:


Single Wing - Complete Wings Set

Wing Texture (used on all of the wings)

Here is a .rar with the wings meshes I made and the TGA texture I painted, in case you want to recreate it!

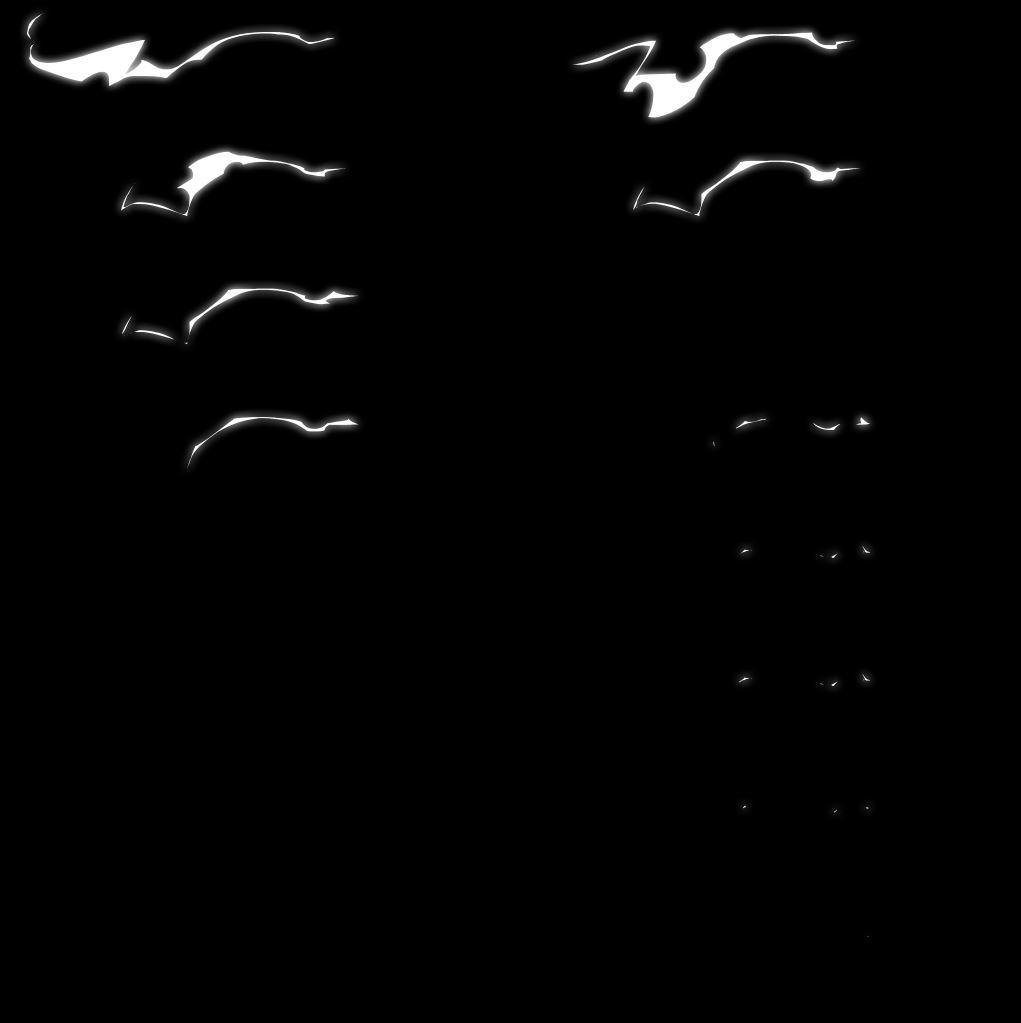
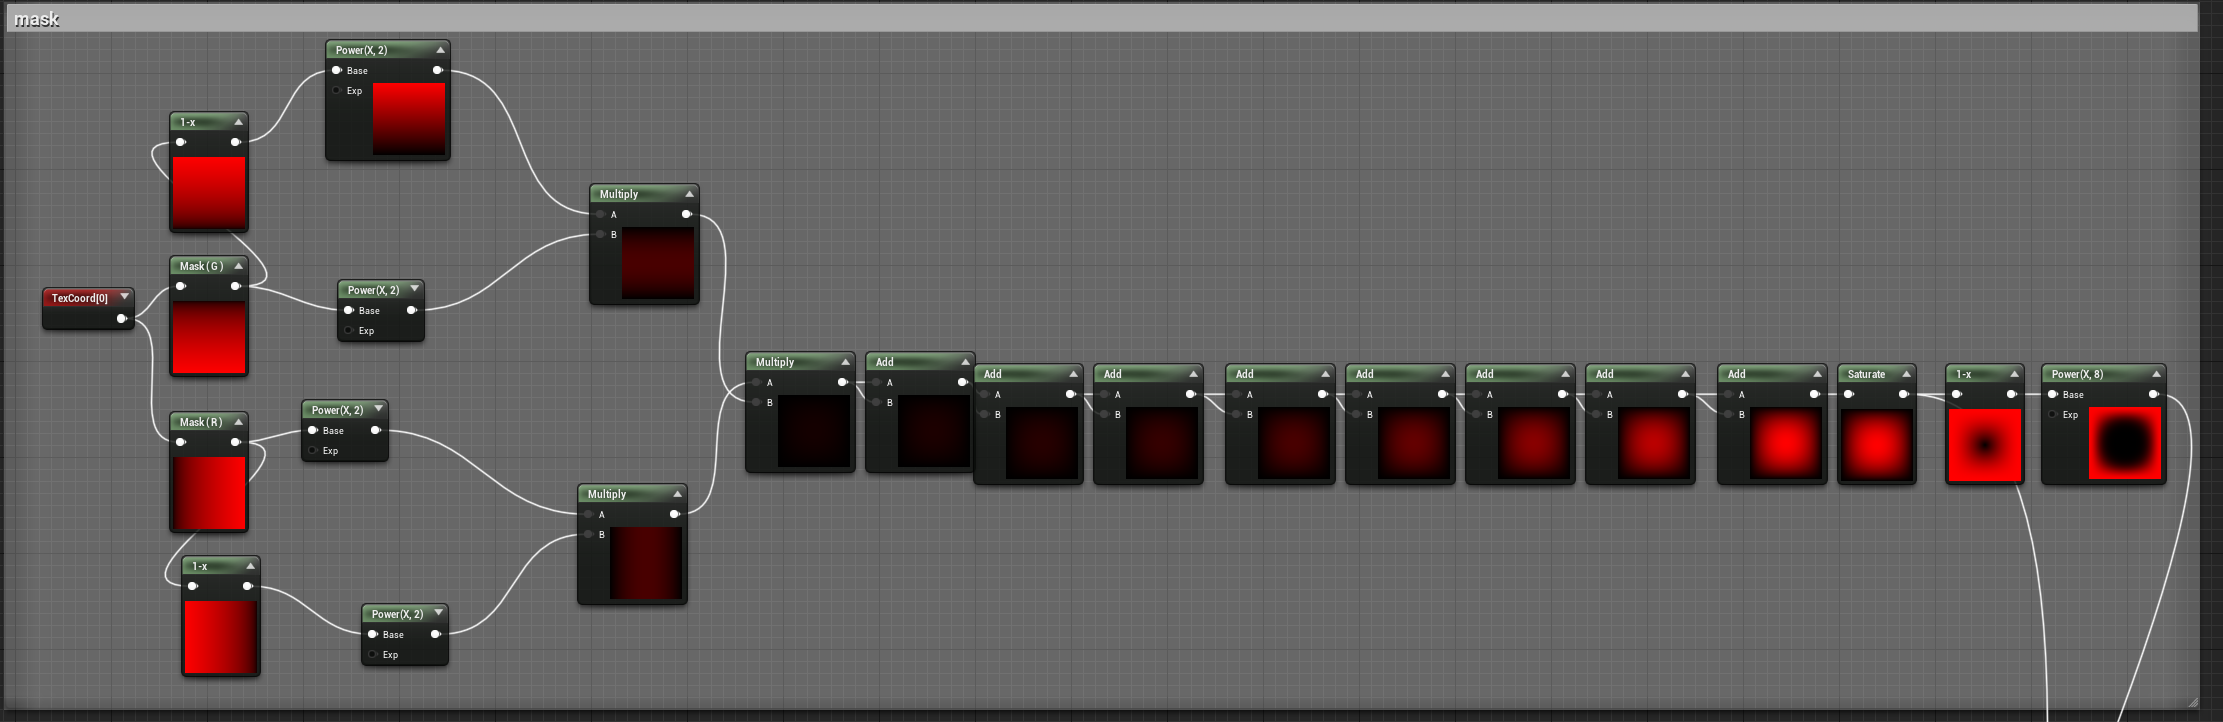
THIRD PART - Masking

Now, I tried to emulate a cool mask @Saiel made some days ago and I did not land too far from it, but she made a more optimized version of it.
If someone knows how to make an even more optimized version of this mask, let me know please!

Here is my version:

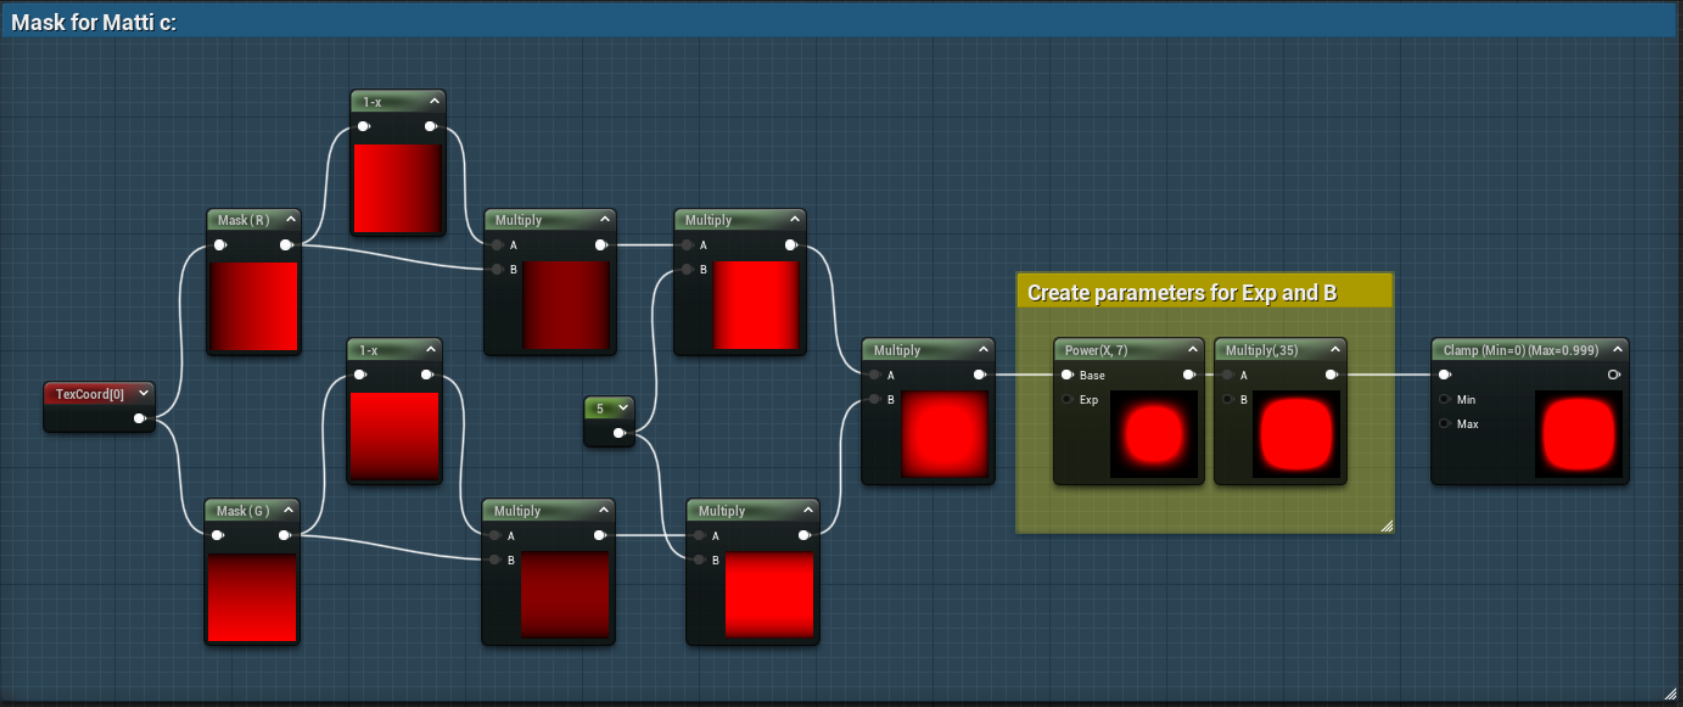
And here is Sandra’s version (more colorful and sweet to reflect her personality):

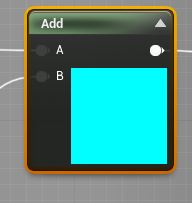
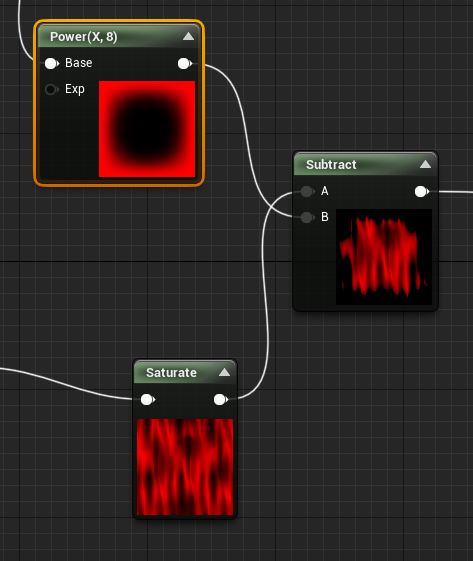
Ok, next subtract it from the current panning textures like this:

and now there’s only a few things left to do.

FOURTH PART - Color and Control

I don’t love coloring the material in the material editor because it’s pretty unflexible when it comes to changing colors, but I don’t know a better way at the moment, I’m sorry.
LERP is all I know.

So LERP me baby. (lerp is such a fun word xD )

This might look complex at first but let me explain the thought process:

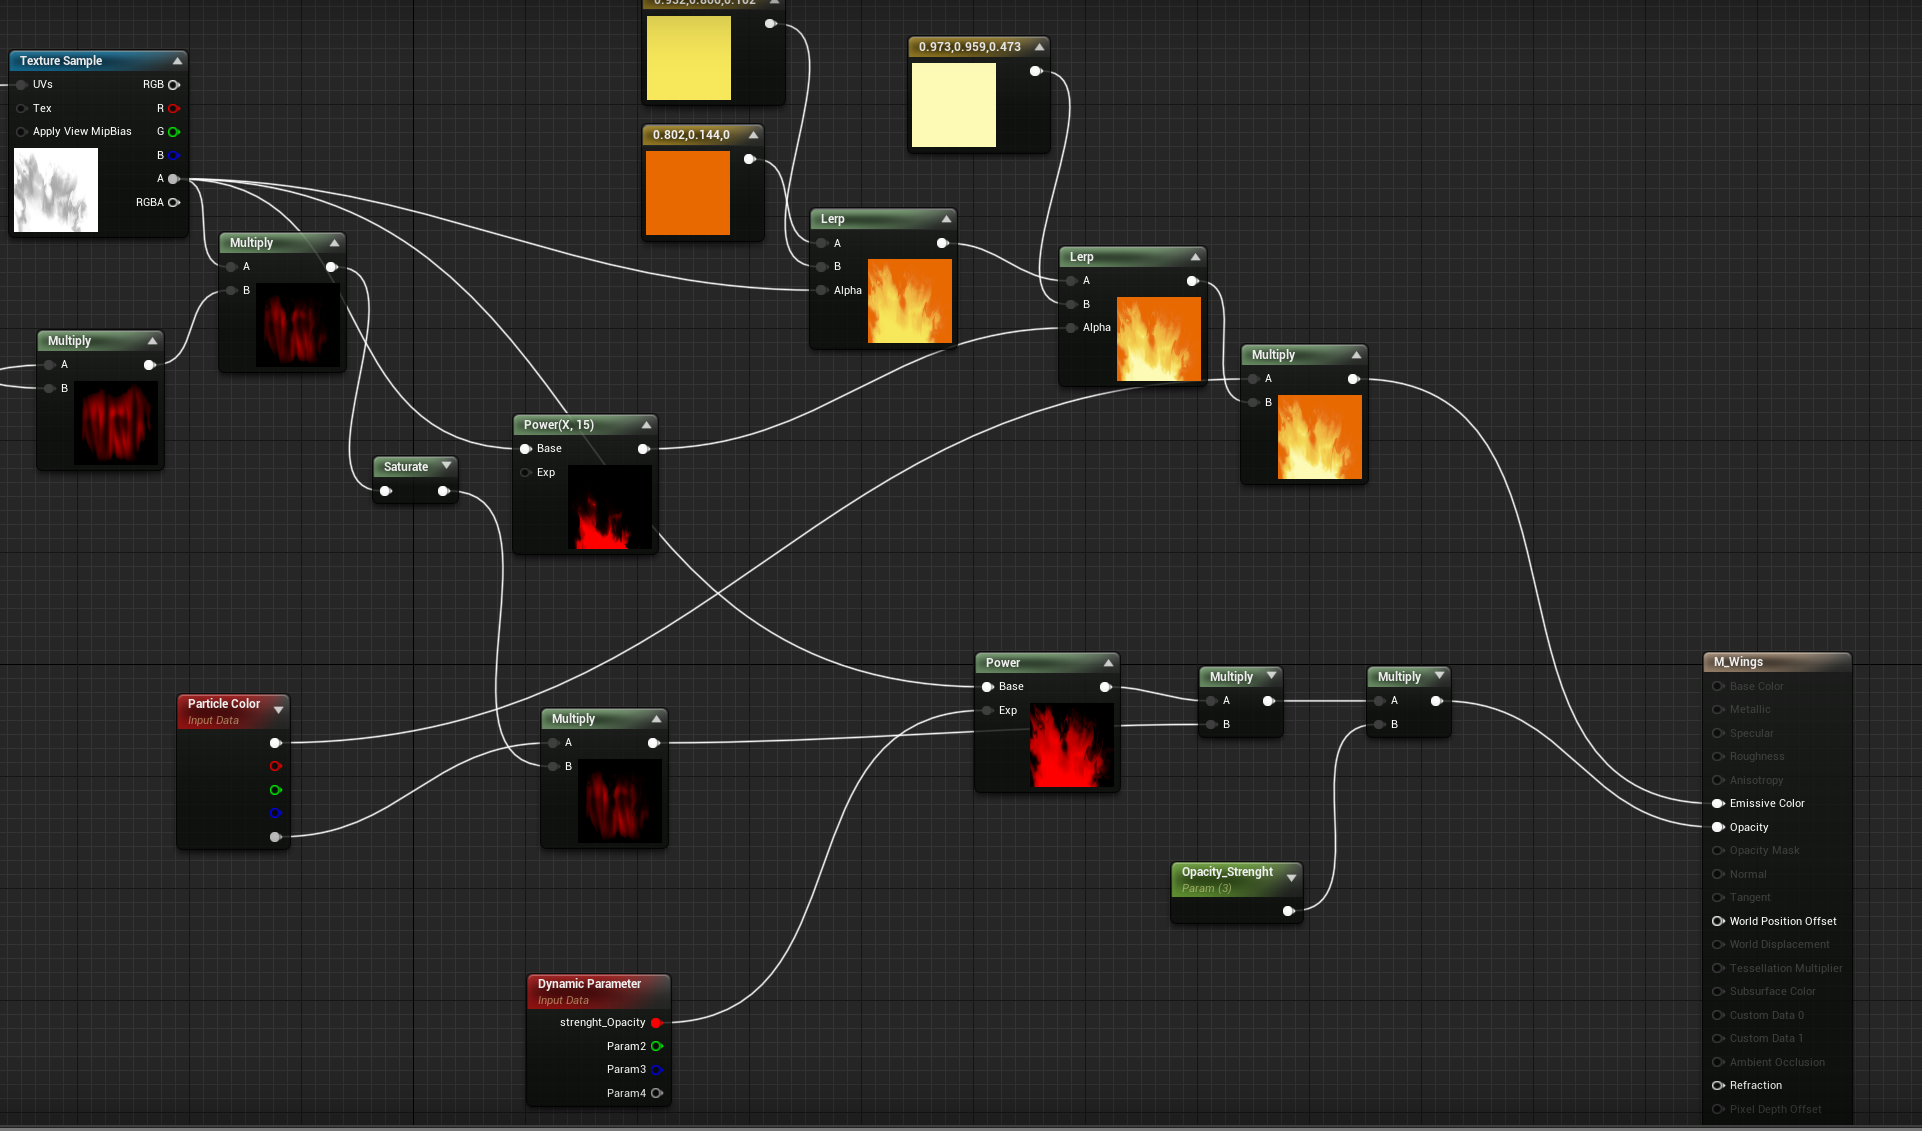
We use the Alpha from the distorted texture to LERP some different colors together (basically just having fun with the color).
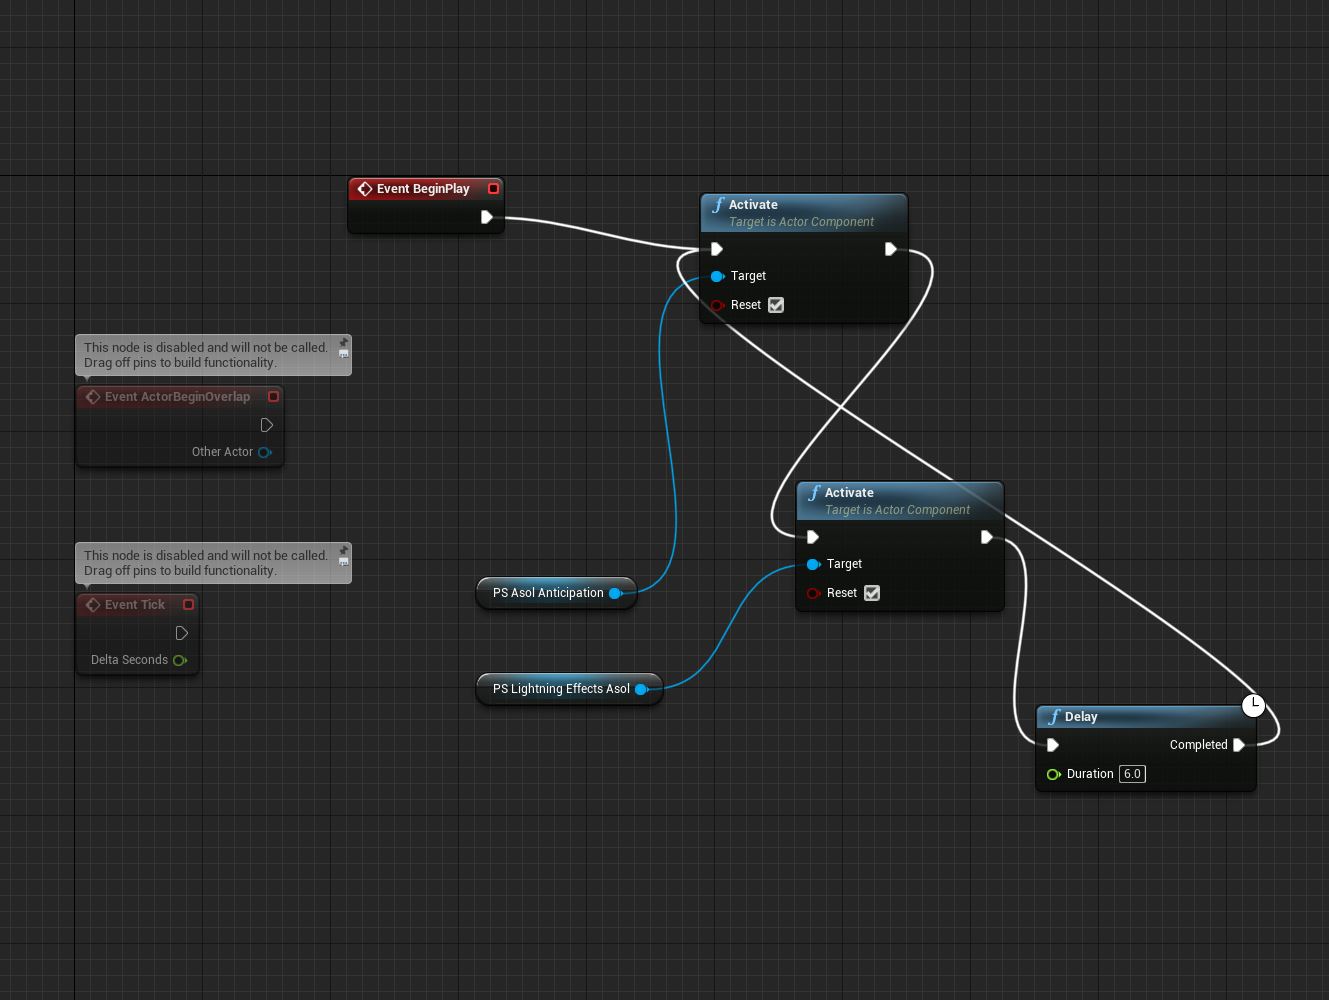
Then we give some Dynamic Parameter and Particle Color here and there to control it better in the Particle System!

  • The first LERP uses a dark and a midtone

  • The second LERP takes the alpha, powers it and uses that to add highlights.

For what you see going on in the bottom, I have a Dynamic Parameter going into a power node together with the Alpha from the texture.
Why? because I want to be able to change values according to the life of the particle.
Dynamic Parameter allows you to control that specific value in cascade by using “parameter >dynamic parameter” module.

Everything else that you see is optional.
The main controls are there!

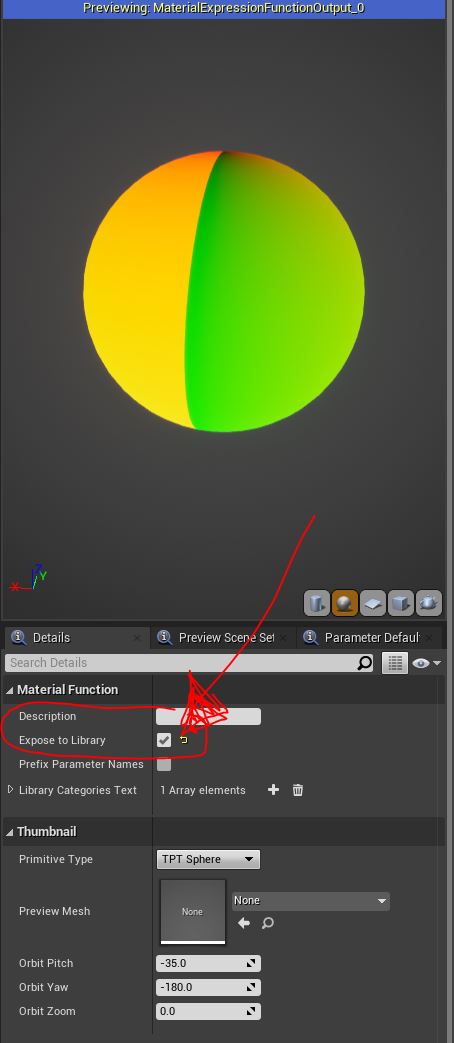
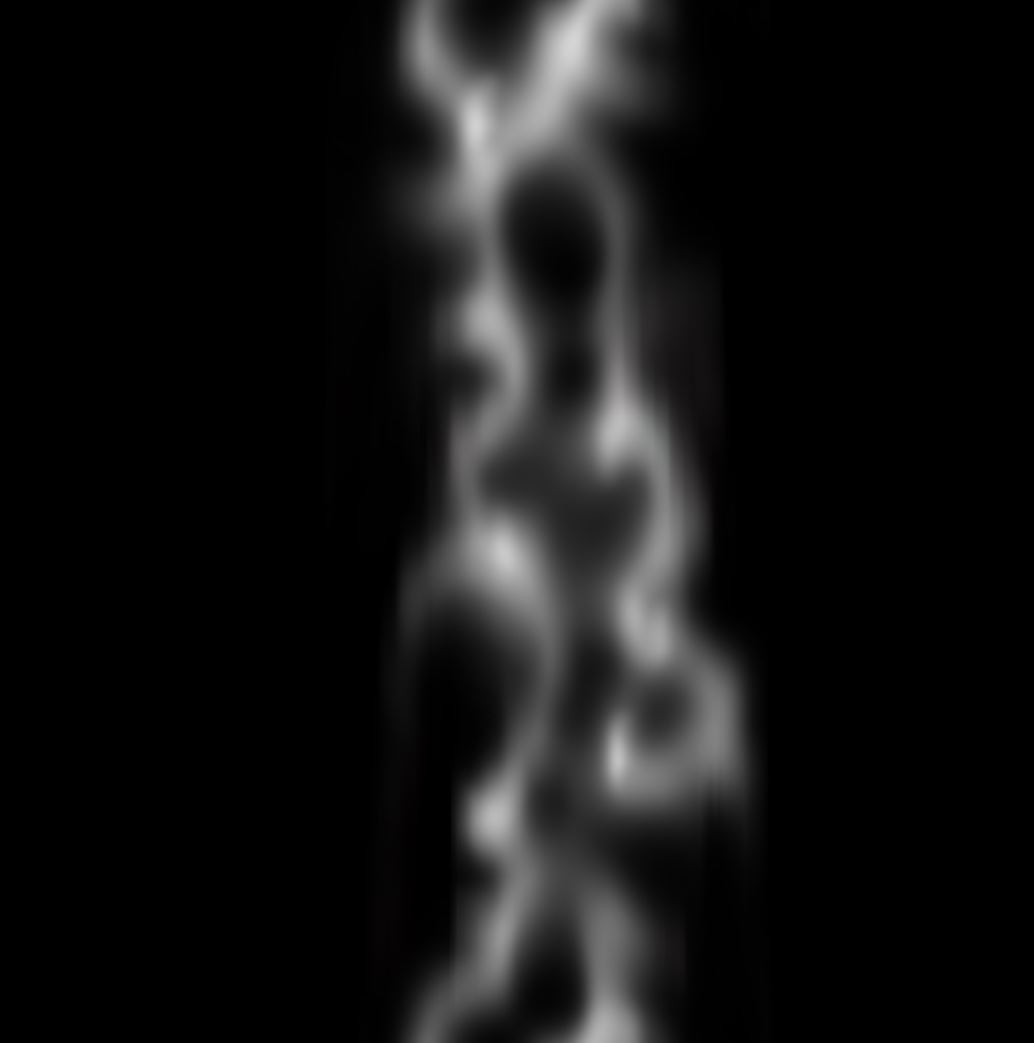
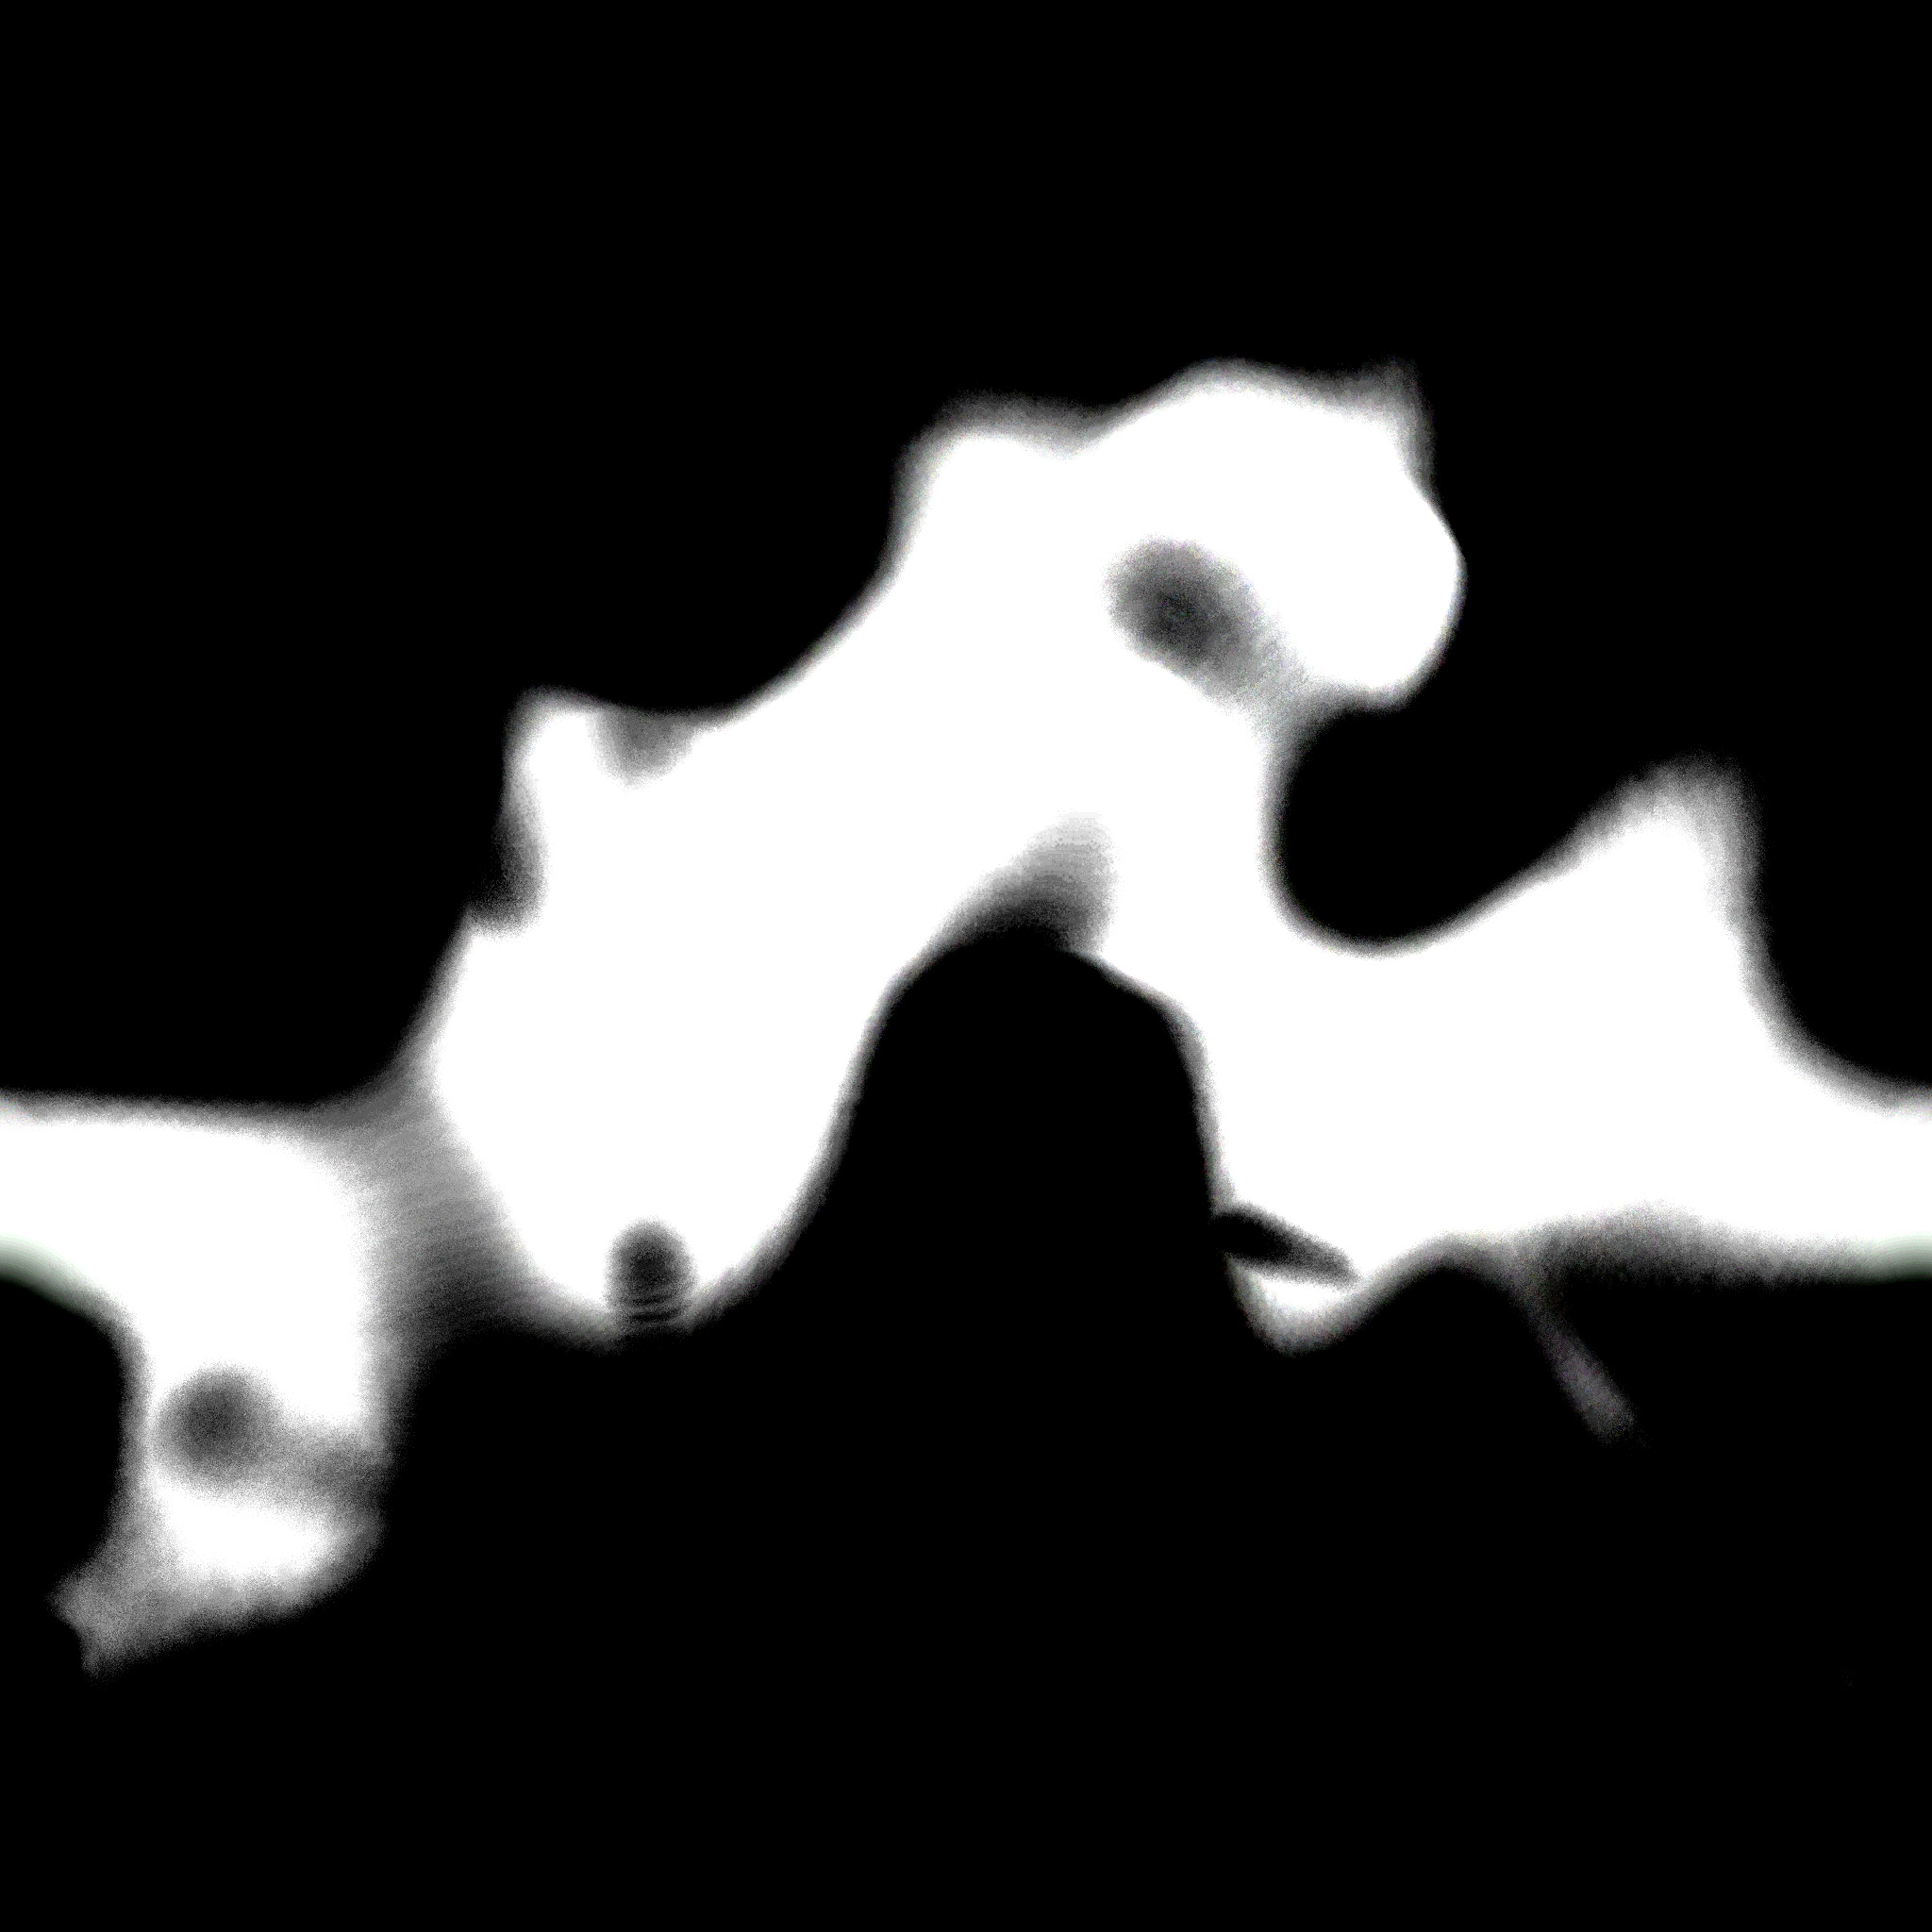
The material preview should look something like this (it’s fine if it doesn’t move for you, it will in the particle system):

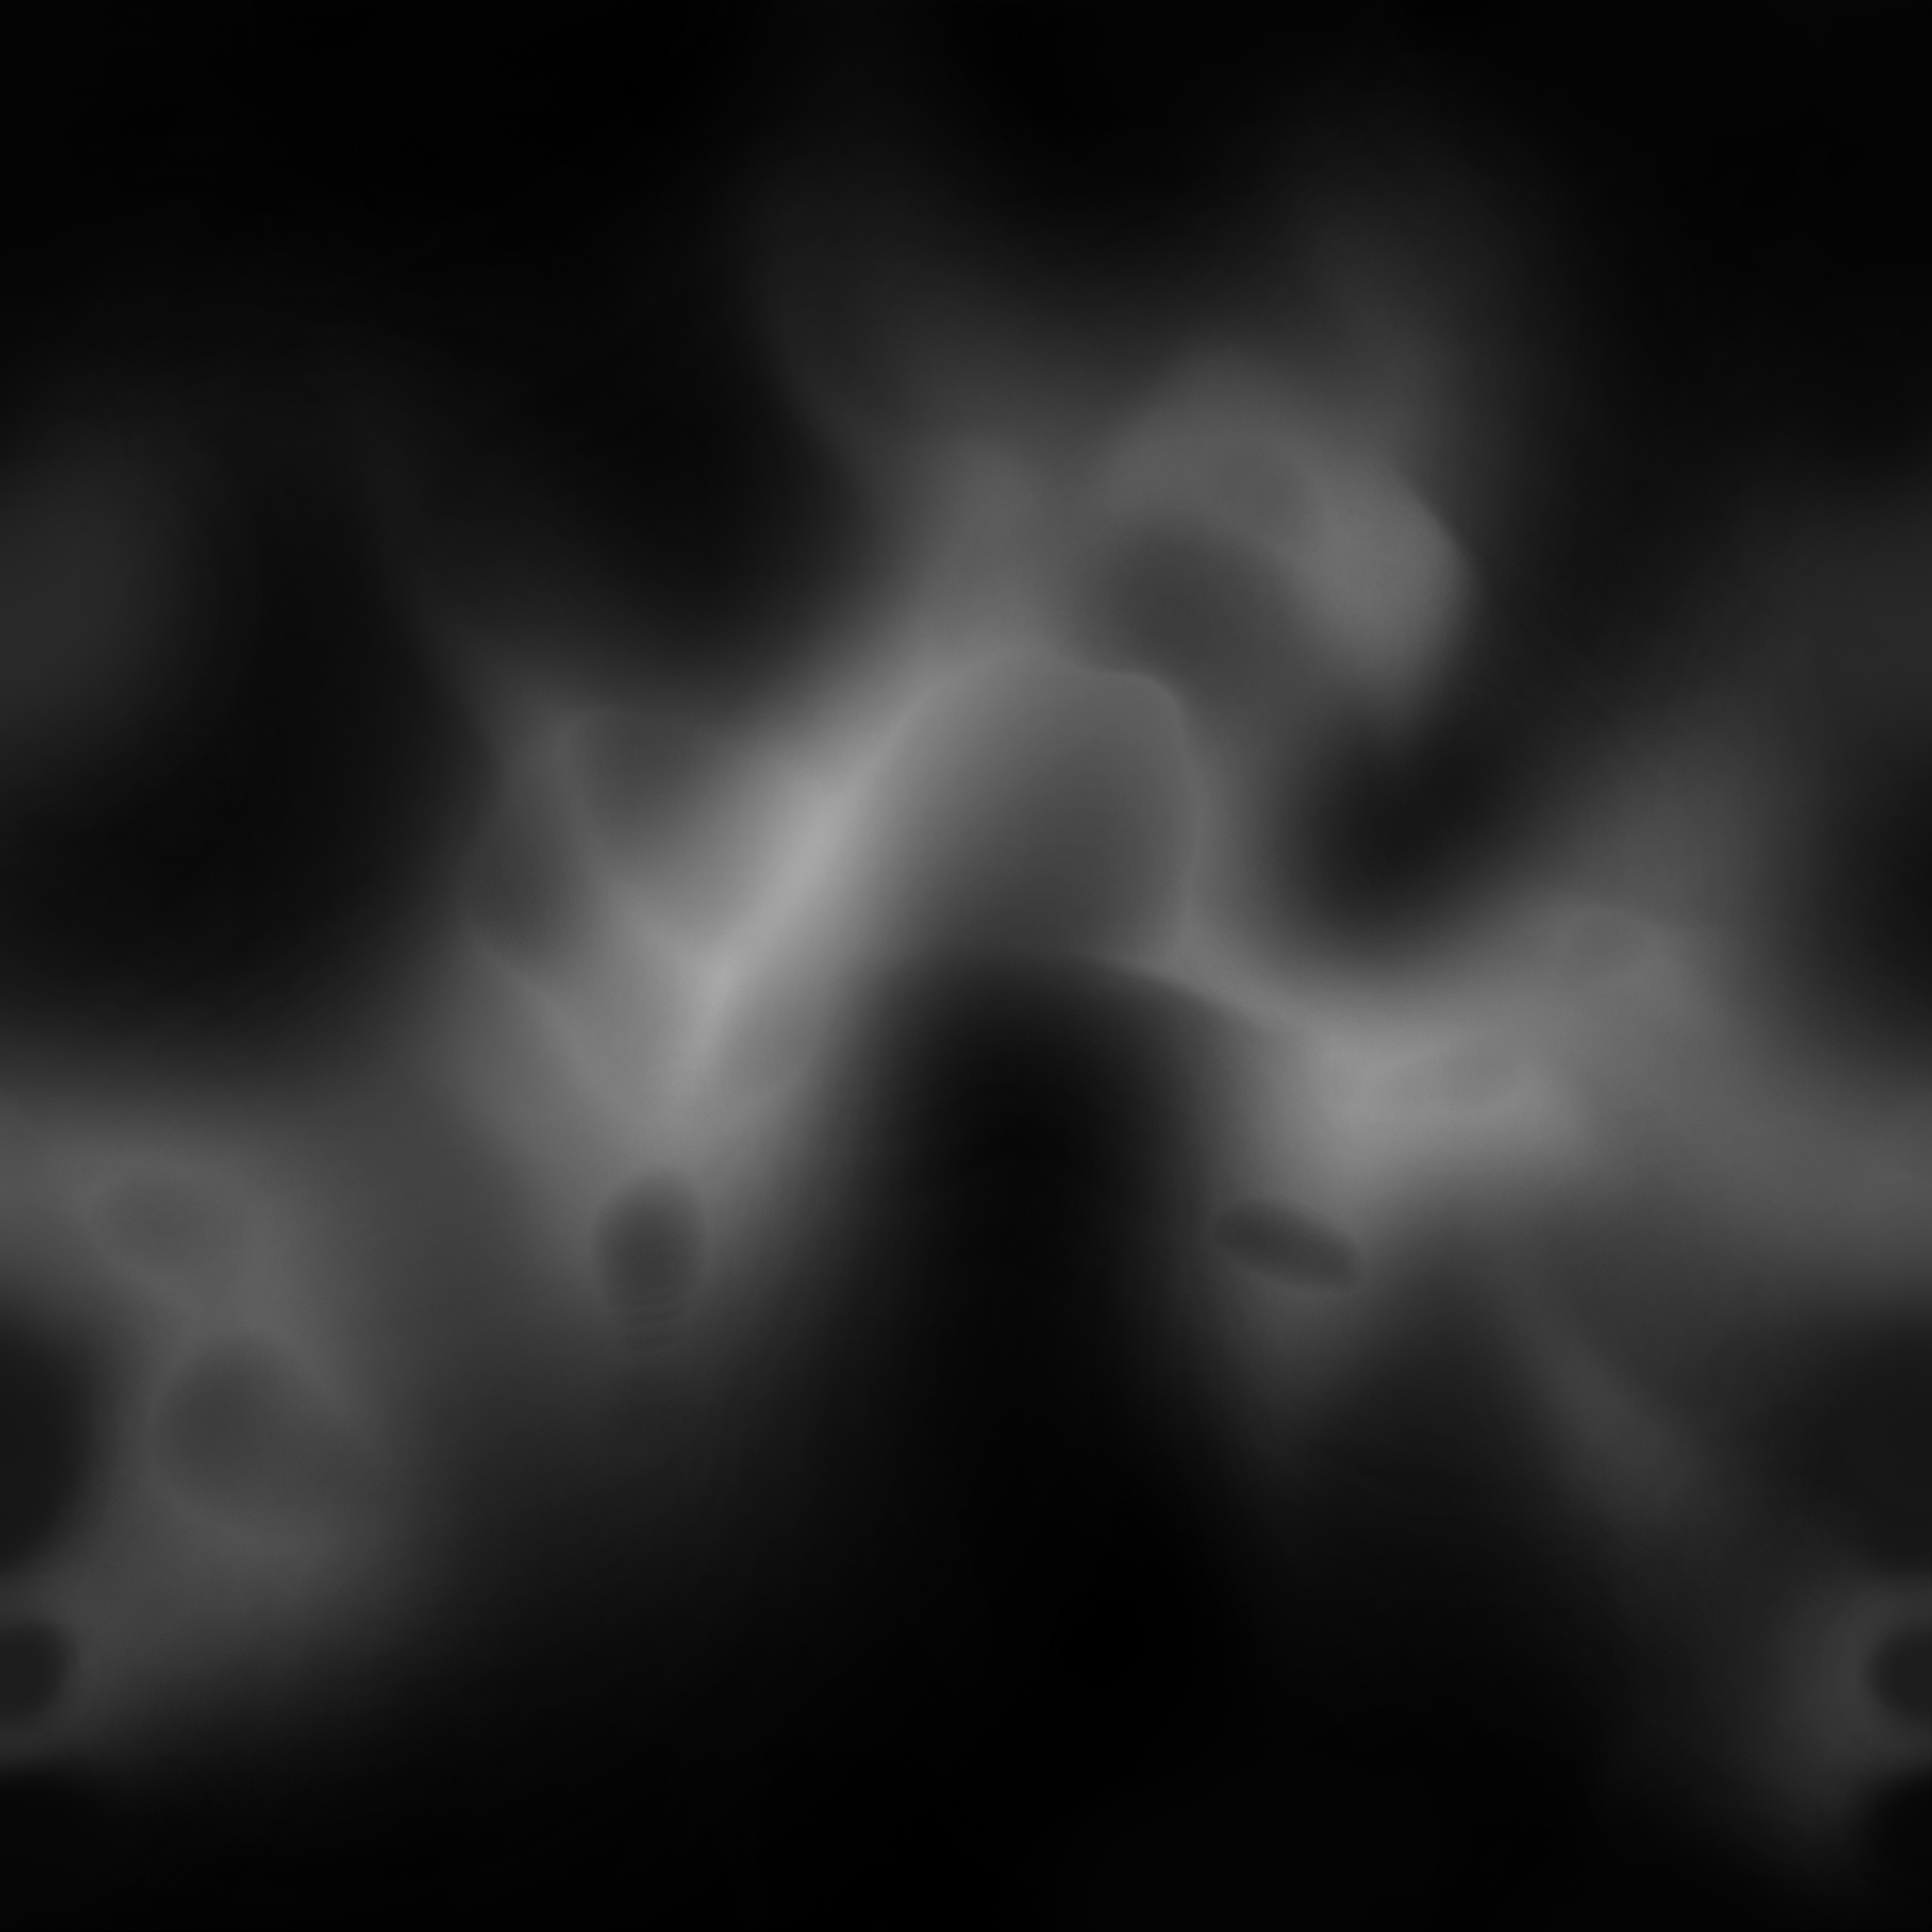
This is what it looks like on the mesh, because it will be stretched:

You can use this material to create some fire, holy fire, dark flames or whatever. I think you can have a lot of fun with them.


Little showcase of use

I hope this article helped you!!
Let me know if you have any questions.
I will be back soon!

Until then, CIAO!

14 Likes