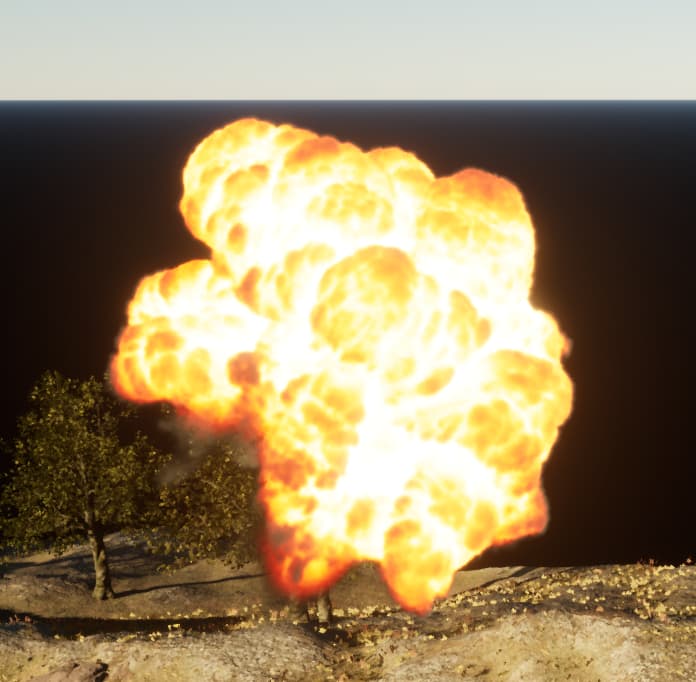
Hello! I am learning realtime vfx and I made a small explosion as an exercise. I am looking for feedback on aspects I can improve, so if anyone has any it is greatly appreciated. Thanks!!

Hello! I am learning realtime vfx and I made a small explosion as an exercise. I am looking for feedback on aspects I can improve, so if anyone has any it is greatly appreciated. Thanks!!
First off, youre on the right track! I like the colors of the explosion, are you using the black body node in the materials? Personally i love that node for my explosions. (assuming its unreal)
Here are a few things i noticed that could improve things…
My first piece of advice is always gather reference photos/videos and try to match those! Watch videos and step through them frame by from (keyboard shortcuts for frame advance in youtube is comma and period)
Also look up the “12 principals of animation” and learn to implement some of those principals in your effects. Things such as anticipation, secondary motion and squash/stretch.
Another thing that is sort of sticking out to me is the scale. The fireball with thick smoke reads to me like a huge explosion, yet the overall size seems fairly small, about the size of a grenade. Learning about the difference between size and scale is very important. Size is the physical space the effect occupies (how many meters) and scale is how it looks at any given size. You would never see a camp fire look like a candle flame for example. Currently, your scale seems to read like a massive explosion but the size reads like a small grenade explosion. Based on the big fireball flipbook, i will assume its for a bigger explosion. A lot of my feedback will be based on that assumption, although the principals still broadly apply. If its for a smaller grenade explosion, it would look a bit different. (less fire, snappier, thinner/wispier smoke, less debris etc)
The texture resolution on the explosion looks pretty low. How big is your flipbook? You can use frame packing to divide up your frames into multiple channels and get a higher resolution per frame. Smoke textures can be made greyscale and tinted in the material, dont use all 3 rgb channels for smoke.
Your sparks are way to big and blobby. I tend to make my sparks fairly small, only a few pixels big. I also usually have one leader spark that is emitting secondary (short lived) sparks as it flies away. Take a look at the transformer movies for reference on this, they use this technique everywhere. You can use the nodes in the gpu particles to spawn particles from another particle. The curl noise is also way too high, making them swirl around in the air in an unnatural way, some even fly upwards.
Add much more dust, debris secondary elements. Little stones and rocks flying away. Youre missing some small/high frequency/crispy elements that can really increase the perceived resolution of your overall effect. Layer those effects overtop of the smoke that’s in the middle.
You also want some low lying wispy dust that sort of sticks on the ground as a secondary element, as if the dirt is being stirred up by the shockwave. (secondary motion principal) Tint it brown to match the dirt to separate it from the darker smoke in the middle. The rock particles that you are spawning just look black, it would integrate into the scene better if you matched the color of the rocks in the environment. Make sure they are shaded properly, either by spawning a mesh (expensive option) or a sprite with a texture of a rock with a normal map. (cheap option)
A note on debris/rock and sparks, basically anything that’s ejected outwards. Never just spawn them in a sphere and use a point force to push them away. It is way too uniform and unnatural. For these types of elements i spawn multiple bursts/clumps of particles and shoot them in different directions. This will give you a much less uniform distribution. Imagine a bunch of cones, with the point in the middle and the wide end pointing out in the direction of travel. You can adjust angles and speeds of the particles in each burst/cone to make the cone thinner or fatter to control how it looks.
Also, When an explosion happens on the ground, the majority of the force is directed upwards at about a 45 degree cone due to the shockwave reflecting off the ground. This means that debris ejected straight up will fly faster/farther than debris ejected horizontally near the ground.
I would make another smoke/dirt flipbook that has spikey shapes to break up the uniform roundness of the core fireball and layer it in around the edges of the core fireball. If its for the dirt being kicked up, its heavier than smoke so its movement will be different than smoke. Watch the scorponok fight from the first transformers movie to see what I mean.
The scorch decal your using doesn’t really match the power of the effect. It looks more like a burn mark than a blast mark. You want something that is much more spikey and radial. You could actually layer the existing one with another blast mark, just make the blast mark darker and more prominent.
If you want to make it feel really punchy at the start, have a big spikey muzzleflash sprite spawn for 1-2 frames at the start. Make it really bright so you get a quick flash and big enough to cover the spawning of the round explosion sprites. This is a minor detail but it can really help dial in the feeling of power. You can literally use a single frame muzzle flash texture from a gun, scale it up and spawn a few of them. Currently when the fireball in the middle spawns, its already round, which is a bit unnatural. Anything that is moving that fast is stretched. (stretch/squash principal)
Your smoke is lacking any sort of light directionality. Consider making normal maps from your simulation or using a curvature map in your material to get some shading across the sprites. There is a material setup i posted in the “improving niagara lighting” thread for the curvature map. Its better than the default engine “use spherical normals”
Another trick to help the smoke lighting is to use the sky color node to tint the smoke the color of the sky/atmosphere. This helps simulate light bouncing in the volume and makes the entire effect feel more integrated in the scene.
Reference.
https://www.youtube.com/watch?v=voBuGV2QJmQ Scorponoc battle. Look at spikey shapes, debris/crispy details, smoke shading and blast directionality. (more upwards than outwards)
https://www.youtube.com/watch?v=A89sZ3f0RHI Base attack from transformers. Look at the sparks when the electricity transformers explode to see what i mean about how the sparks burst out in clumps instead of radially. (2:41) You can also see the main particle spawning secondary embers as it travels. Its a bit exaggerated but you get the idea.
https://www.youtube.com/watch?v=Q1cyBeZmC60 Check out this video for an example of the shockwave stirring up the dust on the ground. It tends to stick to the ground more than the explosion (less temp/buoyancy) and it happens extremely fast. (shockwave is supersonic) If you step through frame by frame you will see how the first few frames of the explosion, the smoke is much more spikey before it billows out into a round shape.
https://www.youtube.com/watch?v=CIph_7yCtzk Notice how far some of the debris flies. It also has some directionality to it. Flies out in clumps. Secondary dust kicked up as debris hits dirt. Smoke has strong directional lighting because its thick. Shading on the smoke gets less pronounced as it gets thinner.
Looking good so far, if you add some of those suggestions i think it will really bring it up a few levels!
Hi! First of all, thank you so much for all the feedback. I am learning real-time vfx on my own right now, so this is invaluable to me! I checked the references, and I understand what you mean. Thank you for taking the time to give such detailed suggestions!
Yes, I forgot to mention, I am using Unreal. I am not using black body, I picked the colors manually. I didn’t know there was a black body node, so I will definitely look into that. I actually packed the temperature and density as separate channels inside the flipbook texture so that I have more control later inside Unreal.
The flipbook texture is a 2K with 16 frames, accompanied by a motion vector texture so that the animation is fluid even in slow motion. To be honest, I’m not sure whether I should use this technique or if it is better to just use all 64 frames. I guess it is a thing that depends on each project’s needs? I will definitely try packing the frames into multiple channels!
I will improve the effect with your feedback and come back with the result! Thank you again!
No problem! If youre flipbook is only 16 frames at 2k then that’s still 512 per frame which is fine. I tend to make my explosions 64 frames with a 4k texture, which is pretty standard in the industry. Maybe the sim itself is a bit low resolution? What software are you using to create this?
As for the frame count vs motion vector maps, its up to you. Vector maps are great for when you need really slow and smooth effects. However it increases the cost of the shader a decent amount, it also uses more texture samplers which further increases the cost of the shader. It really comes down to what you need and performance cost. I think a single 4k texture would be cheaper, but i havnt profiled it recently. How are you generating your motion vector, are you using tflow?
To use the black body node, feed your greyscale texture into a lerp, then after the lerp plug it into the black body and then plug that into your emissive color. The lerp controls your min/max for the black body node. Put something like 0 and 3500, the values are in kelvin. It gives you physically accurate colors based on the temperature.
One last tip, i do see youre using a light, but its very dim and has a small radius. I would crank up the brightness and radius, but only have it visible on the 1-2 frame flash at the start.
I am using Houdini, but maybe I can increase the sim resolution. I didn’t do it before because my PC isn’t super fast. I want to look into houdini’s Axiom solver or even EmberGen since it has a perpetual license, but I thought Houdini would be a more attractive skill when looking for employment. To generate the motion vector I am using Slate Editor by FacedownFX. Okay! Thanks for the tips again!
Knowing Houdini is definitely a massive bonus. It can do pretty much anything. In my experience, you can be successful even without it. I have used it but its not my main go-to when creating effects. Its only really necessary when youre doing cutting edge stuff that has never been done before. The downside is its slower compared to something like embergen, which is real time. What was your simulation grid resolution in houdini?
For fire/explosions etc i use embergen. I used to use fumefx back in the day but the real time of embergen is just too good to beat. Their liquid gen is also pretty good. JangaFX has really optimized my workflow and allowed me to dramatically increase the speed at which i can create assets. Their new illugen looks amazing as well, although i havnt tried it yet.
I have only used slate briefly a long time ago. I was never able to get good motion vectors out of it. I also had trouble finding that “magic number” that gave me perfect blending. These days i use the tflow plugin for unreal. It does cost a bit of money ($20 i think?) but its not too bad. Before tflow existed i used an after effects plugin called twixtor. It works well but its expensive and the work flow sucks. Use whatever works best for you. If youre getting good results out of slate then stick with that!
Post another video of your progress when you have more!
Hi! I see, then I will finish this effect with Houdini and give JangaFX a try for the following ones.
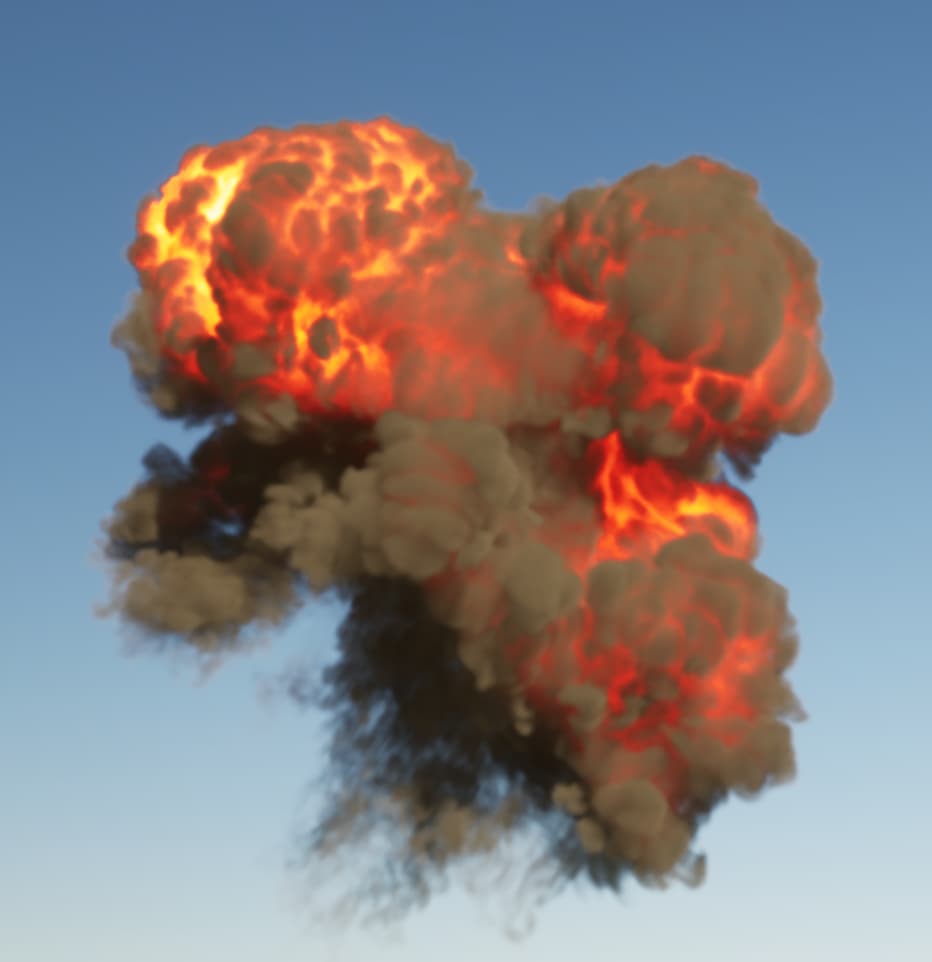
Last week, I did not have time to work on this effect, but this week I have been implementing some of the feedback. It is not finished yet, but it is looking like this right now. I think there is definitely a big improvement!
For the main flipbook, I increased the resolution, and I ended up using the 6-way light method instead of a normal map. For everything else, I have been modifying it as you suggested and paying close attention to the references. But there’s still some tweaking to be done. Most of my time was spent resimulating and rendering the main flipbook, as well as creating the new one. I am considering adding another flipbook for the rising billowy smoke that most of the big explosions seem to have in the references.

Damn, such a huuuuge improvement from the first one <3
Amazing job!
Thank you!! I mean, @cEssex really set me up for success with such detailed explanations haha ![]()
Massive improvement from the first version, great job! Keep tweaking it!
I do have a bit more feedback to improve it further…
For the big fireball texture, increase the lifetime randomization. If you have a few of the sprites animate quickly and a few more much more slowly, it will make the overall fireball feel more interesting and organic. It makes the fire feel like it’s moving it’s way through the fireball as the fuel burns.
The shockwave ring isn’t really working great. I wouldn’t have the smoke sprites fly out in a ring like that. In the reference footage, the smoke itself isn’t really moving. It’s being kicked up as the expanding shockwave passes by. The shockwave is too fast to be visible. (Unless you’re miles away) In my experience, trying to make the shockwave visible looks very gamey. Instead of shooting out sprites with velocity, you want your spawn area to expand by giving your spawn shape a curve on the radius and increase it over time. Give your emitter a spawn rate and a short spawning time. The sprites themselves will just sort of linger in position and drift around. They can have a little bit of outward expansion/velocity but not very much, slow them down with drag too.
The first few frames are lacking a punch. I wouldn’t use a big glow sprite for this bit. As I mentioned before, grab a spikey muzzle flash texture and spawn it for 1-2 frames. (Extremely fast) Crank up the brightness so the engine bloom gives you nice glows. Textures don’t have enough bit depth to achieve nice glows unless you use HDR textures. (Overkill)
Use an actual light, not a texture. Flash it for 1-2 frames like the spikey fire. The radius should be fairly large. It should illuminate all the rocks around the explosion, 2-3x the radius of the fireball. It should be fairly bright too. There is a bit of an odd delay after the flash to when fireball comes out, the flash is finished before the fire spawns. Tighten up the timing so they are closer together, it will feel snappier.
I would love to see more dust and debris kicked up, but it’s more of a personal preference. Having different color smoke sprites can really sell the idea of different materials interacting, even if it’s using the same texture. You can use brown for the dirt dust and grey for the bomb smoke. Having them move differently can also increase this separation. Ground dust tends to linger on the ground and sink. Bomb smoke rises up because it is hotter.
Some thin wispy, white/bluish smoke coming from the Crater would be a nice touch. You don’t want to fade everything out at the same time. Fade certain elements sooner than others to give the effect some more layering. In some of the reference vids (the real ones, the one that shows the nice dust from the shockwave) you can see some nice bluish wispy smoke that lingers after the main cloud has risen up.
I do see the sparks spawning in clumps which is good, however you don’t necessarily want it to stay in a clump the entire time. Have then spread out more as they travel. Increase the randomization for the speed at which they fly away as well. Imagine them flying out in a cone shape. I would also increase the overall speed at which they fly out. You might need to reduce the lifetime to balance it out. Would increase the life randomization too.
I would scale up that spikey smoke element you have at the start, possibly add a couple more. I would also slow it down a bit so your eye has enough time to read the shape. I only noticed it when I showed down the video. Adding a curve to the flipbook speed would help. Have it slow down a bit as the flipbook plays. That way you can still have it fast at the start but give it enough time to linger a bit.
Keep it up!
I kept tweaking, and I also took into account the latest feedback (I got into it immediately and kind of forgot to reply ![]() ). This is how it is looking so far. On my to do list, I still have improving the blast mark texture to look more natural and organic, and replacing the sphere with an actual missile mesh, but I am really happy with how it’s coming along! One thing that worries me a bit is the fireballs with the longer lifetime, as the lower framerate becomes a bit apparent.
). This is how it is looking so far. On my to do list, I still have improving the blast mark texture to look more natural and organic, and replacing the sphere with an actual missile mesh, but I am really happy with how it’s coming along! One thing that worries me a bit is the fireballs with the longer lifetime, as the lower framerate becomes a bit apparent.
The glow sprite that you are mentioning, I actually used it as some form of anticipation. It has been there since the first iteration, and I think it kind of worked with the smaller explosion, as it didn’t have any projectile to signal that an explosion was about to happen. However, I see that with this bigger explosion it doesn’t work at all. And I finally added the muzzle flashes that I didn’t have time to add before!

Its definitely looking better. We are getting into the realm of smaller adjustments/nitpicks now. One thing i like to do if im really trying to push the quality of my effects is to record a video and step through it frame by frame. When you do that you will see things that you might not notice right away. With that in mind, there are still a few things that stand out to me…
I do like the spikey dirt that is ejected upwards. However there is some funky stuff happening with the sparks. The secondary sparks dont inherit any velocity from the parent. The parent is moving very fast outwards and the child particles just sort of spawn in place and start falling. You get this counter movement between the two that looks off.
The light is good for size and brightness and gives the detonation more punch, but its way too orange and saturated. One trick i like to do is google search for “black body rgb values”. This will give you accurate colors. Use a more desaturated yellow/orange for the light.(What color is a blackbody? - some pixel rgb values)
The dark smoke in the middle still lacks directional lighting. It does have a sort of ambient lighting that looks like an AO map, but its still lacking any shading from the light. It should be be brighter on the top of the sprite and darker on the bottom. Same with the thin smoke that lingers after the explosion, you want a gradient across the sprites. Use the “Curvature map” material setup i posted in the “niagara lighting” thread for the thin smoke. For the Thick smoke i would suggest a normal map. If not a normal, at least use the curvature map as well.
The spikey muzzle flash explosions are low res compared t the rest. One thing that can really impact the quality of an effect is if there is a big difference in texel density between the elements. If you have one element that is 128x128 next to one that is 512x512, it lowers the quality of the entire effect. Also, It looks like youre spawning the spiky effects with a small radius offset. I would remove that and spawn then all from the exact same spot.
The decal on the ground is looking MUCH better!
I can see your simulation was rendered from the top view with the sprites rotated randomly for the core of the fireball. This is fine in a lot of cases and is common in the industry, but personally i feel like it makes the effect feel somewhat generic. I like to render a side view and a top view and then layer them together so achieve a more realistic result. When you render a side view you get that nice mushroom cloud/rolling of the smoke that you dont see from the top view. Doing this is by no means required, but it can really elevate things more. My explosions tend to have 2-4 different explosion flipbooks to layer in different movement and shapes. It may be overkill for some but it can go a long ways. It also helps the effect look more unique every time it triggers.
The dust thats kicked up on the ground spawns too slow. dont scale its size up from 0, start it as something lke 50% size and fade it in really quickly. I would also slow down their dissipation and dont have then scale up or float upwards as much. You want them to sort of linger on the ground and just coat the ground with a thin haze.
There is some lighter smoke that spawns with the big core explosion and falls to the ground. That isnt really working well for the effect. It feels like its clashing with the rest of the motion. If its supposed to be dirt falling it doesnt read that way. I think its using the same smoke texture as the fireball. If i wanted dirt falling like that i would render a different simulation with much more spikey smoke. Look at the dirt explosions from the scorponic battle again. There is a big difference in shapes between dirt/sand and smoke. If you dont want to render a new simulation, it might be best to just axe it.
Oh, one other small tip. One thing that drives me crazy is when a texture that has large areas of solid white in the alpha gets faded out by the particle system. I dont see anything like that in this explosion, i just figured i would mention it for future reference. Try to make the density in the simulation fade out enough that you dont have large areas of solid alphas. It doesnt need to fade out to nothing in the sim, just enough that you have a lot of nice variation in the alpha channel. Treat solid white alphas as areas with essentially no data.
Almost there!
Hello! I apologise for the delay. Thank you again for the feedback! I really appreciate it! I will get to it right away. I do have a question, though. Regarding the light directionality on the main flipbook, I had added the 6-way light method. Maybe adjusting the directional light (to better highlight that the smoke has “volumetric lighting”) and increasing the contrast is enough? Below, you can see it with just those changes. Do you think I still should add a normal map on top of it/instead?

Hmm, I wouldn’t mix normals and 6 side lighting, choose one or the other. The issue isn’t the technique youre choosing for the lighting, the lighting is just exaggerating the issue. You could just bake the lighting into the diffuse and it would still look off. You also dont want too much contrast between lit and shaded areas of the render, then it looks unnatural. The main issue is with the frequency of noise in the simulation than contrast. I will try and explain…
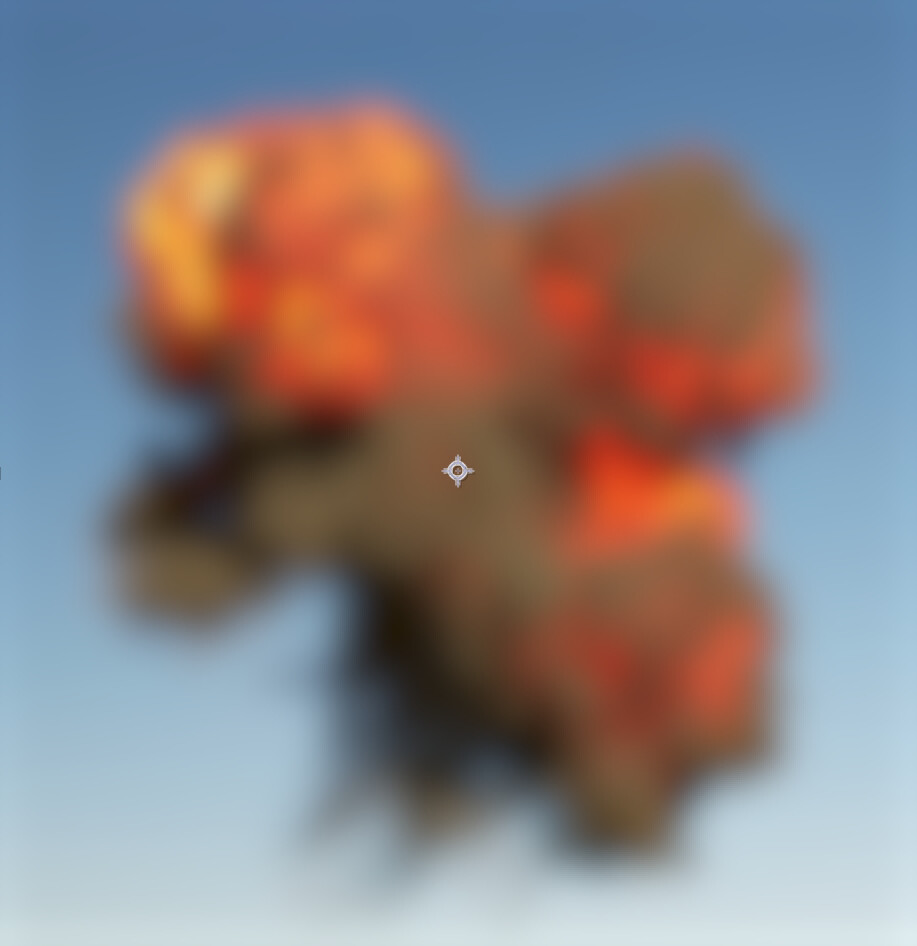
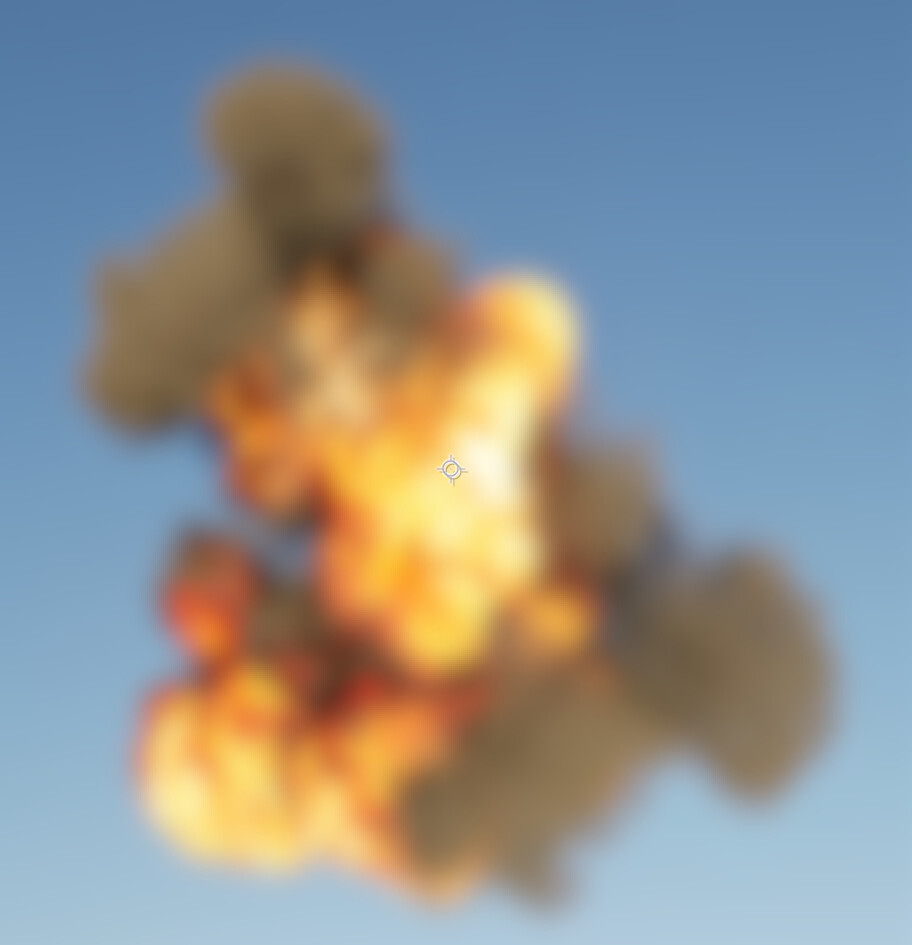
Your simulation and particle effect has a lot of high frequency detail, but lacks any low frequency detail to give it a defined shape. It’s low frequency detail that gives an object its overall form and shape and then high frequency gives details. One trick you can use to help with this is take a screenshot of your effect and blur it a lot with gaussian blur. You should still be able to pick out defined shapes, even when its super blurry.
In your simulation there is too much high frequency detail and its obscuring shapes of the low frequency details. There is a concept in nature/physics/art called the power law. (also called Pareto distribution or 80/20 rule) It handles things like object distribution at various scales. Lets take a scene with a bunch of rocks for example. You never see all the rocks at the same size. You would have 1-2 really large rocks, then at the next scale down you have many more smaller rocks, then even smaller you would have even more. The ratio of quantity to size naturally follows a power curve. You want to try and make your simulation loosely follow this concept as well. You want a few large puffs of smoke to make the overall shape, then have a little bit of high frequency detail to give those big shapes detail. The high frequency details should never be strong enough to start interfering with the low frequency shapes. Too much vorticity or noise forces in the simulation can cause this issue. Also overlapping too many sprites exaggerates it as well. You want just enough sprites for coverage but not so many that large portions of any one sprite is being occluded by others.
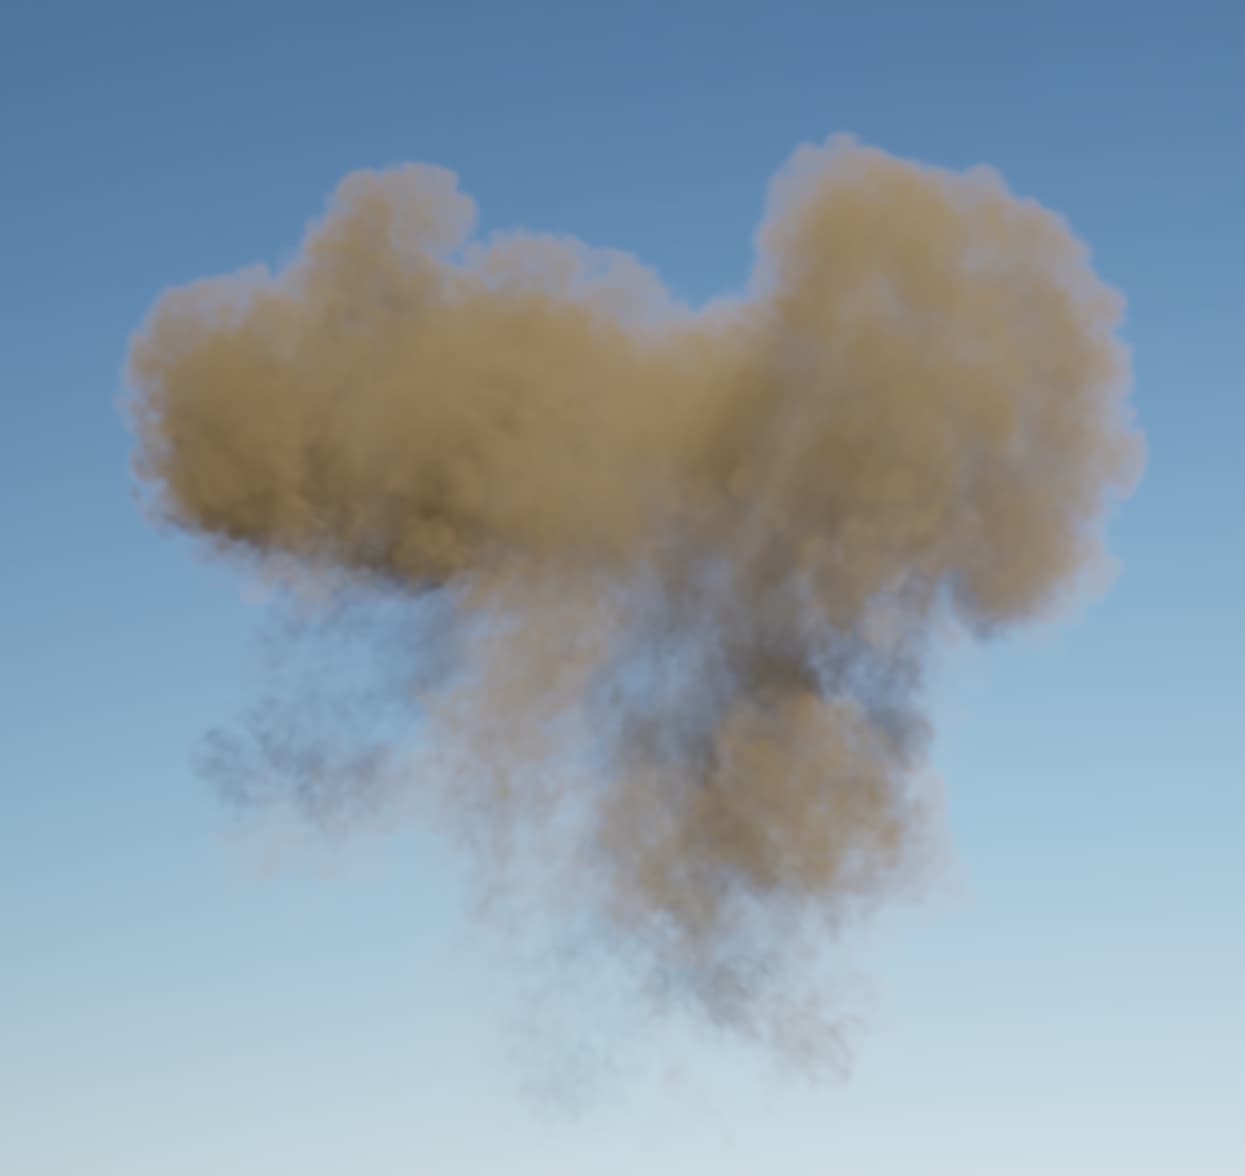
I will use one of my explosion sprites to demonstrate what I mean. This is just a single sprite. No normal map, just diffuse and emissive.
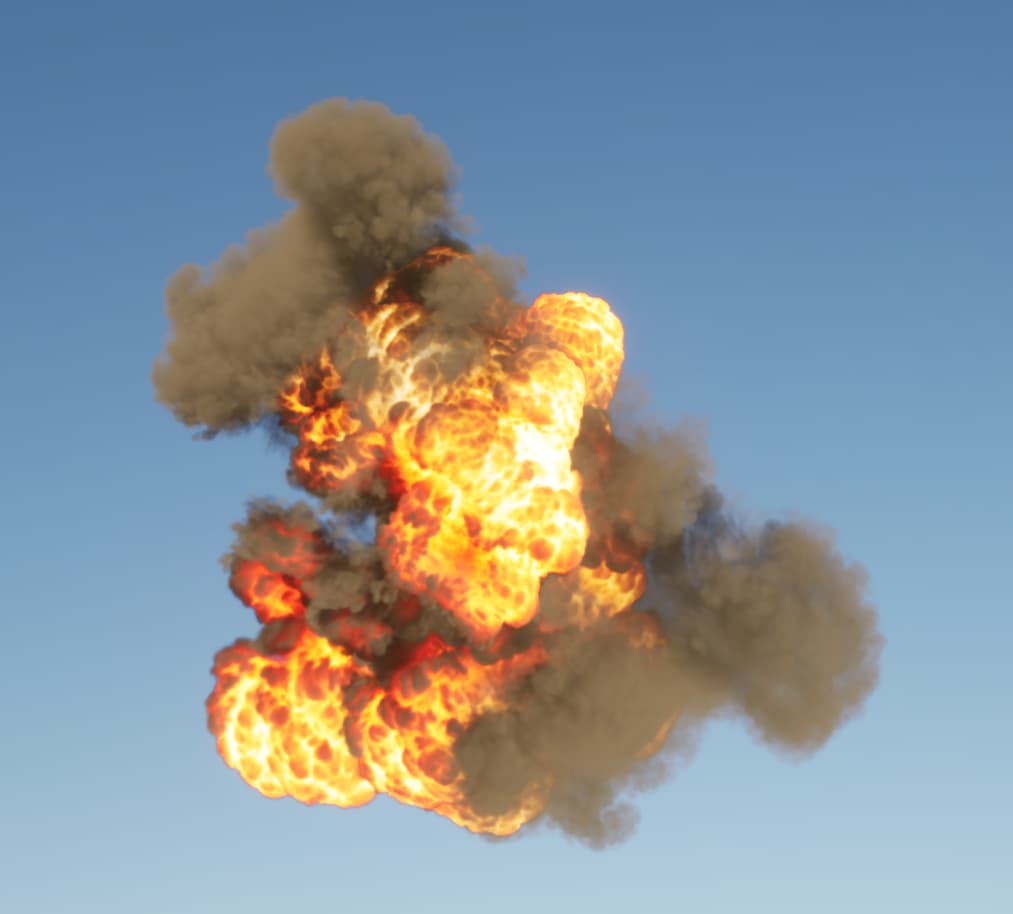
Here is some of the beginning frames. Despite lots of high frequency detail in the fire, there is still an interesting silhouette and an easily definable structure to the overall shape.
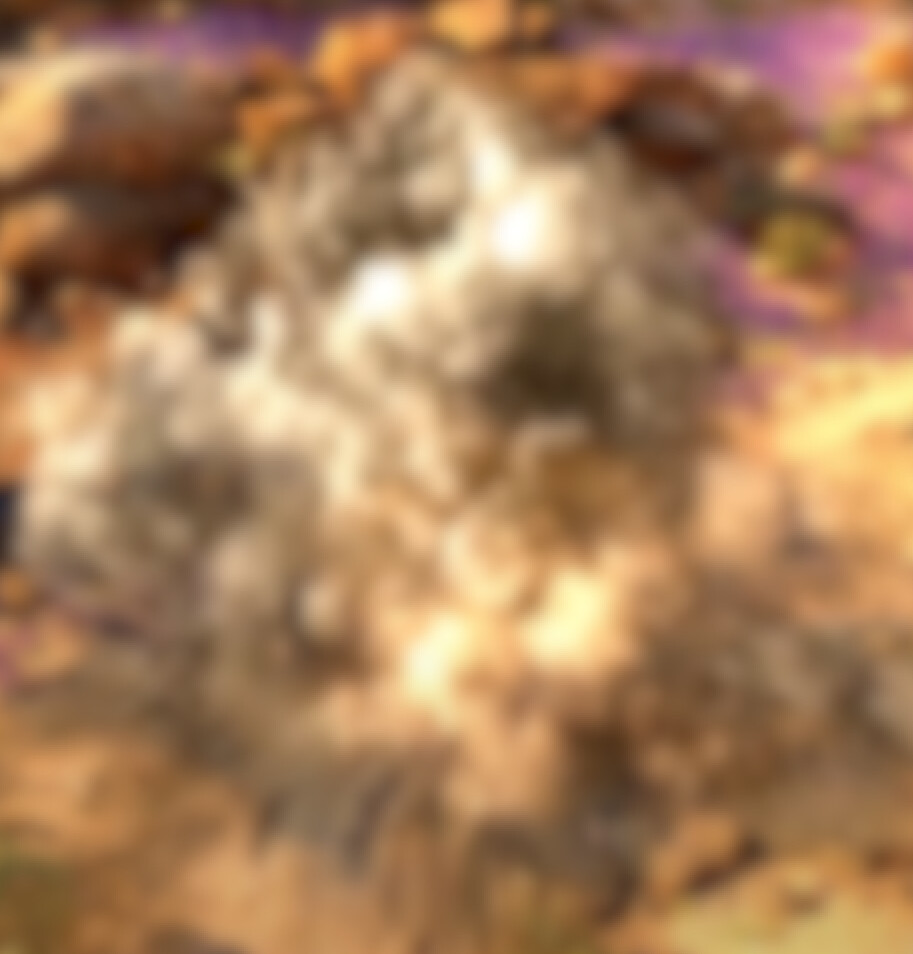
Here it is about half way through the flipbook. Notice it has several large puffy shapes. If i blur it you can still make out the shape.
Here is your effect blurred out. I see lots of high frequency variation but its hard to pick out any low frequency shapes.
Here it is near the end. The lighting has become very soft and youre not seeing many high frequency details in the lighting, however the high frequency details are now being added by the variation in the alpha channel. The silhouette still has its low frequency shape.
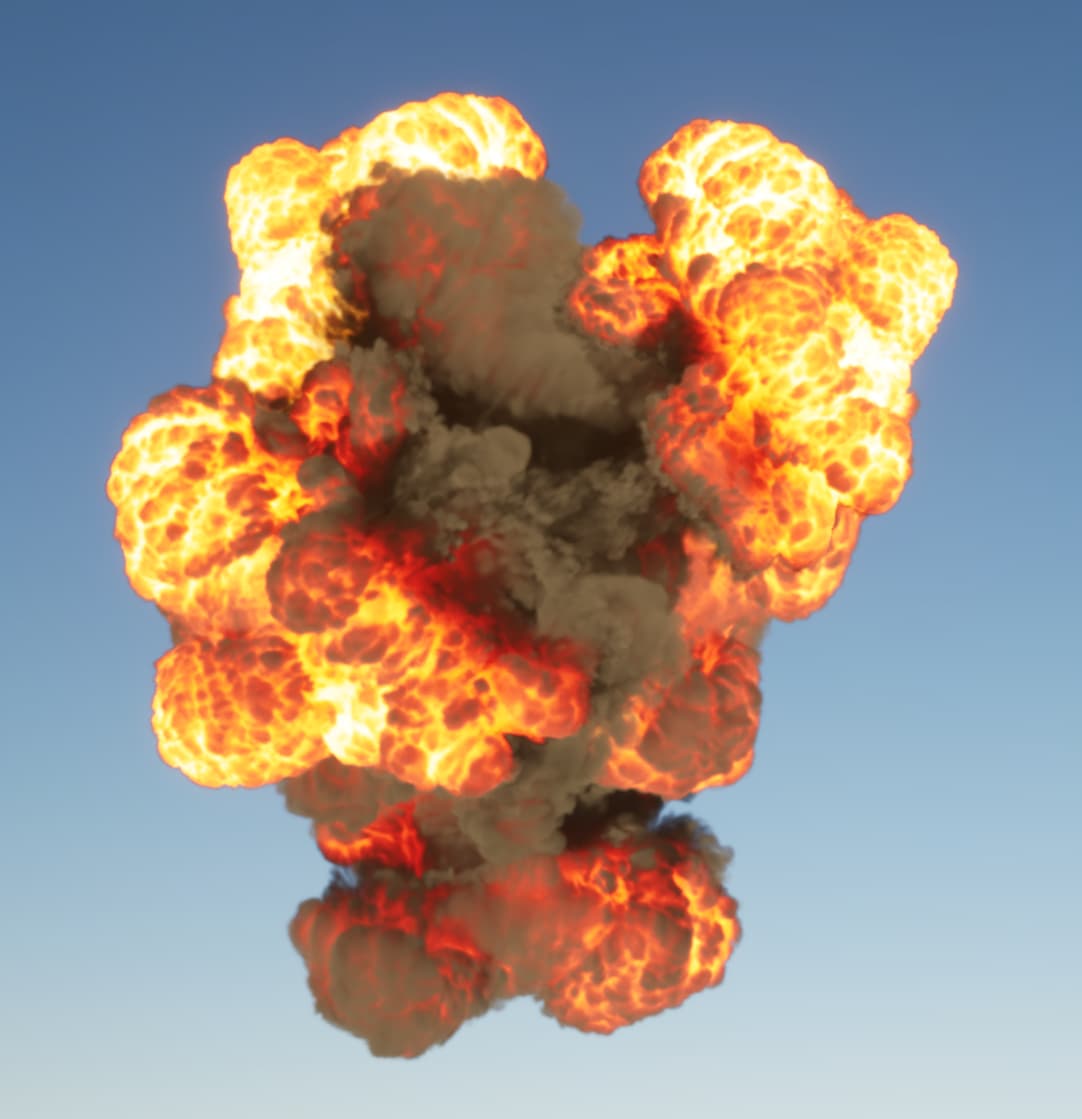
Here are a few pics of this same texture spawned on 6-8 sprites that have random rotation and life. When you have the correct scales of detail, everything just combines together in a very natural way.
These concepts touch more on artistic composition than they do technical skills. Nature follows certain rules and these rules need to be followed in order for our eyes to consider something to be visually pleasing. When these rules are not followed, it doesn’t matter how technically advanced something is, it will always look unnatural.
I’m sure you have seen certain renders that are very technically advanced, with a ton of detail but it just looks off. Maybe you cant even consciously tell what’s wrong, you just know its weird. On the flip side there some renders that are super simple, maybe just 1-2 lights on a subject in a simple environment but it looks amazing. This is the natural result of following the same rules of nature that govern everything we see.
One type of image that shows these scale concepts really well are brutalist architecture renders, such as the city renders from blade runner. (both movies) The overall render is dominated by these massive shapes from the buildings, but then within that shape there are a lot of little details from windows and signs etc. Despite lots of detail, it doesn’t look too “busy”.
Hope that helps!
Oooh! I see what you mean, I’ll get to it right away! Thank you!
Hello! I have finally had enough time to finish the effect. I want to thank you again for all your feedback. I really appreciate the time and effort that it took to write such detailed feedback. It was extremely useful, and it really made a difference not only to this effect, but also in how I will tackle future effects and how I look at references and study the elements that make it up. So, thank you so so much for all your help! I am very grateful!
As for the effect, given the problems, I actually opted for making brand new simulations from scratch for the flipbooks. Here’s the final result. While I still see areas of improvement, for now I want to move on to learning different effects ![]()

During this time, I also wrote a little utility for unreal to help me see and analyse my effects better. I usually use level sequences to do so, but the sequencer playback didn’t really do what I needed. The tool I made allows me to load a sequence on the level, loop it, pause it (which actually also pauses the niagara systems), and change playback speed (which also affects niagara). There’s a replay button to quickly jump to the start and replay it. You can also watch it “frame-by-frame”, although only forward. And I also integrated a blur effect to focus on the silhouette and low-frequency shapes. It’s nothing special, but if you would like to try it out, I can quickly package it in a plugin and send it to you. Let me know! ![]()