Hey guys, this video is old but i’ve always kept it really close. I’m sure most of you have seen this video before, the very specific part i’m looking for help on is at 27:40
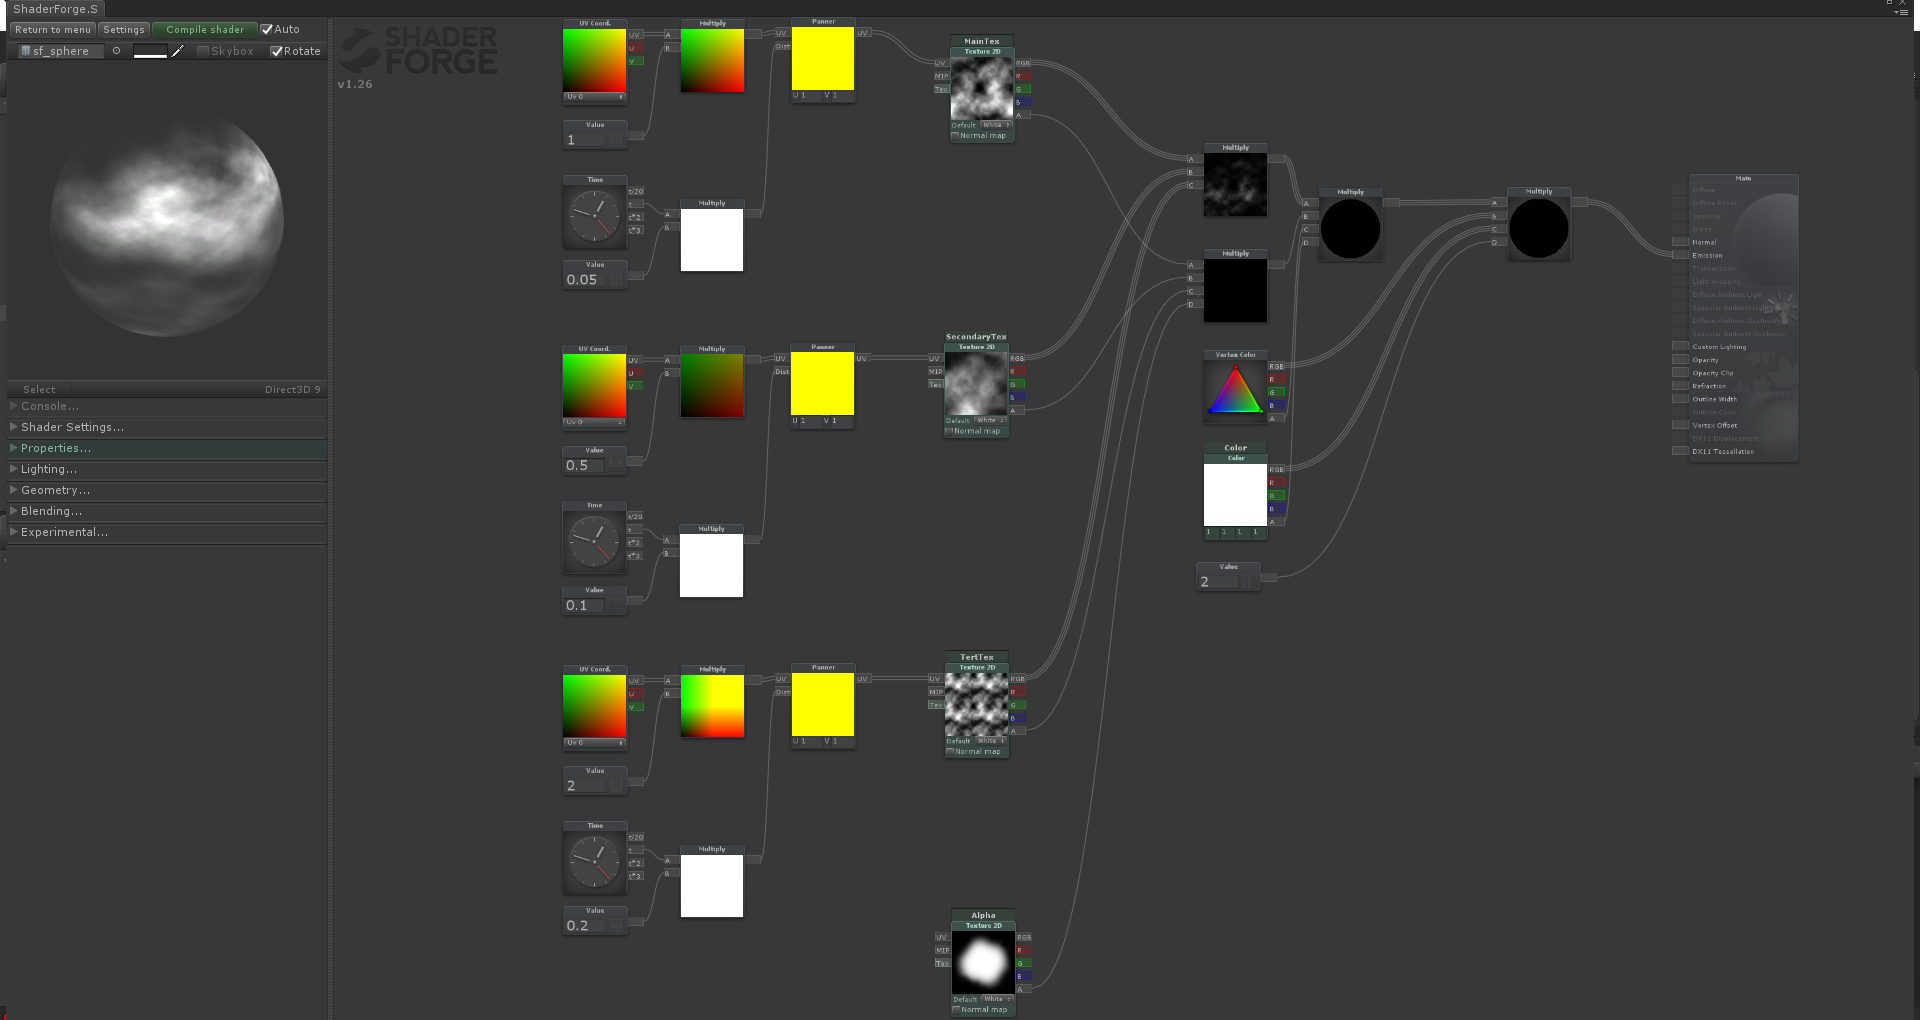
First off, I’m not great with shaders, but I really want to learn them. I created this so far, and it works! But the only part i’m having problems with is that Julian states that each particle has a random UV offset and scrolling speed. I’m not sure how to get the shader to choose a random offset for each spawned particle. I’ll spawn like 5 particles (random size, speed, life) but they all have the same parts of the texture scrolling at the exact same time.
Use a color channel or the alpha channel if you aren’t using it.
Set shuriken to have a random initial color.
Use the vertex color channel of your choice, to add to the offset. Bam. Random offset for all particles.
hmm, let me know if i’m wrong, but if i append 2 values and multiply it with time, won’t it just use 1 of the 2 values instead of a random numbers in between 2 values?
It’s multiplying each value against time but exposing it so you can control it in the unity inspector where you will have separate control of both your u and v speed. In your scene tab under effects you can turn on animated materials to see it update in editor too. This won’t have a random effect per particle though. I may have misunderstood what you were going for initially. This is how I had it set up prior to the current version of unity.
ohh yeah haha it won’t be random per particle, BUT i actually didn’t know about that animated materials in editor. Thank you , it’ll make it much easier to work haha
Hmm, I think the diablo material multiplys two noises together. Multiplys them by two then multiplys in the next texture. They then multiply that end result by two. Then plug your particle colour and vertex colour in after that. Otherwise they are also getting multiplied by two. Resulting in you having to half whatever number you type into the colour channel.
To get random noise motion per particle you can ADD a B particle colour into you network after your uvs. Then in your particle emitter set the number variation on the b channel between 0-1. I think thats the way you do it in Unity. In unreal you just use a dynamic material node after your uvs. Though I guess the issue with that is you cant change your particle colour over life.
I don’t think you necessarily need to sacrifice vertex colors.
If you set a very low second color for the random color, but multiply the vertex color channel you use for the offset by a very large number, then you get a big enough offset per-particle and keep the colors you want.
e.g.
particle color is full white
set the second color to white * 0.99
in your offset, do vcolor.r * 999 (so that you’re not limited to 0.01 max offset)
you still get the vertex color you wanted
The only tedious part would be doing that for a gradient (make sure that each color of the gradient is slightly different than the original).
Or am I missing something?
Sure that would work. But most of the time, sacrificing a channel is enough and a lot simpler. It also doesn’t require that you author your textures differently.
@Faybao Hey, did you ever find out how to randomly off-set UV’s in ShaderForge (while panning)? That’s something I’m trying to figure out.
For example, I can’t plug my multiply node into the UV Panner slot. It only accepts UV Coordinates. It looks like distance is only controlling the panning speed, but what’s controlling the offset?