This community is probably 40-60% of why I love realtime FX. You guys are awesome.
5 Likes
Using processing for generating textures like this is a great idea. I’m usually not happy with most methods I’ve tried on the past for doing “data” texture generation. I might have to pay around with it next week.
For actually using the radial uv texture in a real time application you’ll want to do a couple of things. As mentioned in that older blog post you want to set it to be a linear texture. After that you’ll want to disable compression, mip maps and bilinear filtering (use point filtering). This is specifically because of the seam that shows up at the point the angle gradient wraps, if you just need the radial gradient you don’t have to do any of that. That seam will be minimized, but not completely removed at this point. You’ll have gotten rid of the seam caused by mip maps and bilinear sampling softening the edge and adding a small unwanted gradient, but you’ll still have the problem of the GPU mip level calculation seeing a large change between one pixel and the next. I posted a longer explanation on Facebook when this topic came up there, but the ultimate solution is to override the texture sampler uv derivatives with your own values. For Unity this is done by using tex2dgrad, and with Unreal you can enable the option to provide derivatives.
Using a cone mesh gets around the issues with the seam since uv derivatives are calculated per polygon, so the triangle edges where the uv seam would show up doesn’t cause any issues.
4 Likes
I’ve actually never heard about Processing before, will have to check it out!
Also I’ve been working on the last few days on a lil gradient generating tool inside Substance Designer, to create more complex gradients for my texture work, like those:

Which can be used as a UV Lookup texture too:
And since I’m creating them using the Pixel Processor node, it’s basically the same shader math that you’d be using in Unreal ![]()
19 Likes
brilliant bro! I love substance design ![]()
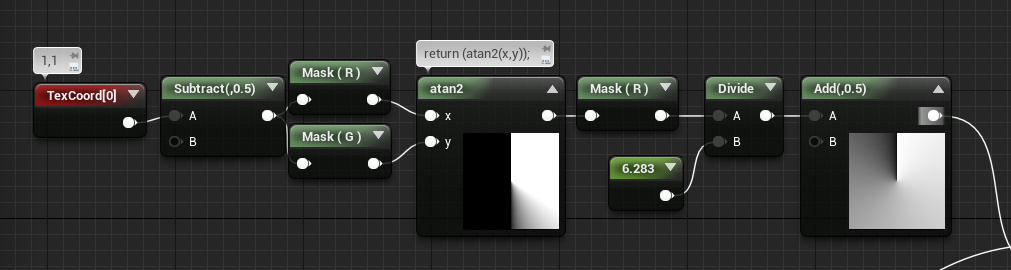
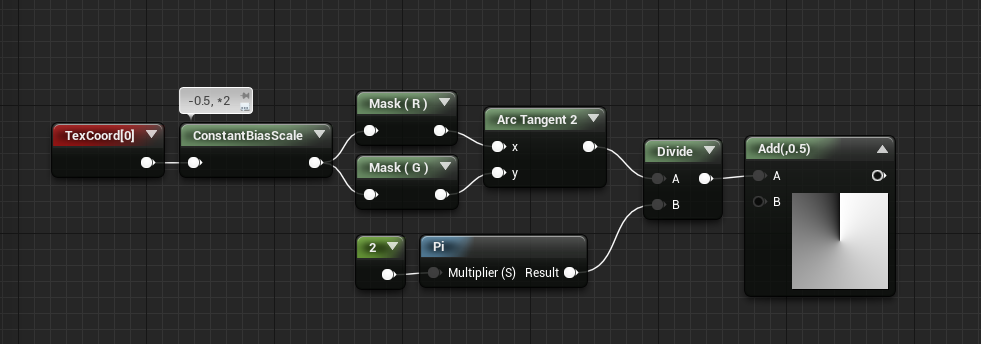
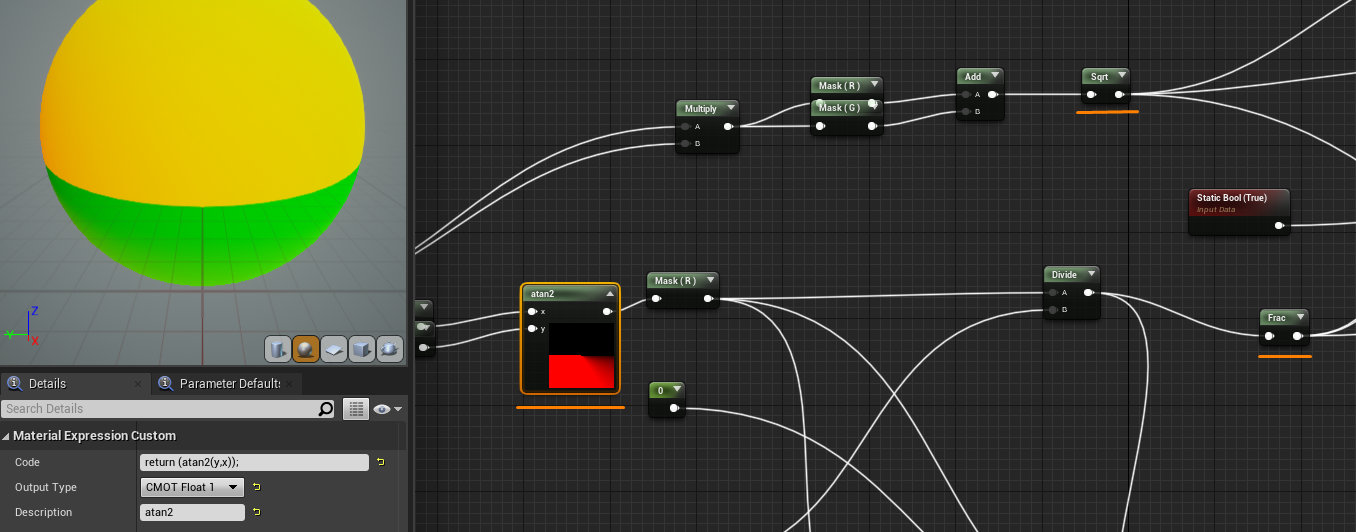
Thanks for the atan2 code! (That seam has plagued me before).
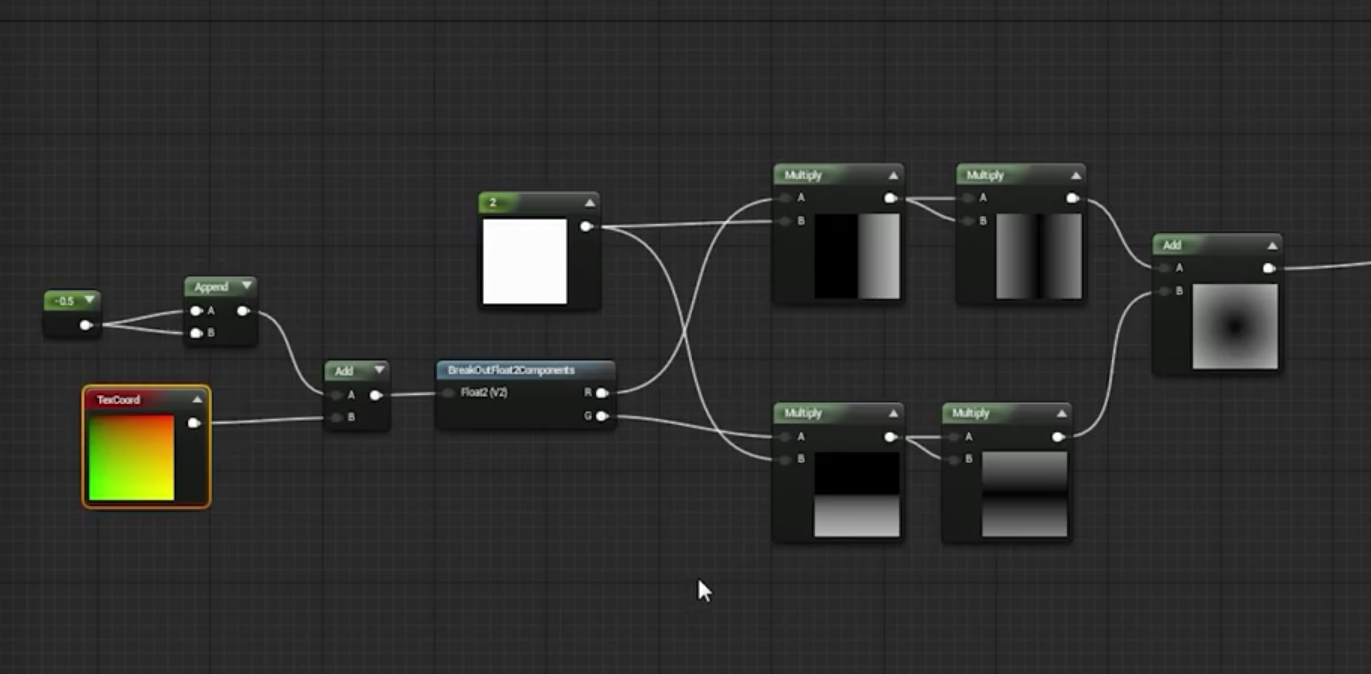
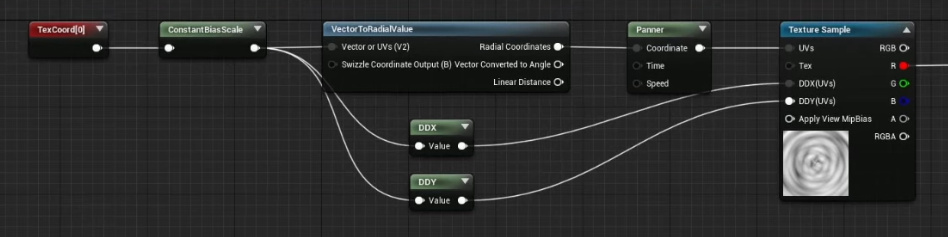
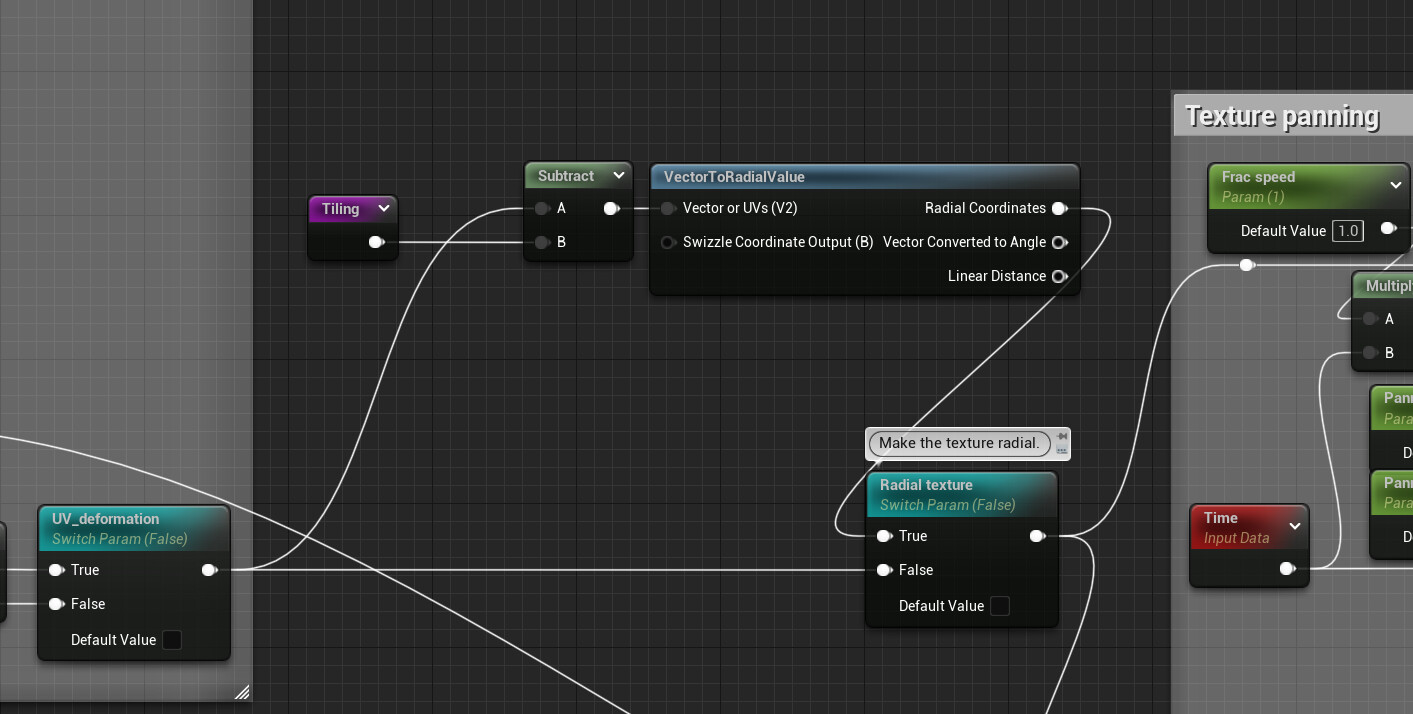
I’ve got the Unreal Material Function “Vector To Radial value” to give a seamless V now:
(Swapped the x and y, added 0.5 instead of doing a frac)
3 Likes
Actually the seam seems to come back at a lower MIP?
Yeah that’s kind of typical of the radial UVs stuff that’s built in to unreal. Usually I enforce mip0 if I can get away with it to avoid any seaming.
As mentioned above you will need to override the mip settings on your texture sampler to remove the seam.
From the facebook discussion on this:

8 Likes
Excellent, that resolves it, many thanks for digging that up!
7 Likes
2 years too late, but hhank you for this, I’ve been looking for a solution to this. Yet again it is a pretty simple fix. ![]()
Here is some more info on how to generate radial (polar) coordinates in the shader and a mention of the problem there the coords start/end:
2 Likes
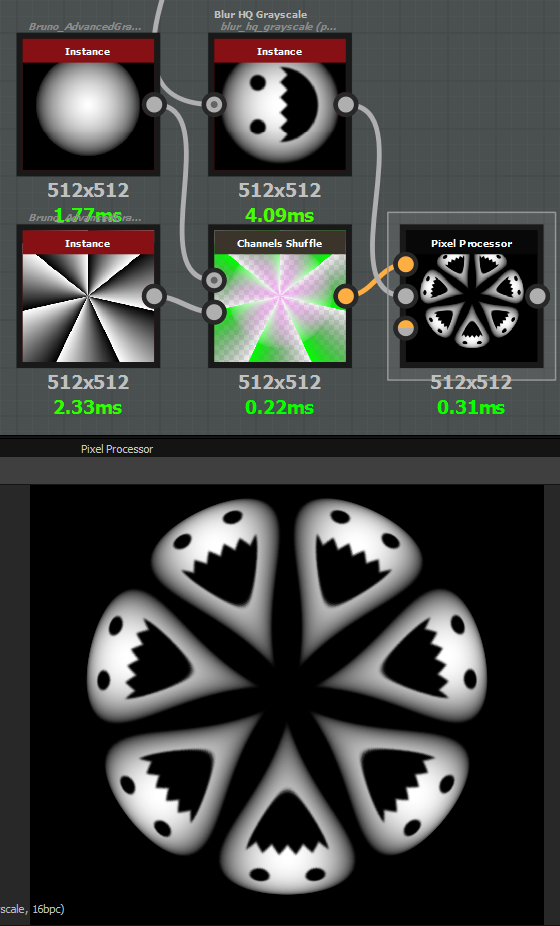
That’d be the entire material editor really. The pixel processor node works like a pixel shader kinda. See below:

9 Likes
Here you go buddy:
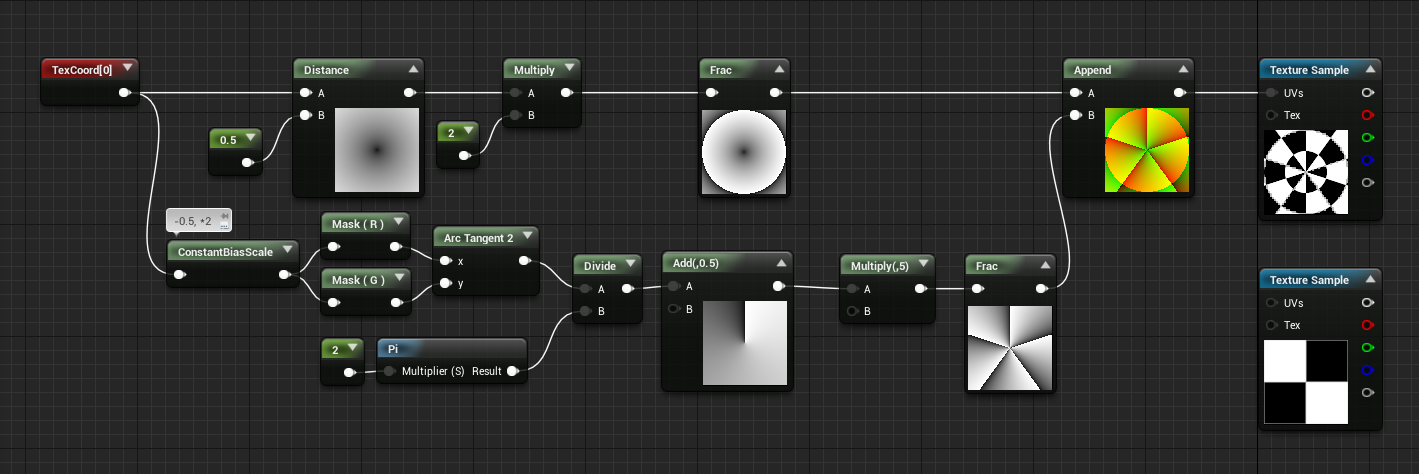
Channels Shuffle in Substance is basically appending/masking different channels from the inputs. In this case we want to append together the radial gradient and the angle gradient to create UV coordinates that are polar instead of cartesian. In the lower right you can see the same texture with default cartesian UVs
13 Likes
There’s the VectorToRadial material function in Unreal too, for quick simplicity
Another way to get rid of the pixel line is shown at this time stamp: https://youtu.be/T9ks0cs_COw?t=581
8 Likes
If you want to control UV offset or tiling, you can do that before the VectorToRadial, and (if I remember correctly) you can grab DDY/DDX after your multiply/add, but before the VTRV function. I’m trying to find the original post, but it was along the lines of “any kind of math applied to the tex coord is fine to do DDY/DDX off of” so things like Add and Multiply are fine.
I think the Frac, Sqrt, and custom atan2 in the mat function break that though
2 Likes
Nice Radial UV Shader: https://twitter.com/Cerva_saiki/status/1584282244943781888
2 Likes
I know this thread is old but still relevant. If you were to have a texture for uv deformation and want the radial to affect both but each have their own different tiling values (say my main texture is tiled by two but my uv deformation texture needs to be tiled by 0.5), how would you do this?
I have it all looking good if I don’t tile my uv deformation texture but it’s too small.
This is my main texture’s radial node, happening basically before anything:
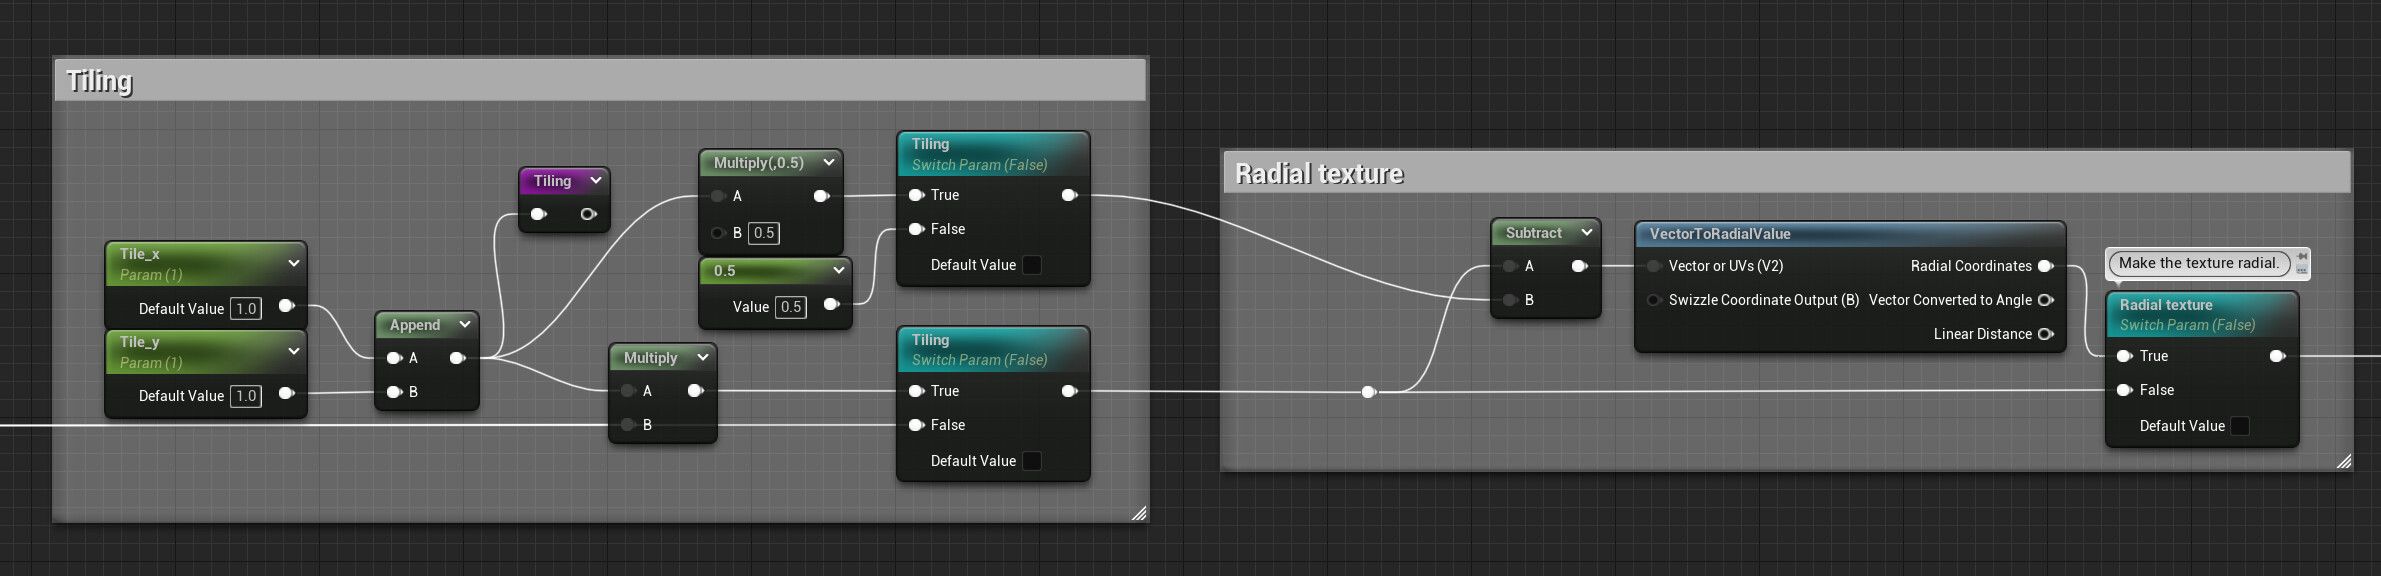
Then later on I have this:
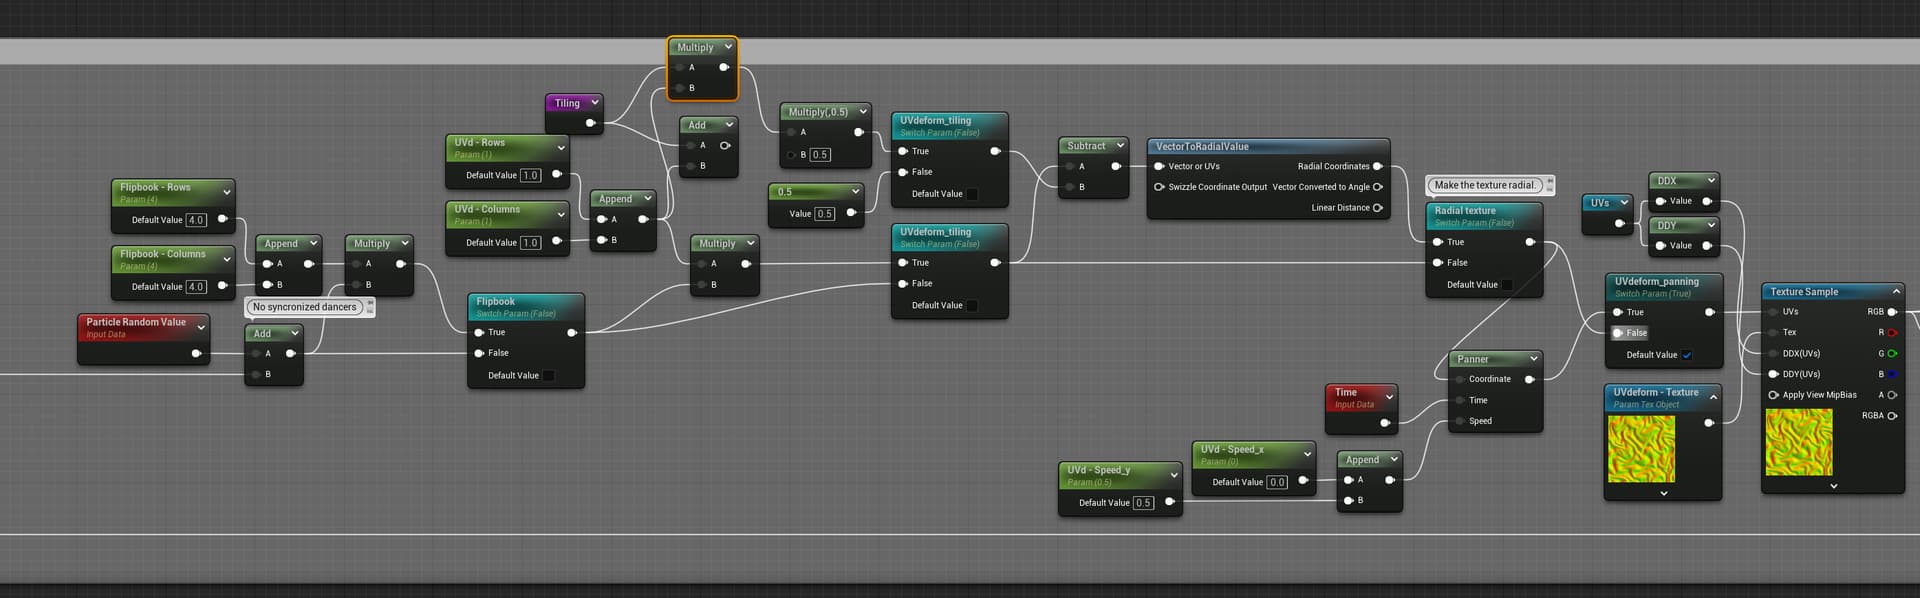
But it’s not working. So I tried disconnecting those and instead putting just one right after my UV deformation - before panning. And it seems to work but I cannot figure out what formula it’d be to have the center of the radial be at the center of my UVs, tried multiplying or adding both of the tiling values, dividing that into 2, but nothing works. I’m so close though
– EDIT:
Solved it like this:
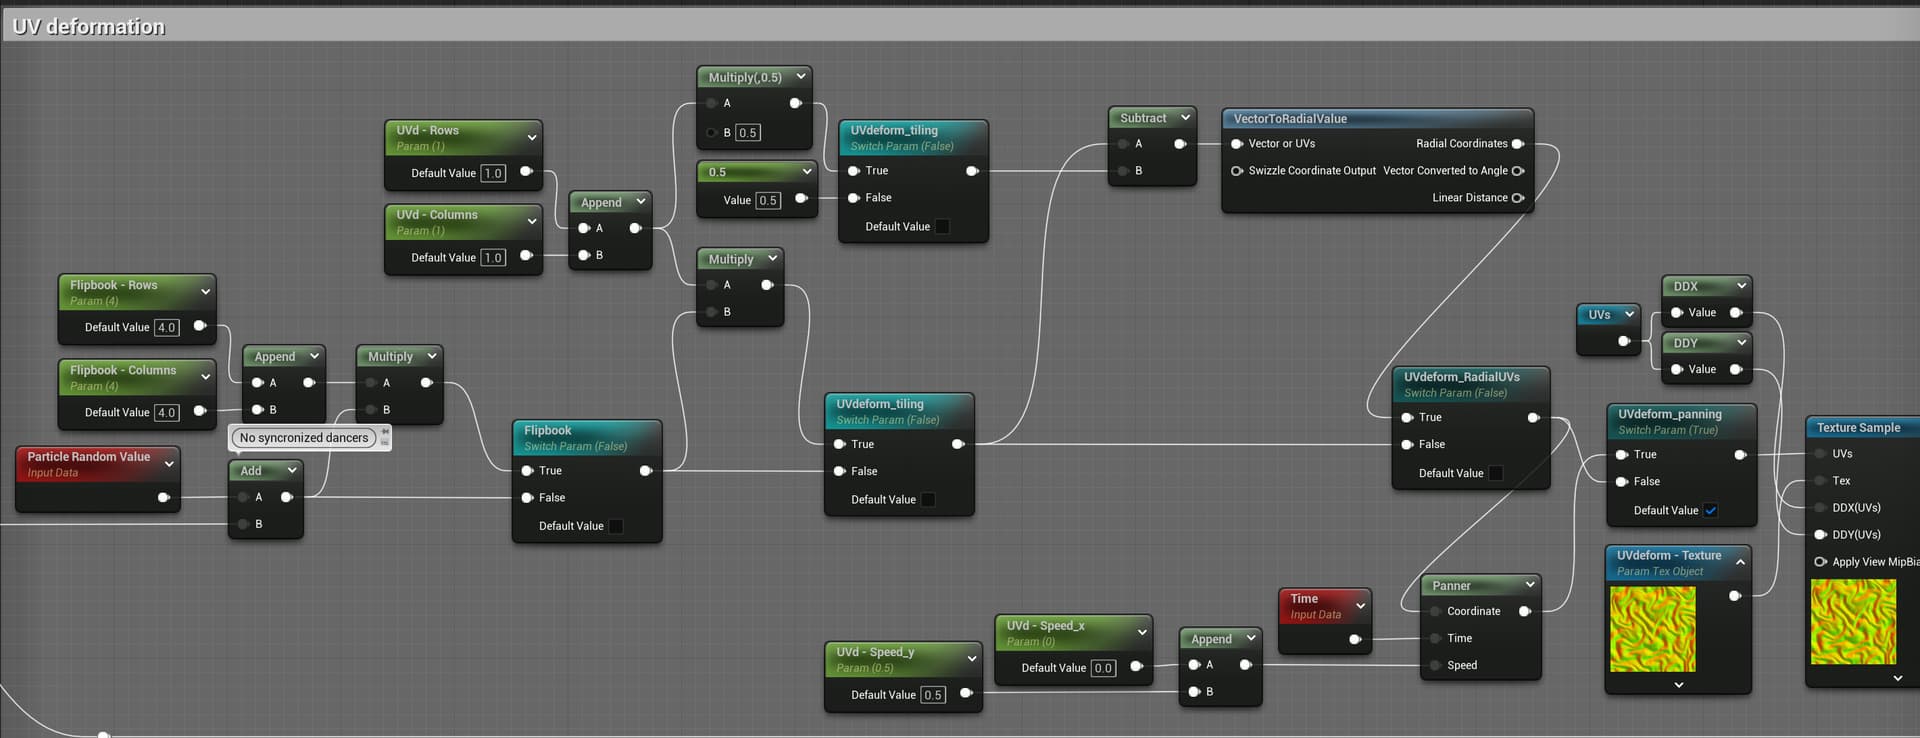
The redirect node of tiling multiplies the tiling values by 0.5.