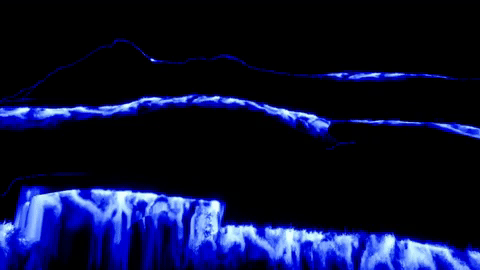
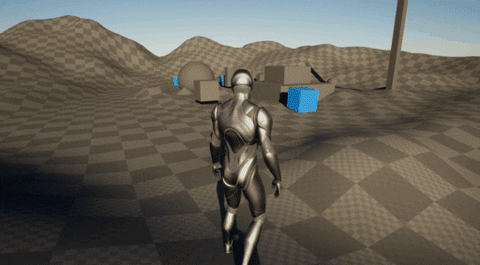
Found a way to create an easy and interesting Terrain Scanner in Unity and decided to share it with the world!
Here ya go folks:

Found a way to create an easy and interesting Terrain Scanner in Unity and decided to share it with the world!
Here ya go folks:
Interesting tutorial, unfortunately I have to tell you that this is not the technique used in Death Stranding because with your method it would require spawning a lot of sphere particles to achieve the same stripe effect which generates a good amount of nearly full-screen overdraws which is not desirable in practice.
What Death Stranding did was to access the scene world position buffer (which only includes opaque objects) in the shader, then subtract the effect origin position whose XY gradients can act as the UV for texture or calculate the vector length for ring gradient. I am no longer a Unity guy for many years so I don’t know exactly how to access the world space position buffer in Shader Graph, but this is something already done by other Unity guys with HLSL shader code and shader graph.
Unity official manual: Reconstruct the world space positions of pixels from the depth texture
Unity official forum: Reconstructing world space position from depth texture
Reddit: How To Get World Position From Depth Buffer
True indeed and if you watch the intro I mention very similar stuff. I’m definitely not trying to recreate the Death Stranding terrain scanner method on this specific video. I just wanted to share an easier method with the game dev community. But thanks for the resources btw, perhaps one day I’ll do a video where I approach that method.
Oh btw there’s actually someone around here on RT that made an outstanding recreation of the Death Stranding terrain scanner in UE. Let me see if I find it, oh here it is, done by MrBrouchet - Death Stranding - Odradek Terrain Scanner - UE4 case study
Thank you, Gabriel and Thomash for the great resources in making the depth scan shader. Especially getting the WP with an inverted matrix on the depth pass.
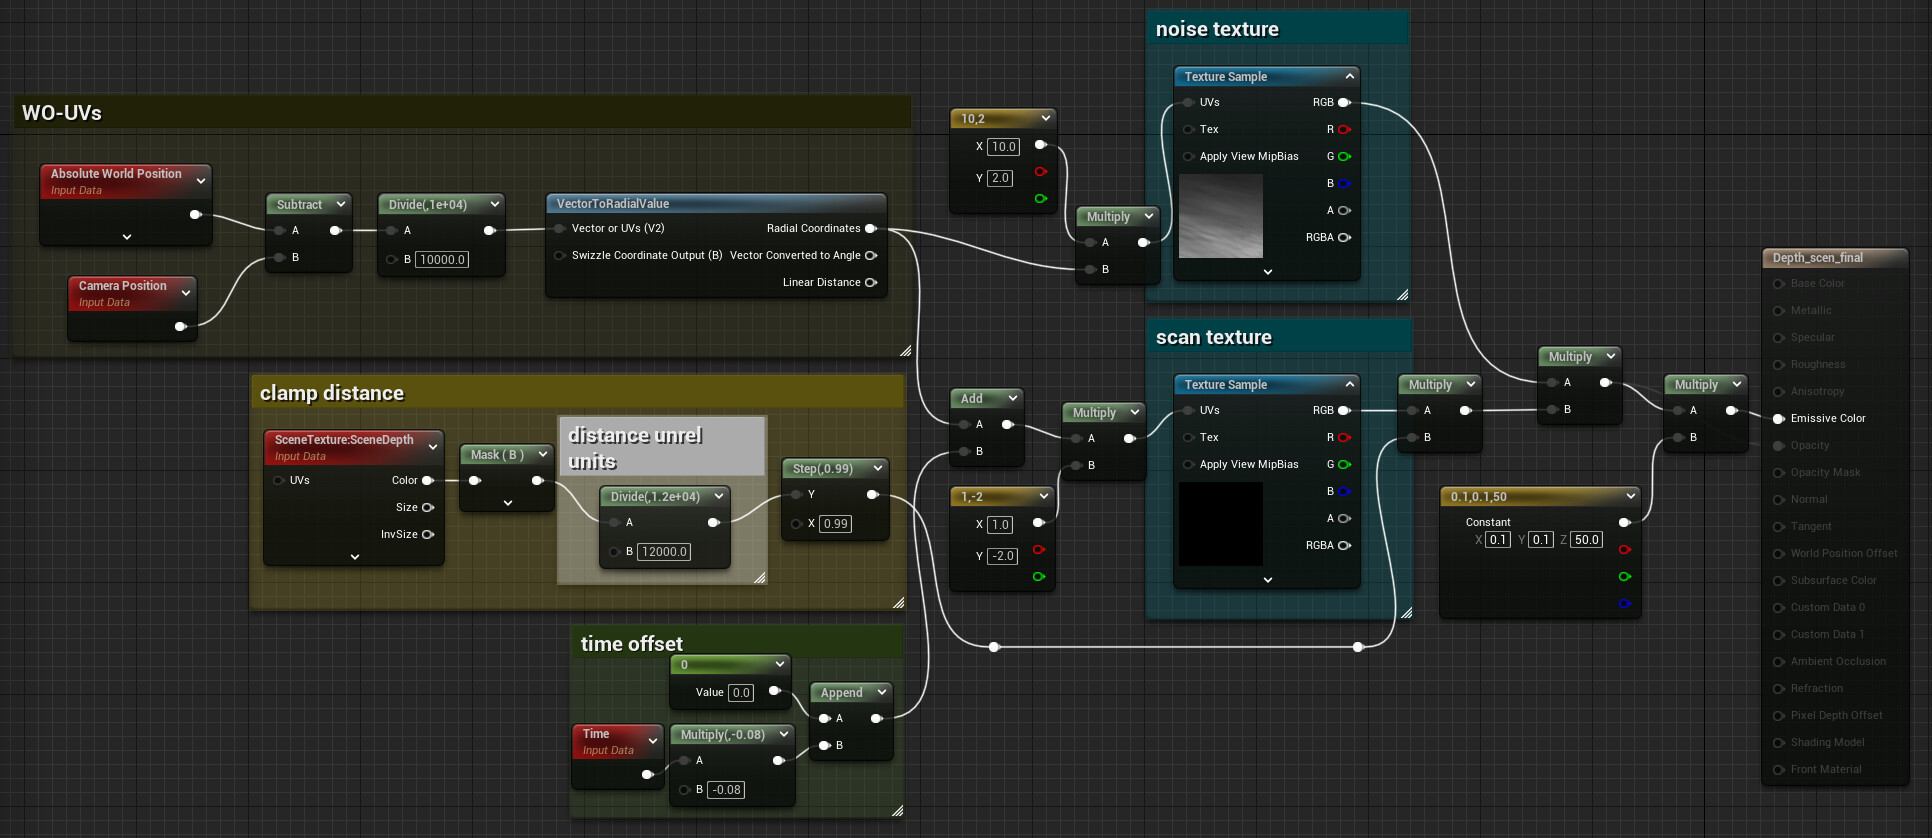
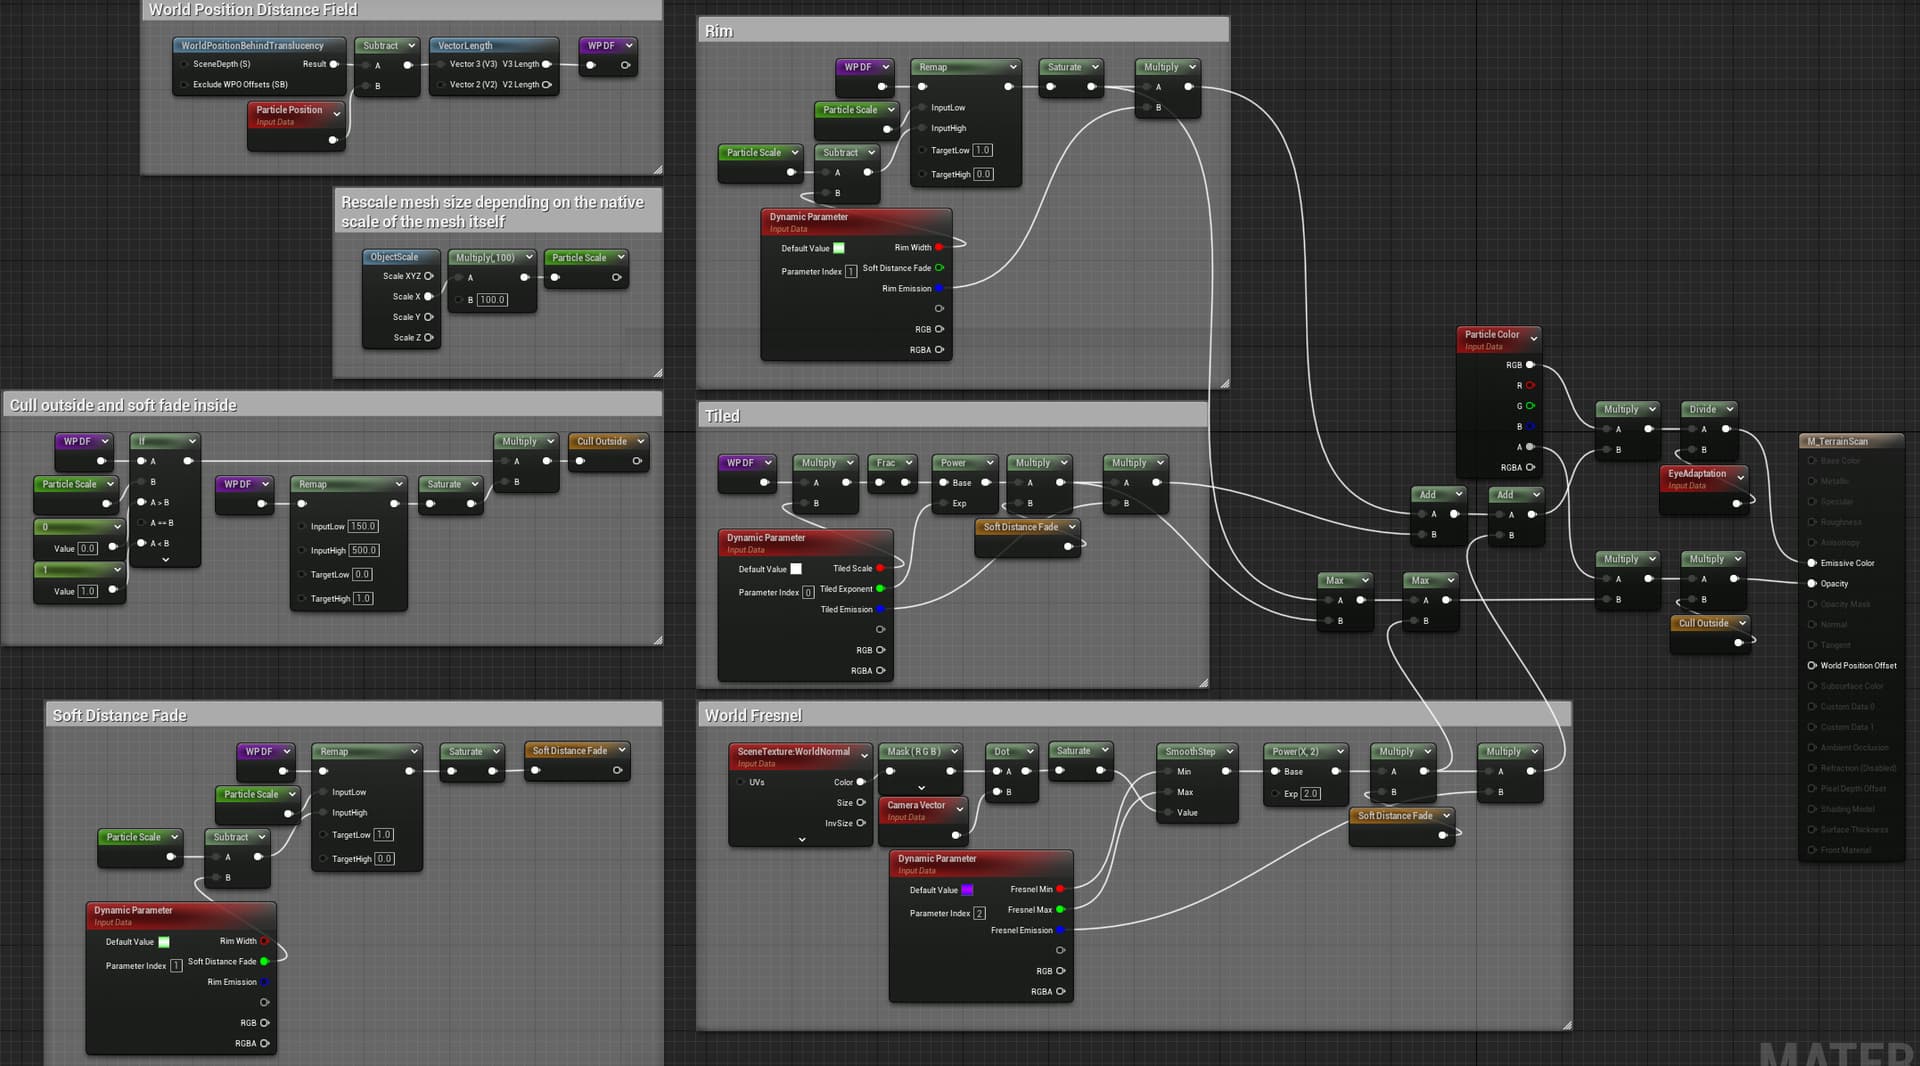
Here is an extremely simple scan shader for the unreal post process with interchangeable textures if somebody needs it.
Very interesting results btw, I might try to convert this to Unity. Thanks!
In UE there is a much simpler way to achieve this by using the “World Position Behind Translucency” node. The effect itself is really just a decal.
I have been using Niels setup for decals to sample 3D volume textures from Houdini to make non-clipping blood splatters with Niagara particles, but never in a "Post Proces Material’ that covers the whole map. I’ll try to implement it, thanks for your advice.
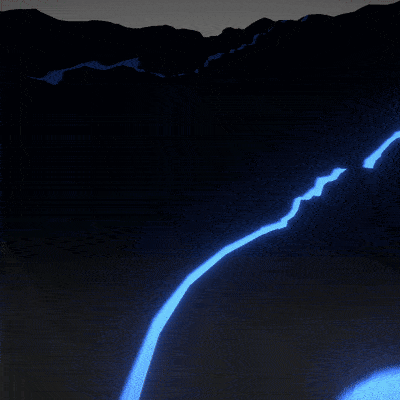
Not exactly sure if I should create a new thread for this, but most of the basic concepts were learnt from Niels. Anyway I made an attempt to reproduce the same terrain scan effect of Death Stranding in UE 5.2.
This is the material. I am obviously not using the Deferred Decal domain because it doesn’t support Dynamic Material Parameter or Additive blend mode (WHY EPIC???). Anyway this is just a surface additive unlit material:
Most importantly, you need to disable depth test.
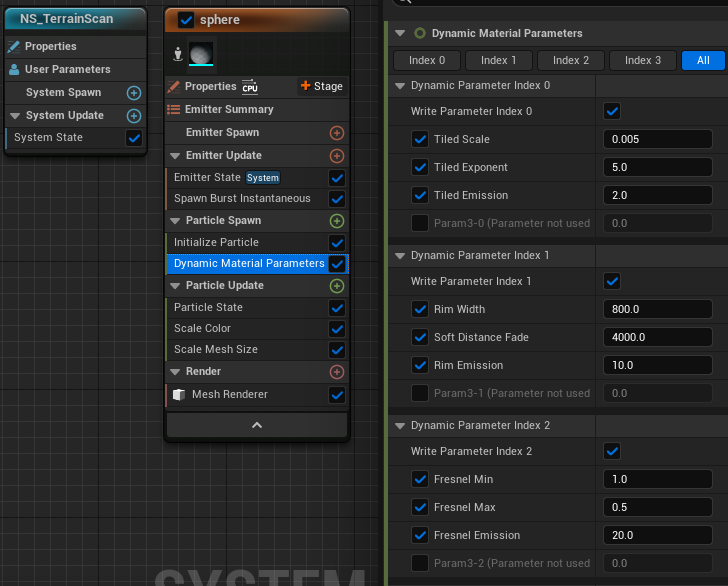
I am using Niagara to control the behavior. I just burst one particle. The rest is very straightforward:
The mesh itself is a simple sphere with flipped normal, IOW pointing inward instead of outward (another crucial trick I learnt from Niels) so it wouldn’t matter if the camera is “within the sphere”, and this avoids the necessity to enable “Two Sided” in the material. Niels’ sphere has a radius of 1 unit/cm; mine is 100 unit/cm. I did this so I can preview the mesh in the thumbnail, but consequently I need to multiply the “Object Scale” by 100 in the material for correctly scaling the distance calculations, which can be avoided if you follow Niels’ way.
")
Edit: minor typo correction
Nice setup ![]() . That inverted sphere implementation is pure gold.
. That inverted sphere implementation is pure gold.
This came out really nice btw ![]()
Any Chance you could share your project files?