Hi!
Full disclosure, …I am in no way an expert at python. I’ve written a few scripts over the years here and there so, while I did test this it may not be as robust as you like. It may also be a bit unoptimized ![]() Also, apologies on the heavily worded post ahead of time
Also, apologies on the heavily worded post ahead of time ![]()
I’d been wanting to do this for quite a while but hadn’t been able to find the time. I put together a few tools to help in setting up a Texture Atlas. You can download it → right here, from github. ←
To run the script need to have Python 3.7 and PIL (Python Imaging Library). If you do not have the PIL library installed, this will not work.
I know there are several ways one could go about setting up a texture atlas, however I was requiring a solution that doesn’t cost money or a piece of software that I can’t run on the two platforms I primarily work on; PC and Mac. I love SlateFX and have grown accustomed to that for most things but it lacks a few features which I wanted and sadly, it does not run on a Mac natively (bootcamp is not an option). That being said, this script is way faster than running a photoshop droplet or script. I had also been using Houdini to Super\Stagger Pack my sequences as I found it insanely easier to do with the compositor. That is an expensive solution to something that should be FREEEEEEEE.
On Ragtag we were experimenting with different methods of Texture Atlas’ing flipbooks which require channel packing. This script will offer 3 different channel packing Methods; Atlas Packing, Super Packing and Stagger Packing. Below is a breakdown of the different packing methods I use.
Atlas Packing: Your traditional texture atlas. Supports RGB and RGBA layout. This is your typical flipbook layout, nothing special here.
Super Packing: This method will pack up to 192-256 frames into a single flipbook. It packs your images across every channel availble. RGB images will take 192 frames where an RGBA image will take 256 frames. I’ve made the defaults 192 and 256 frames which would be an 8x8 Channel Packed Texture Atlas. This method will pack 64 frames into each channel. This method is quicker and a bit less shader instruction but it may show more artifacts since your pixels will not be as tightly packed.
- Red Channel: Frame 01-64
- Green Channell: Frame 65-128
- Blue Channel: Frame 129-192
- Alpha Channel: Frame 193-256
Stagger Packing: This method will pack up to 192-256 frames into a single flipbook. It packs your images across every channel available. RGB images will take 192 frames where an RGBA image will take 256 frames. I’ve made the defaults 192 and 256 frames which would be an 8x8 Channel Packed Texture Atlas. This method does offer a bit better method of compression with your flipbook. Since the frames are a bit closer together in the packed channels the pixels are a bit tighter. If I am packing large sequences I will typically go for this over the Super Packing.
- Image01.R = Frame 1
- Image01.G = Frame 2
- Image01.B = Frame 3
- Image01.A = Frame 4
- Image02.R = Frame 5
- Image02.G = Frame 6
- Image02.B = Frame 7
- Image02.A = Frame 8
- …etc, all the way up to 64 total images.
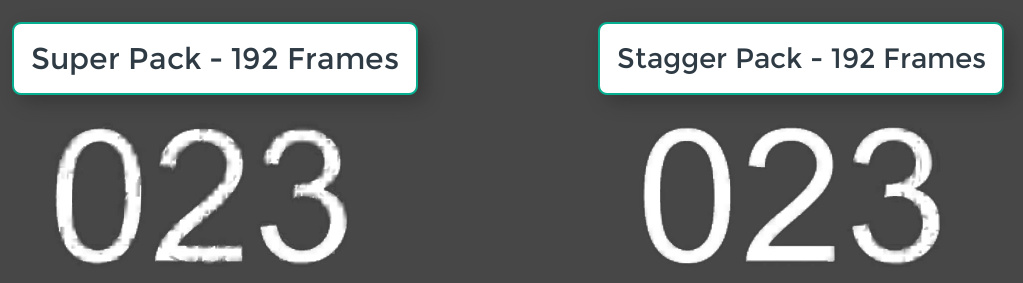
Here is a side-by-side comparison of the packing artifact differences. Notice the Stagger Pack method has substantially less artifacts.
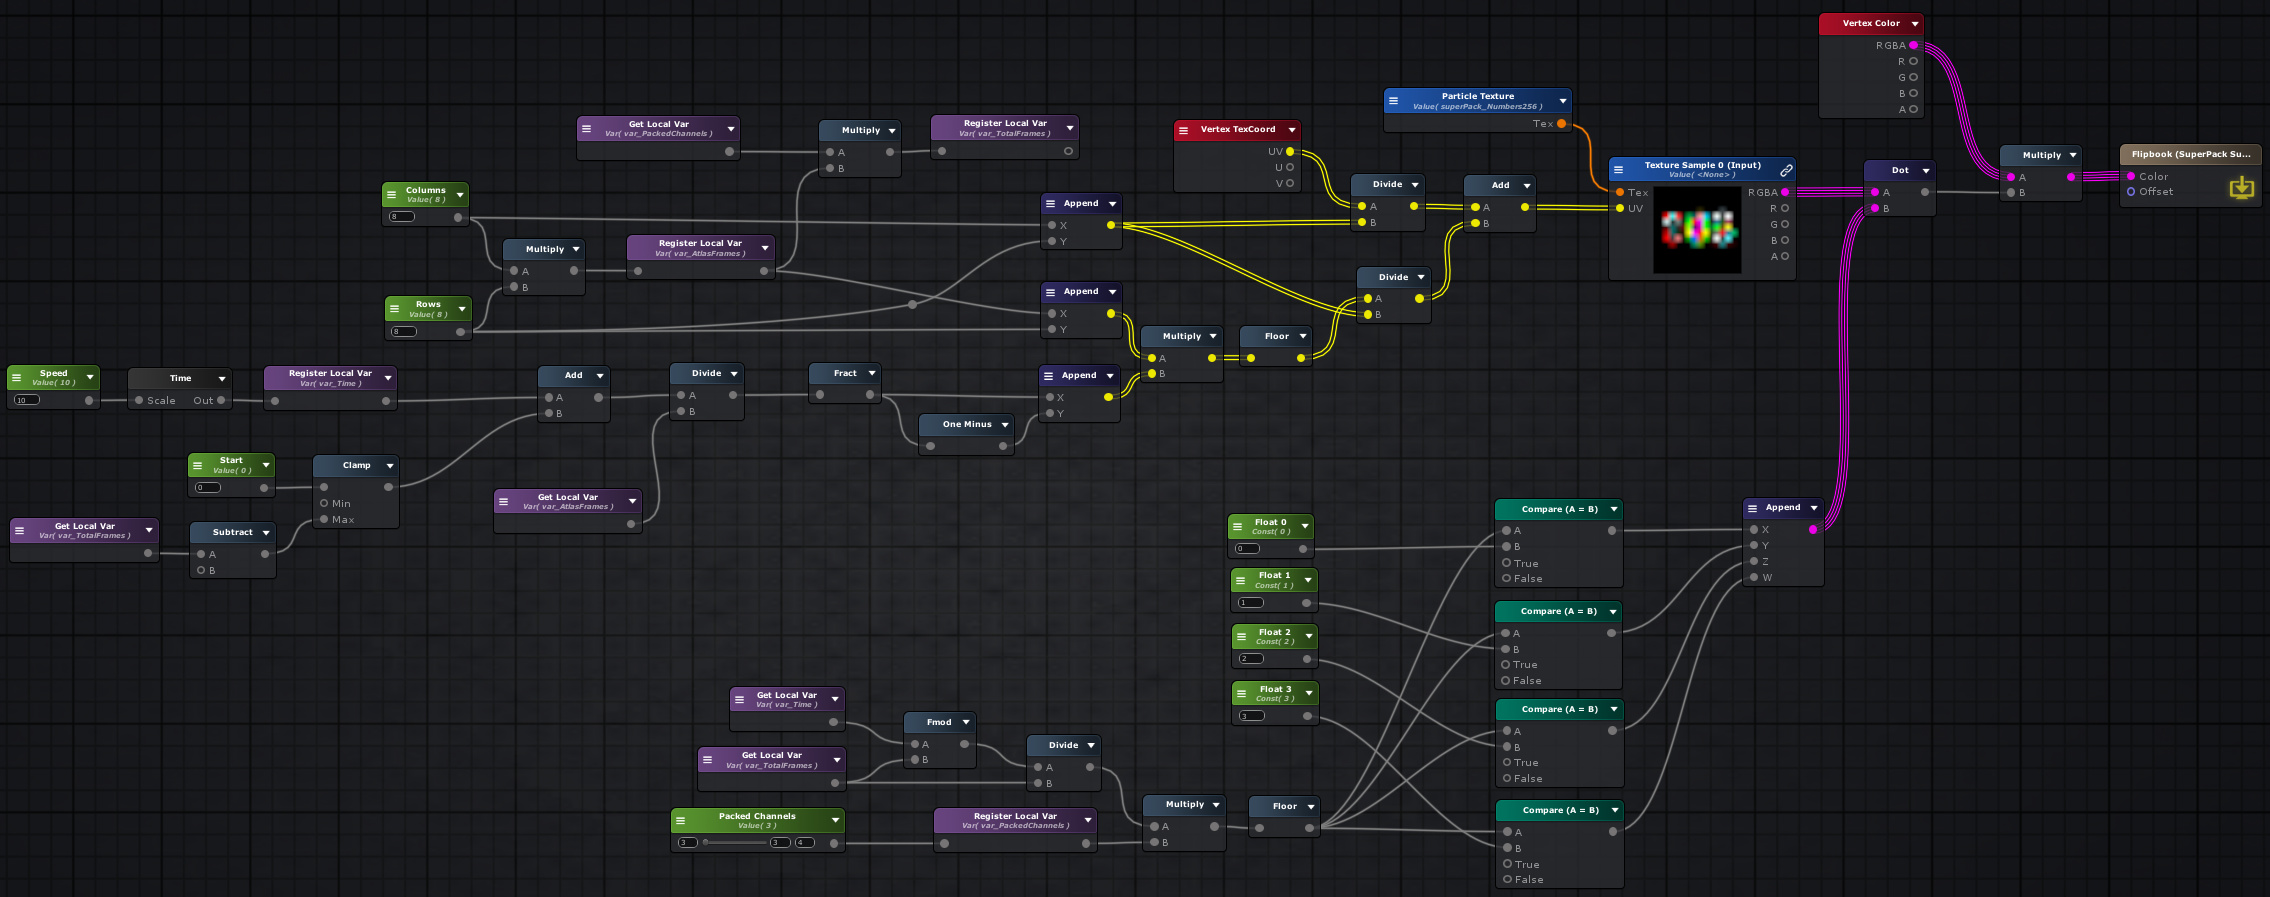
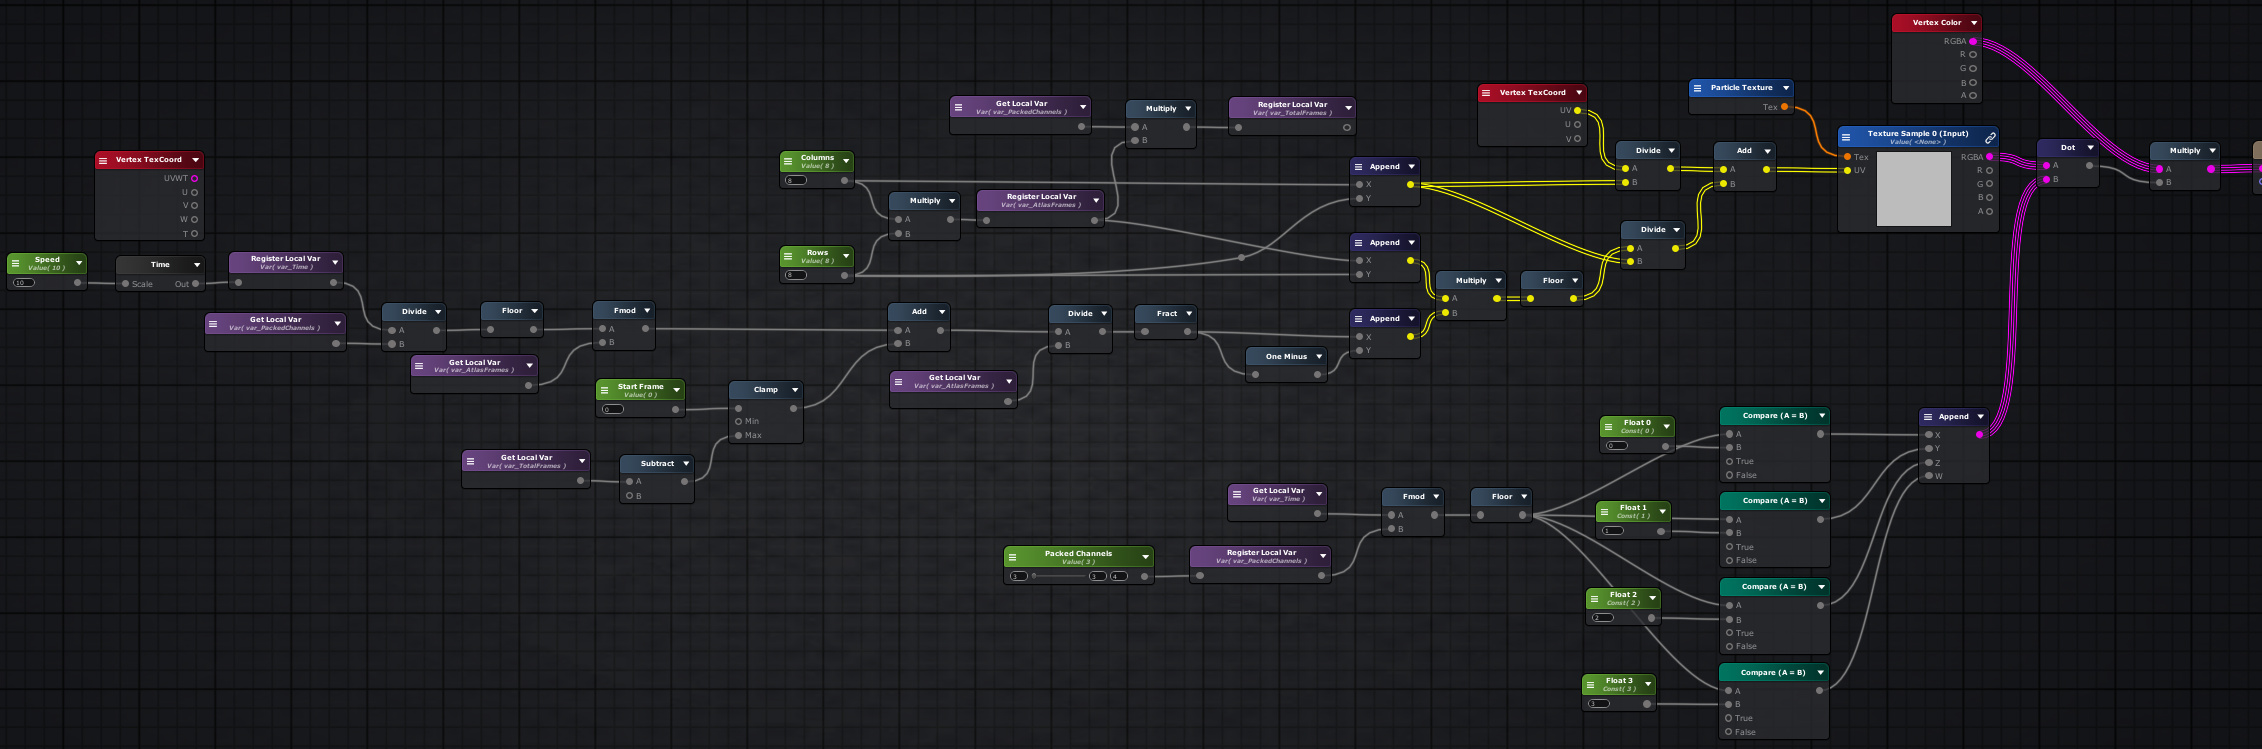
Here are some shader graph screenshots which will help in unpacking them in your VFX shaders. These could probably be more optimized but I was lazy and I like to keep things flexible since I’ll probably be tweaking my setup here and there.
Super Unpacking Shader (Built with Amplify in Unity):
Stagger Unpacking Shader (Built with Amplify in Unity):
Lastly, a short movie showing the 2 different methods side by side. These textures are just using Unity default compression. Something lke BC7 would make these things sharp as a tack, but for sake of example between the two methods I wanted to illustrate the compression artifacts you get between the two.
You may wonder why you actually want 192 or 256 frame flipbooks. Not to mention, it’s not great for things that require their own alpha channel or full RGB color. So why do this? While working on the (pour one out) canceled Ragtag title at Visceral Games I was developing out a lot of fire. We went through several iterations on how it should look and ultimately came to the realisation that for our needs, high quality looping flipbooks were what we required. So I scoured the internet and found some really amazing high resolution fire footage that I was able to loop and spit out. Run the final image through a blackbody node and you’ve got yourself some pretty solid fire. Give each particle a random start frame between 1-256 and then you only need a few particles, it is harder to spot the repetition, especially when coupled with a few fire textures that are unique.
Hopefully the community finds it as useful as I have. I’d like to push this a bit more with some other ideas I have.
Cheers,
Seth