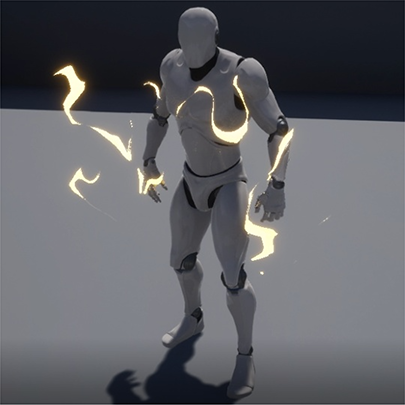
I created the electric shock effect with a Vertex Animation Texture exported in Houdini.
I want to solve the problem that the drawing goes wrong when I move the character.
If anyone knows how to solve this, please let me know!
I created the electric shock effect with a Vertex Animation Texture exported in Houdini.
I want to solve the problem that the drawing goes wrong when I move the character.
If anyone knows how to solve this, please let me know!
Is that happen when your character actor move? If the actor stands still but the animation play (for example, running anim play but actor stands still), does that happen? Does a sphere actor cause this as well?
I don’t know how you set up this so there is a lot of thing to check.
Edit: okay my bad, animations have nothing to do here. Can I have a peak at your vertex animation material setup?
Where should I show the settings?
I built the material based on this video.
(Starting at about 17:00)
")
I tried to repeat the tutorial, if you used standard node network Houdini provided, there should be nothing wrong. So this should be some calculations you added into the network.
If possible, I would like to have a look at your added calculation in the material. If not, I recommend rebuild the material and test them on a static mesh actor before moving onto Cascade, step by step to see where it went wrong.
Thanks for trying!
I downloaded this file from the official SideFX website and tried again, but the result was the same, so it looks like the problem is in the UE4 settings.
When I attach an effect to an actor and then move the actor, it looks weird.
I’ve uploaded the project file to my google drive, so if you have time, check it out.
Like I said, thanks for responding!
https://drive.google.com/drive/u/1/folders/1RxTngLjltyM_K6-5xaY87DULZywwORyN
Your problem can be mine one day, beside, you helped other so you deserve people’s help ![]()
Btw, I found the problem. Your setup is fine, but Motion Blur in Postprocess f*cked your effect up. I propose 2 solutions:
_ Set motion blur to 0 in Postprocess volume. This removes the problem completely, but terrible idea to implement in game. So another option is…
_ Set your material to any other than opaque mode, for example: additive, transparent,… UE will not allow you to exclude object with opaque material from motion blur (yeah, that suck), so you need to avoid that mode. This will make the blur effect only visible while rotating, as in the screen capture.
P/S: nice effect, I will took it as my payment ![]() . Do you have anything I can contact you with? Telegram, Twitter,…? Your style is eye candy so I really want to follow you
. Do you have anything I can contact you with? Telegram, Twitter,…? Your style is eye candy so I really want to follow you ![]()
I see! I’ve solved it.
I tried asking on other social networking sites, but I couldn’t figure it out, so it was bothering me.
Thank you so much for your help.
I’m registered with Art Station.
https://www.artstation.com/murokun
Very nice effect, I’m glad you got your problem sorted out.
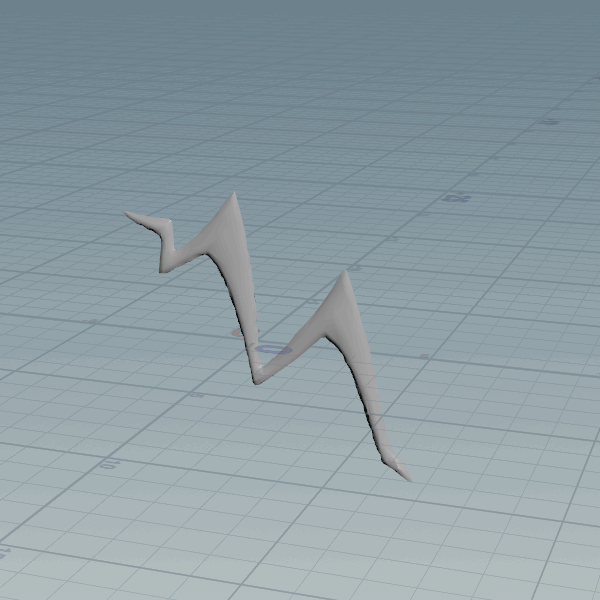
Would you have any tips to share on how you made the lightning in Houdini?
I’m very familiar with the VAT process, but I really like those shapes and would love to know more about how you made the animation.
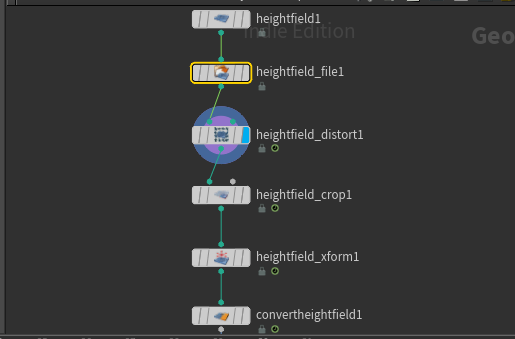
I create a heightmap in the substance designer or photoshop and convert it to a mesh in houdini.
heightfield_file…heightmap to load
heightfield_distort…apply distortion
heightfield_crop, heightfield_xform…adjust size and position
convertheightfield…convert to mesh
Connect the mesh to the clip node.
I animate the clip node to gradually rise and dissolve it.
Uploaded here.
The texture is a modified version of an image I found on the internet, so I won’t share it here.
I’d be happy to help.
https://drive.google.com/drive/u/1/folders/1YnJfYM6VnRYmbsUZGeq3IRxOWmahFefh
Here’s my attempt, thanks so much for the detailed help.
My lightning doesn’t feel as alive as yours, but it’s something!
So good.
Glad I could be of help!
This is such an awesome process! @Murokun could you explain how you got that smooth bevel on the lightning itself? I’m trying to use an image of my own , but it’s coming out like this.
I really like the smooth bevels you’ve got on yours!
That’s a bad texture.
I think a smoother gradient would work better.
Also, the size of the texture should be as large as possible. (Like 1024x1024 or 2048x2048)
Ah thank you! I’ll give that technique a shot.
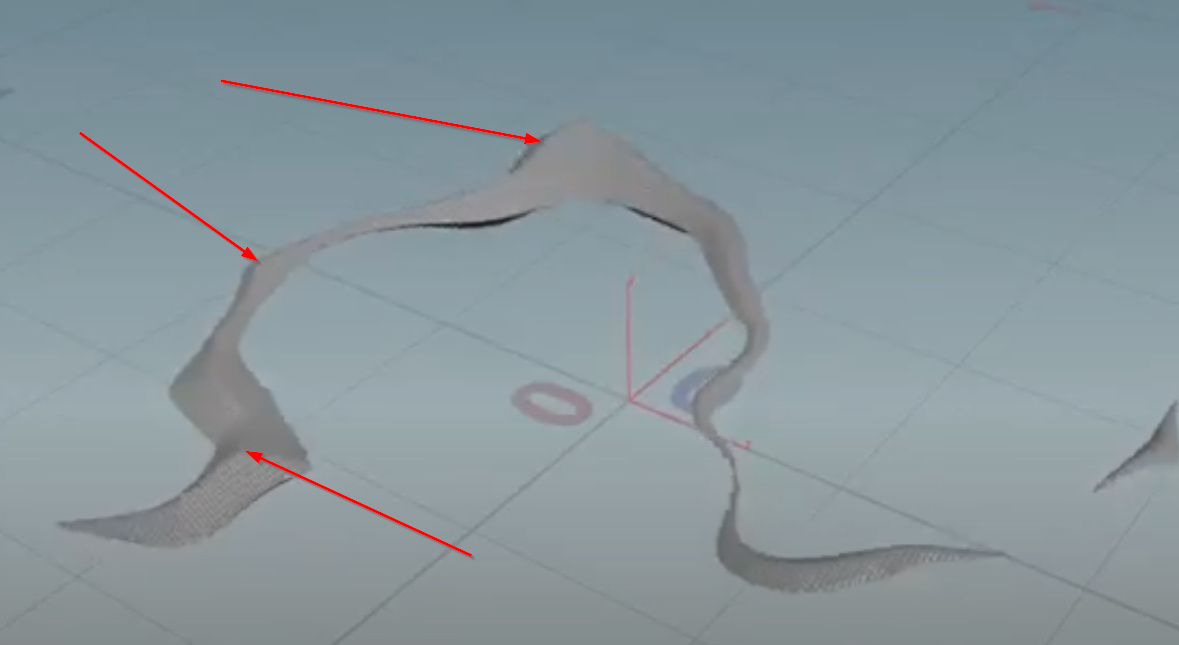
So I think I got a pretty cool result @Murokun ! I appreciate the help! I now have a follow up question XD. I brought it into Unreal and it doesnt look correct.
This is what I’ve got in Houdini
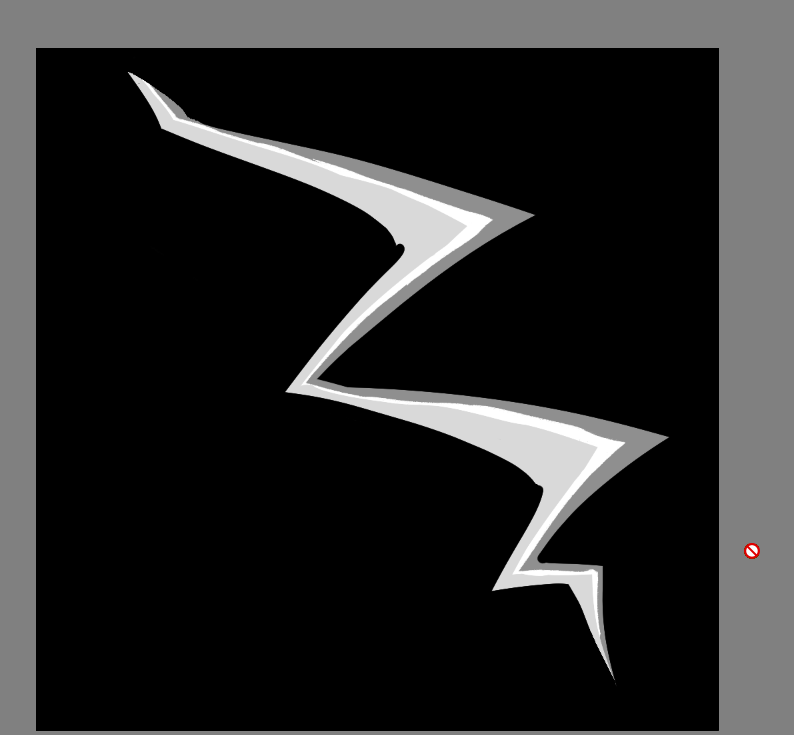
However, when I try to export my VAT like I’ve done with simulations. This is the result I get
It honestly doesnt even look like anything.
I’ve done this process before and it worked. Was there anything different that you noticed about exporting the lightning?
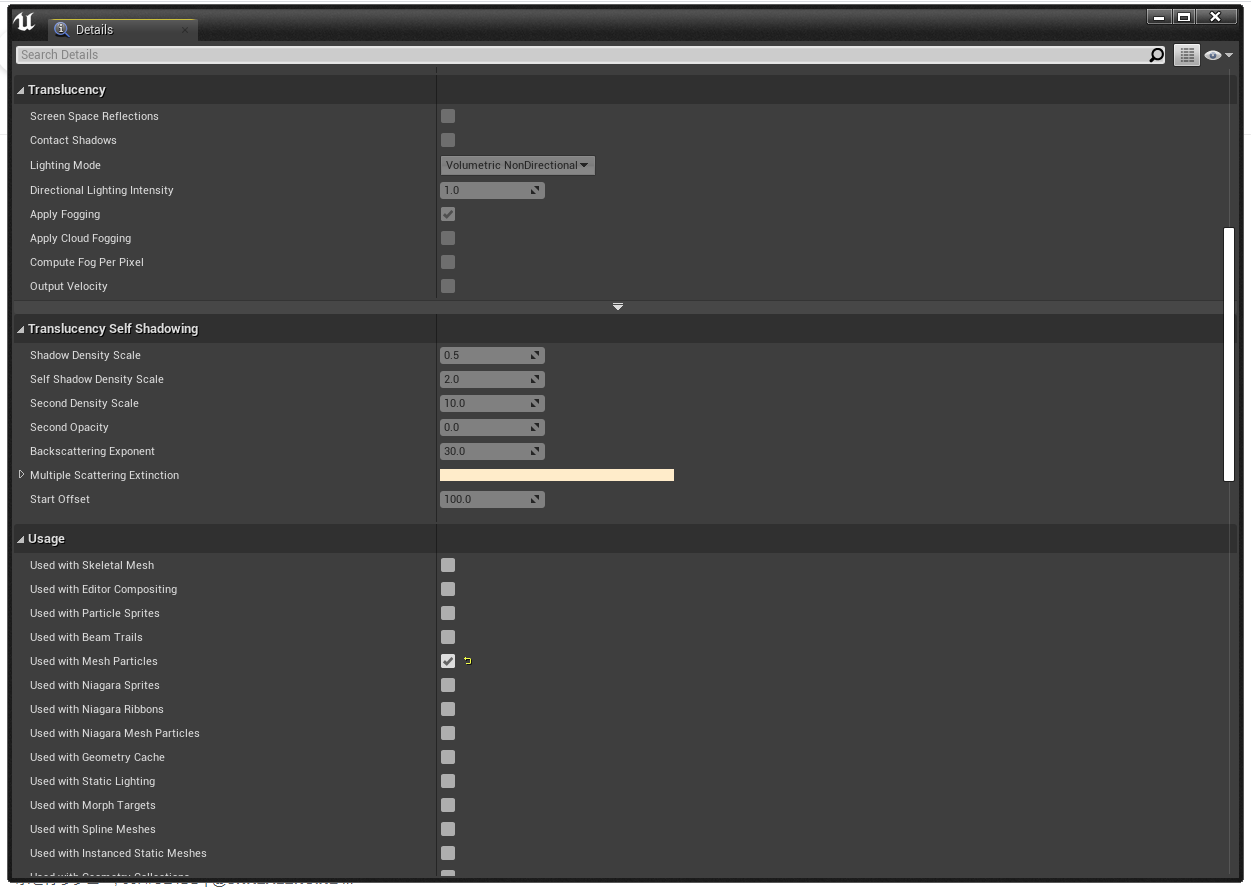
These were my VAT Settings.
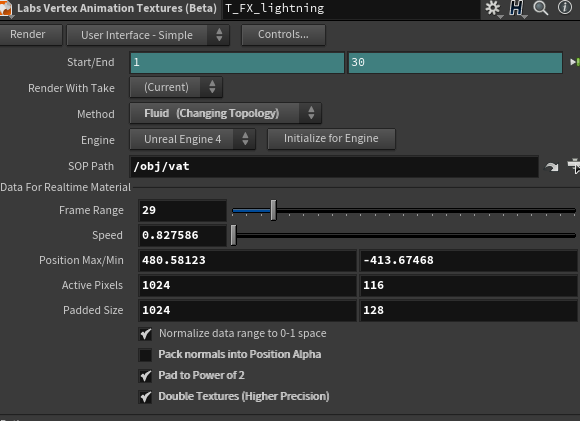
These were my Material settings in Unreal
The first thing I noticed when i did this, was how different the Position texture looked from what I was used to.
Does this look right to you?
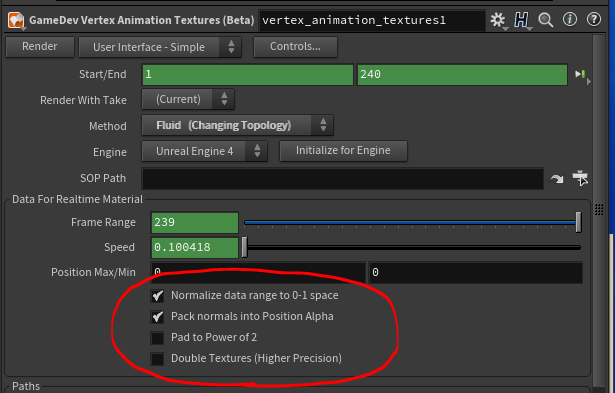
You have a different Houdini VAT node and Unreal material settings than I do.
This is my GameDev Vertex Animation Texture (Beta) node.
Also, I used this video as a reference for creating materials in the Unreal Engine.
As you said, you should have no problem using only one position texture.
Houdini may have different node specifications for different versions, so please be careful.