I have a project I’ve been working on for several weeks, with an uneven workload. It’s for a very small studio, an internal showcase, and the employer allowed me to share my progress.
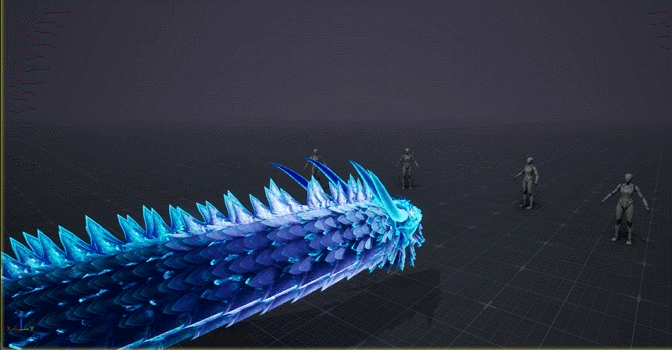
This is a dragon attack in two stages: a weak attack and a strong one. To get started, I created the dragon and the animation, using this as a reference for the effect RIOT Character Effects | UNREAL.
Honestly, I don’t do animations like this, so I just had to figure out how to do it quickly. The animation and rigging itself took about 6 hours. I’ll share my progress below.
When I got started, the first thing I thought was that I’d have to find a head reference somewhere online, and that it would be pretty tough to build one from scratch. Then I watched a YouTube tutorial on how to start modeling things like this, and after watching it, I gathered a bunch of references and just went ahead and made the model.
I thought long and hard about how to make the scales, and at first I tried using planes to cover the body, and it worked right away. The only thing was that I had to try the scales a few times when I started working on the textures.
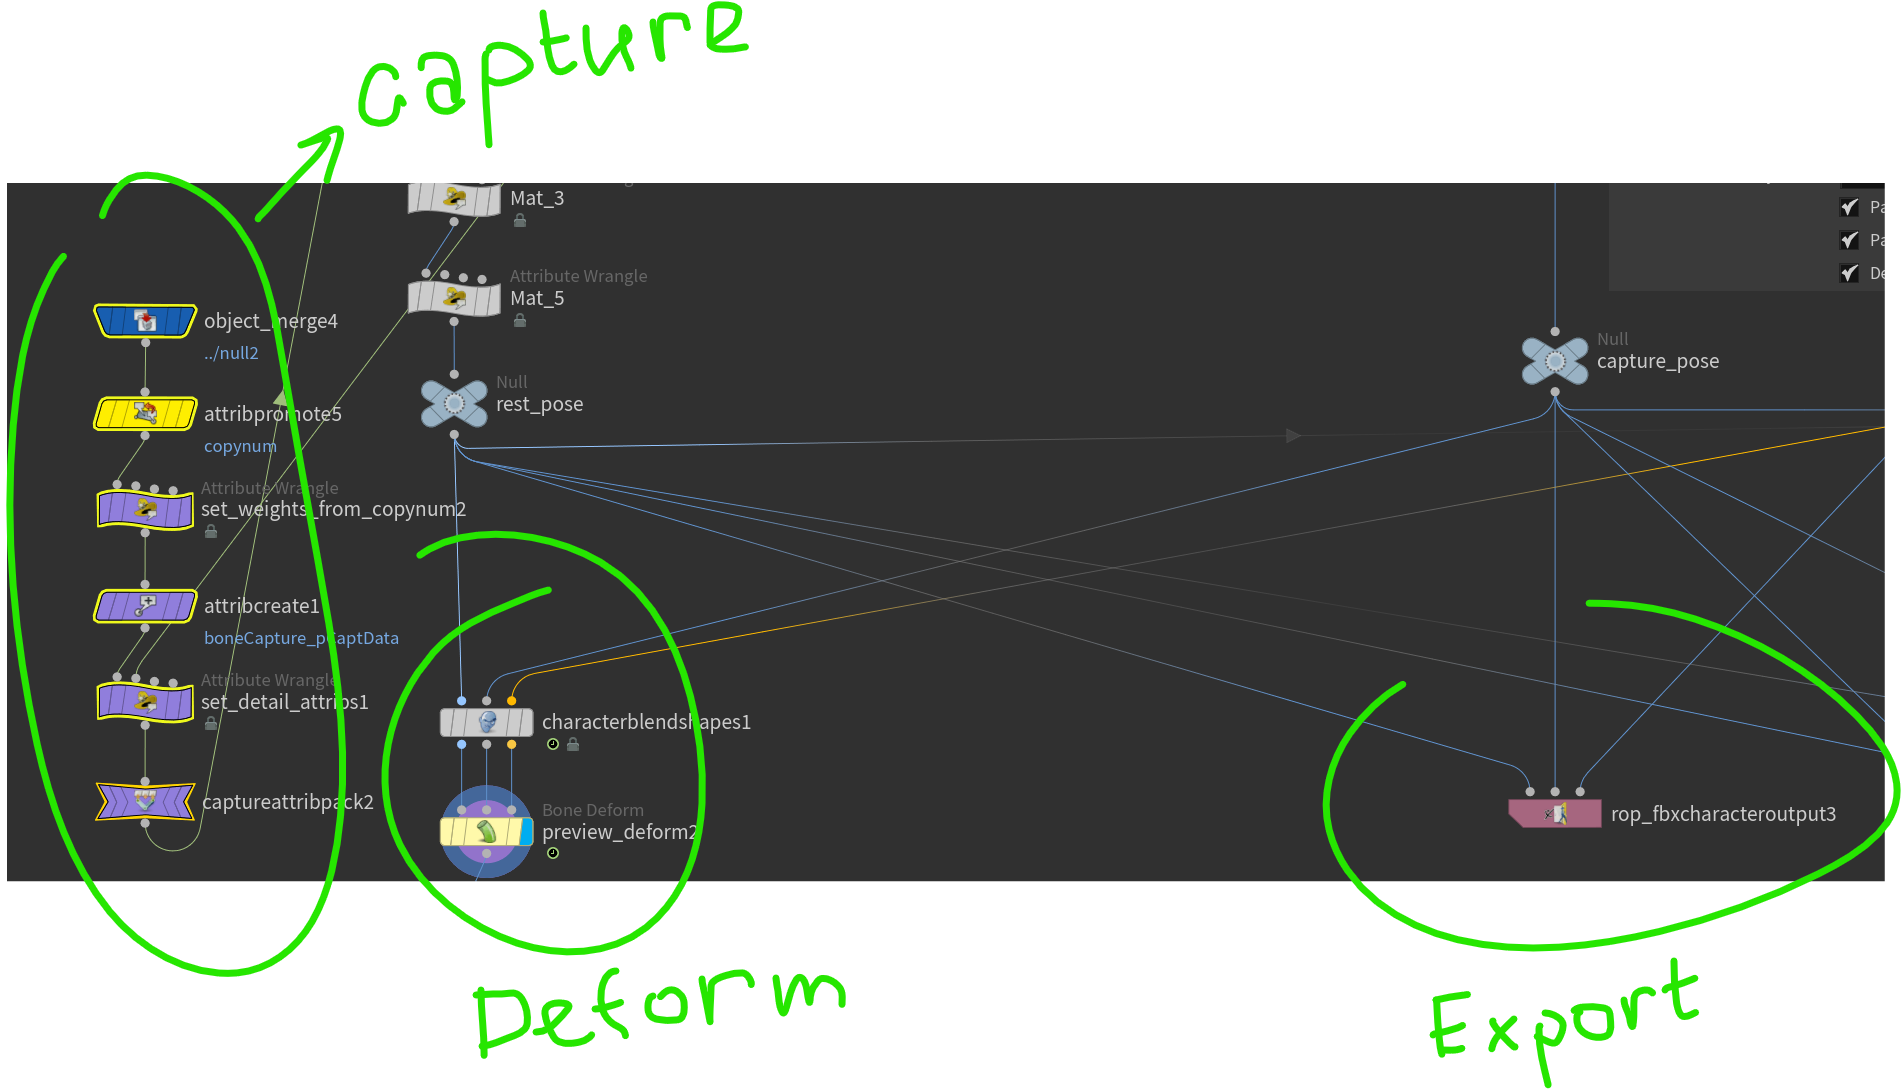
I don’t do animation in Houdini either, much less rig, so I searched for simple examples of procedural rigging, collected several files online, and then created a rig by selecting the necessary elements from several files. But such rigging isn’t suitable for manual animation, so I had to figure out how to make the animation look natural. I did that procedurally, too. I collected all the necessary poses using curves and blended them.
I added smoke to the body, camera shake, a decal under the character and started working on the impact. Oh, and I tweaked the whiskers a bit, put the Lightning - 2 back where they were (along the mane), and made them a little less noticeable (I’m not sure if they should be any brighter, either).
I would like to make the decal brighter, but it seems to me that the dragon will blend with the decal. It has a lot of bright things on it body and I want to have a balance so that the body itself doesn’t become unnoticeable.
I didn’t use vertex animation in this case, although it can be a good solution in many scenarios.
When you need to combine particles with character animation like this, vertex animation becomes difficult to manage. It is technically possible if everything is built in Houdini and exported as vertex animation textures for both the character and the particles, but this approach is not practical and can become expensive.
The main issue is memory. Vertex animation relies on textures (position, rotation, and sometimes additional data like color). These textures can easily exceed 4K resolution, and typically require multiple maps that do not load, which makes them quite expensive. Vertex animation does have a loading option, but that only makes sense for a crowd, not for this case.
Instead, I used standard skeletal animation, but generated it procedurally rather than animating everything by hand. The blending between animation curves for the character was done manually, since in this case it was more efficient than building a fully procedural system.
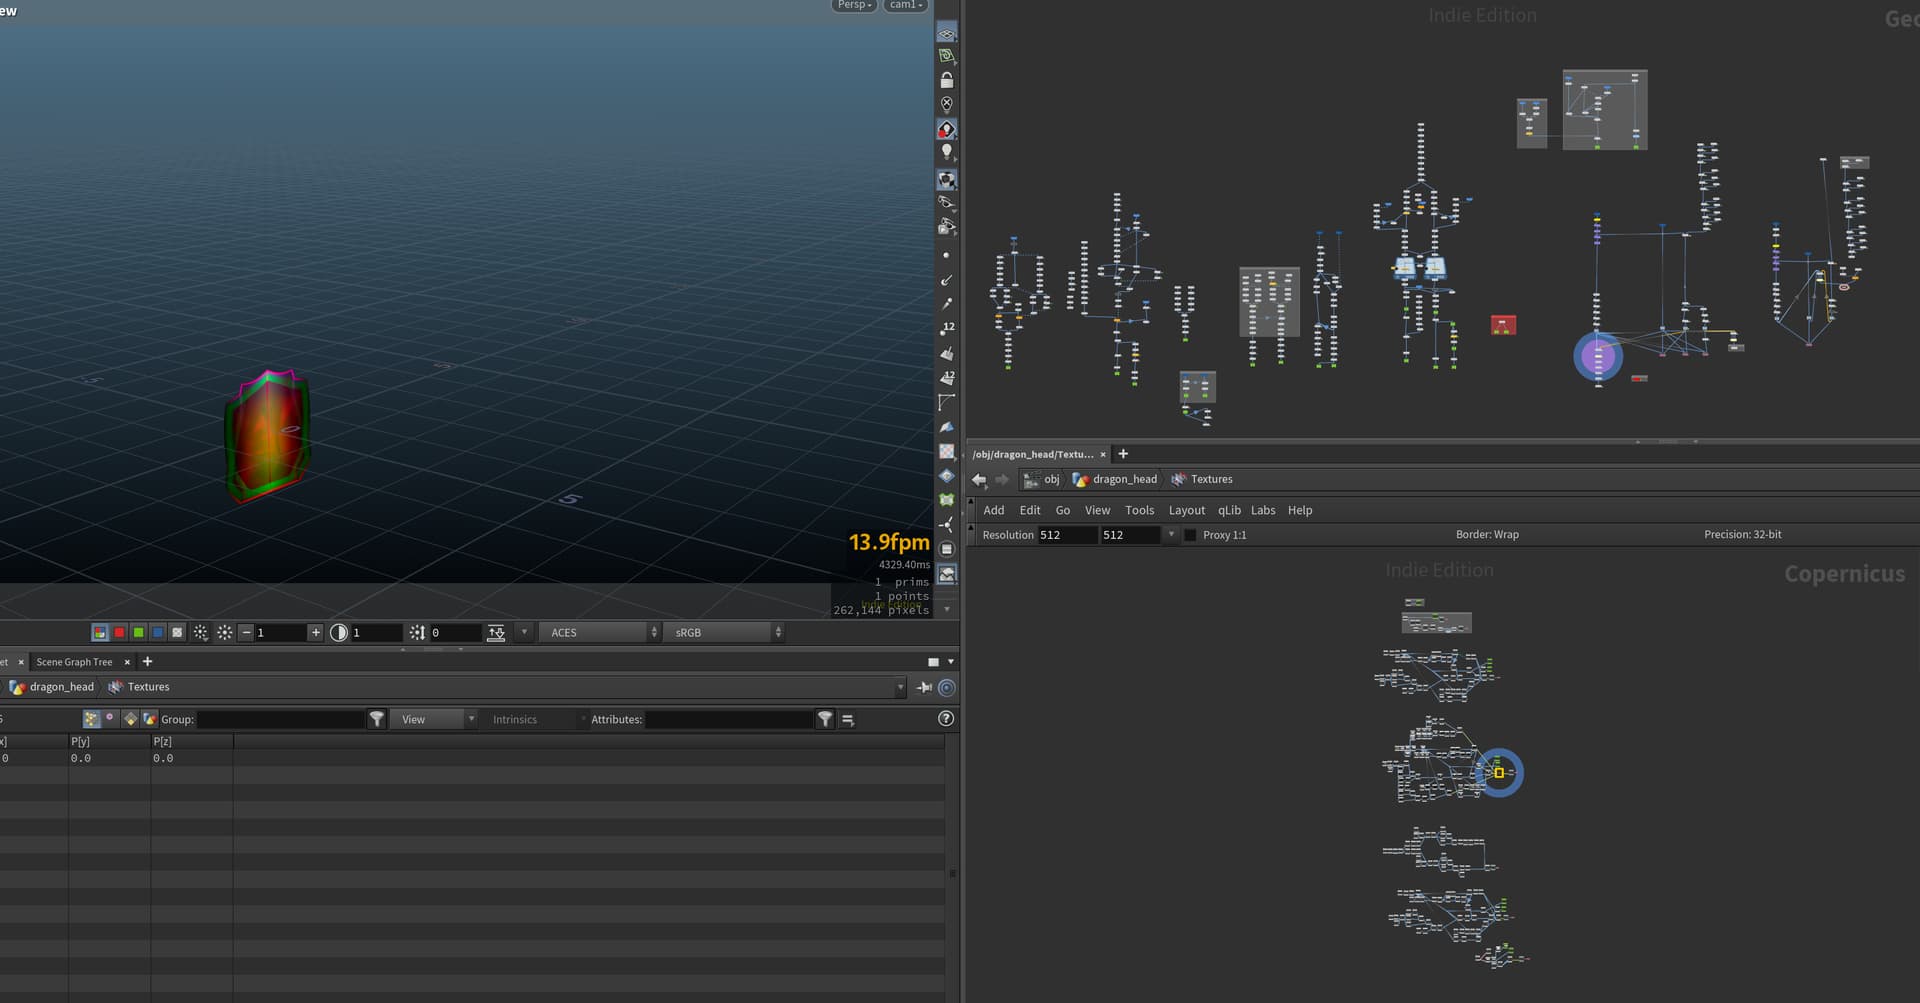
I gather you’re not very familiar with Houdini. I showed a bit above what it looks like; if you take a look, you’ll see there are nodes used for animation and FBX.
I didn’t add anything special to the motion blur. When you have the right animation and motion blur is enabled on the particles, the engine automatically applies motion blur to everything. Of course, there are some techniques that can enhance this effect, and even plugins, but I didn’t use them.
Here’s one way you can enhance motion blur using a material. https://x.com/RyanDowlingSoka/status/1342000189226172416
If you’re really interested in understanding why something looks good or bad, I’d focus on the visuals rather than the technical aspects of the execution. Although I admit, I did use one technical trick for the scales that allowed me to animate the waves along the body, but that’s not of primary importance.
Man, that looks freaking awesome! If you ever make a course about doing Houdini for Realtime-VFX I’d get on it right away. The stuff you make in it are really cool.
Looks really solid, especially for something you don’t usually do. The timing between the weak and strong attack feels nice curious to see how the final effects come together. Keep sharing updates
I will continue sharing progress. I was busy with a small task on another project, and then I spent some time updating my tool for fire rendering and compositing. I returned to this task just a couple of days ago.
In Houdini, there is the older COPNET context where you can use the Mosaic node to assemble sprite sheets, and the newer Copernicus context where this tool is not available. The Mosaic node is relatively slow, and the COPNET context itself is becoming outdated.I had not had time to properly investigate this before, as I had been continuously focused on production tasks nonstop during last 2 years. . Sometimes there was even a time when I had to do one task one day and so on for several months and at the same time it was necessary to maintain high quality.
This week, I was glad to take a break from that and spend some time improving the tool. I used VEX to import an image sequence and split it into AOVs (layers) for further smoke processing, and I also implemented blending directly in code for generating fire sprite sheets. This should simplify the workflow going forward.
During rendering, I encountered a few areas that still need improvement, and there are a couple of additional aspects I would like to refine further.
Regarding the current task, I was only able to focus on the texture so far. There are still aspects of the effect itself that I plan to refine further.