Hi everyone I chose to recreate this effect for an assessment for my VFX class, so I decided to post a more detailed breakdown that maybe will help someone.

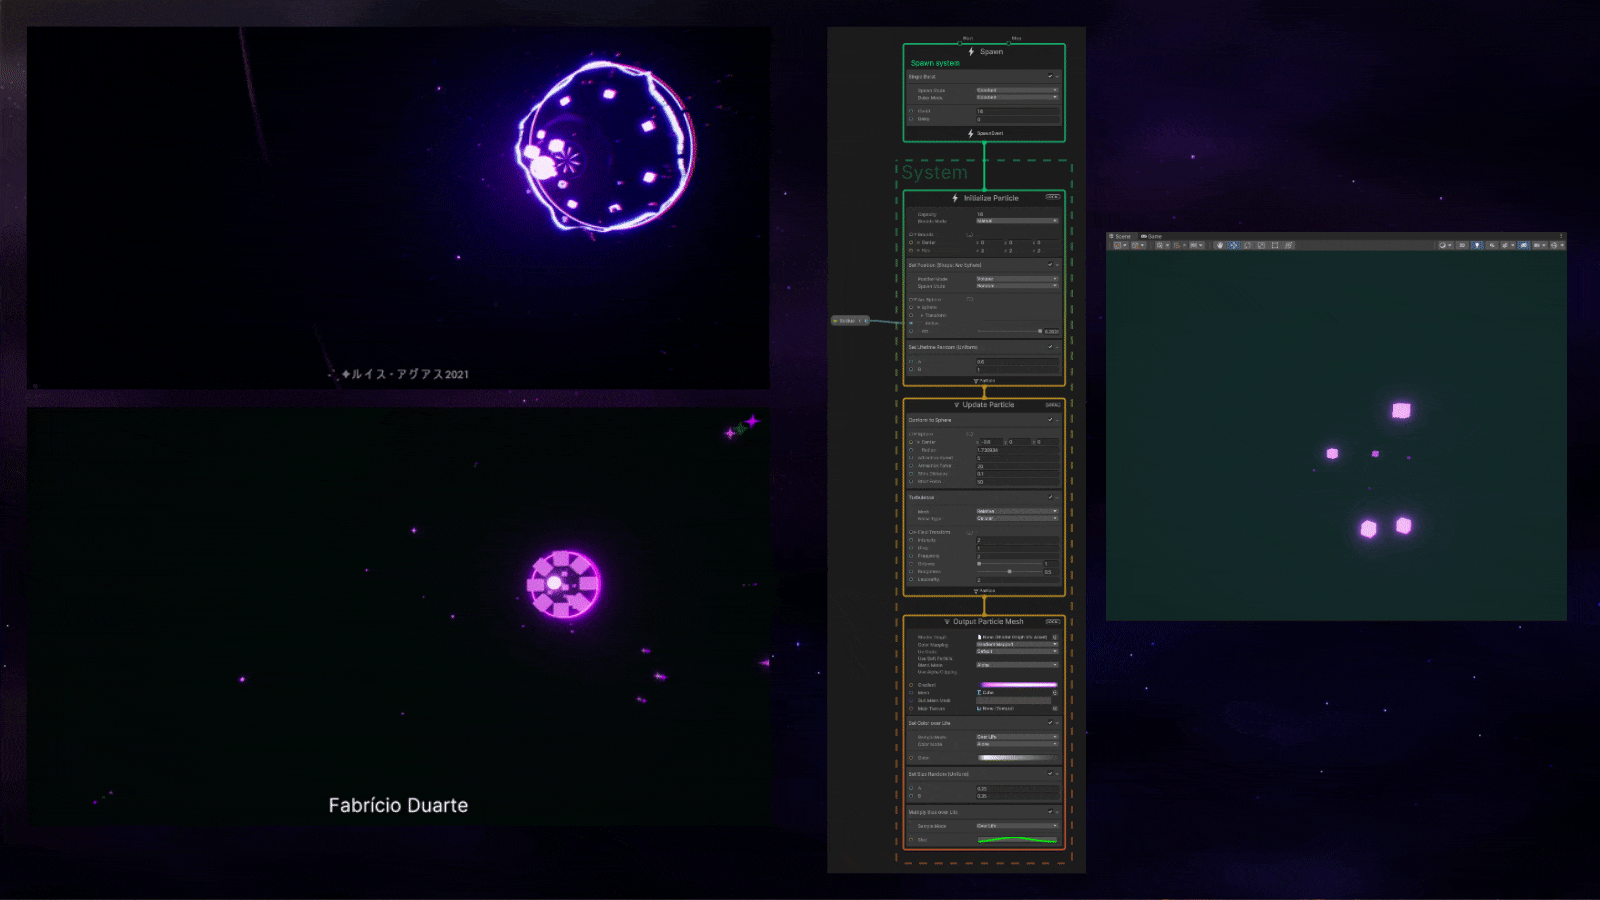
Initil Burst
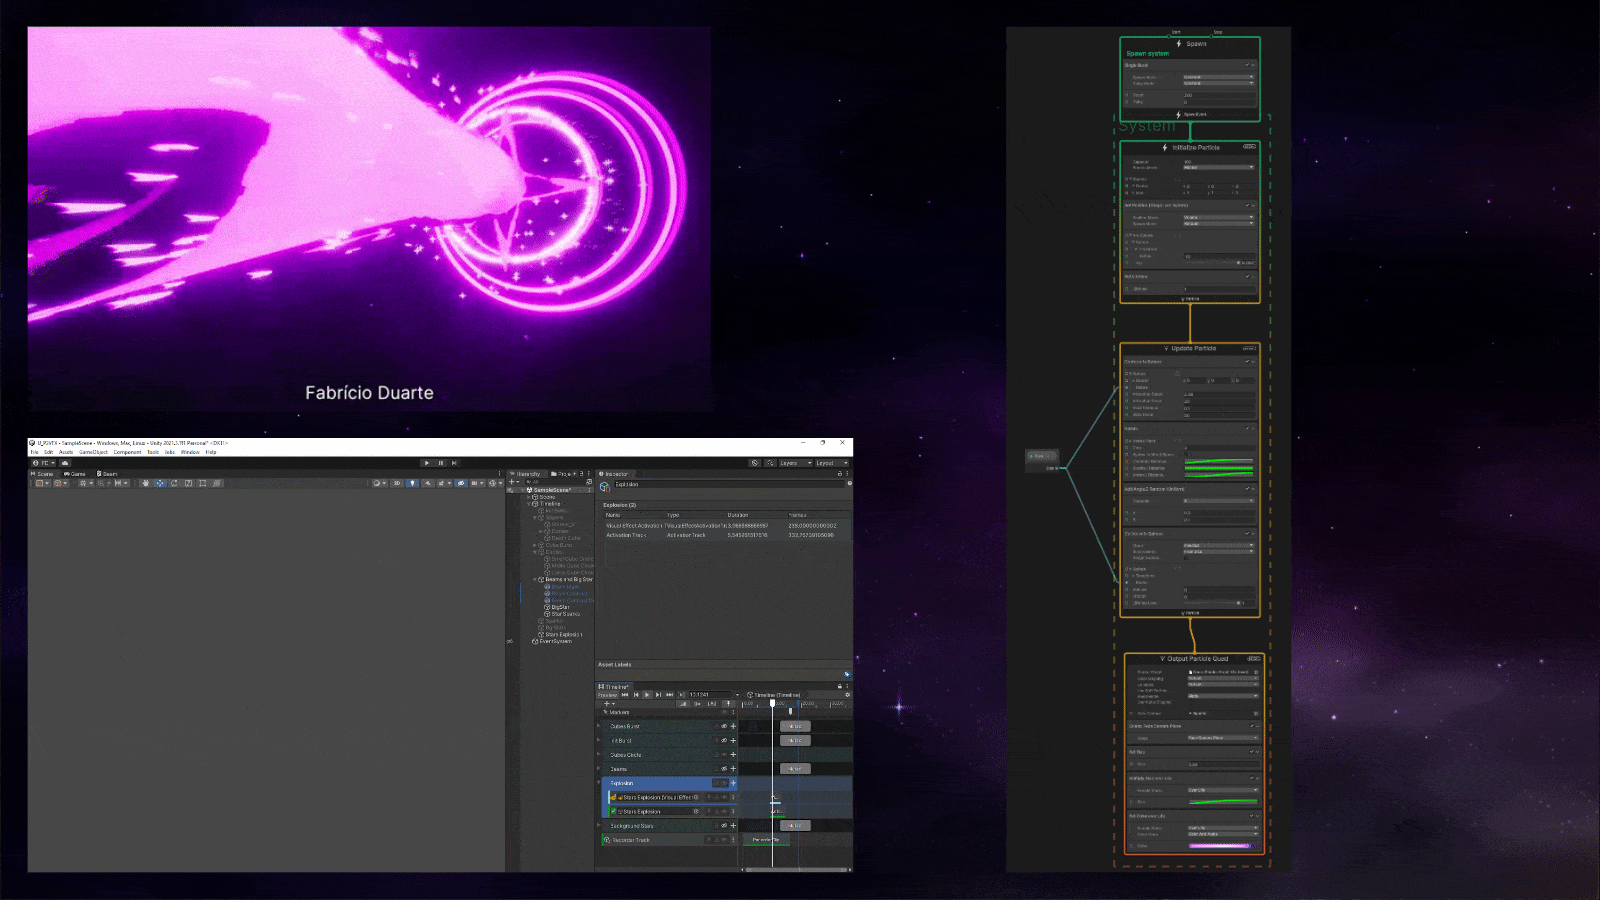
For the star texturing I used substance designer to make, it the image channels have some variations to test which looks better, and the initial particles burst I spawned some particles in a sphere and move it towards the center and for the texture, I use the default spark texture in visual effect graph
The graph for the initial burst
Charge
There are just some cubes with emission, spawned inside of a sphere with some backward force and random position, so I can re-use this for the 3 burst
Fire
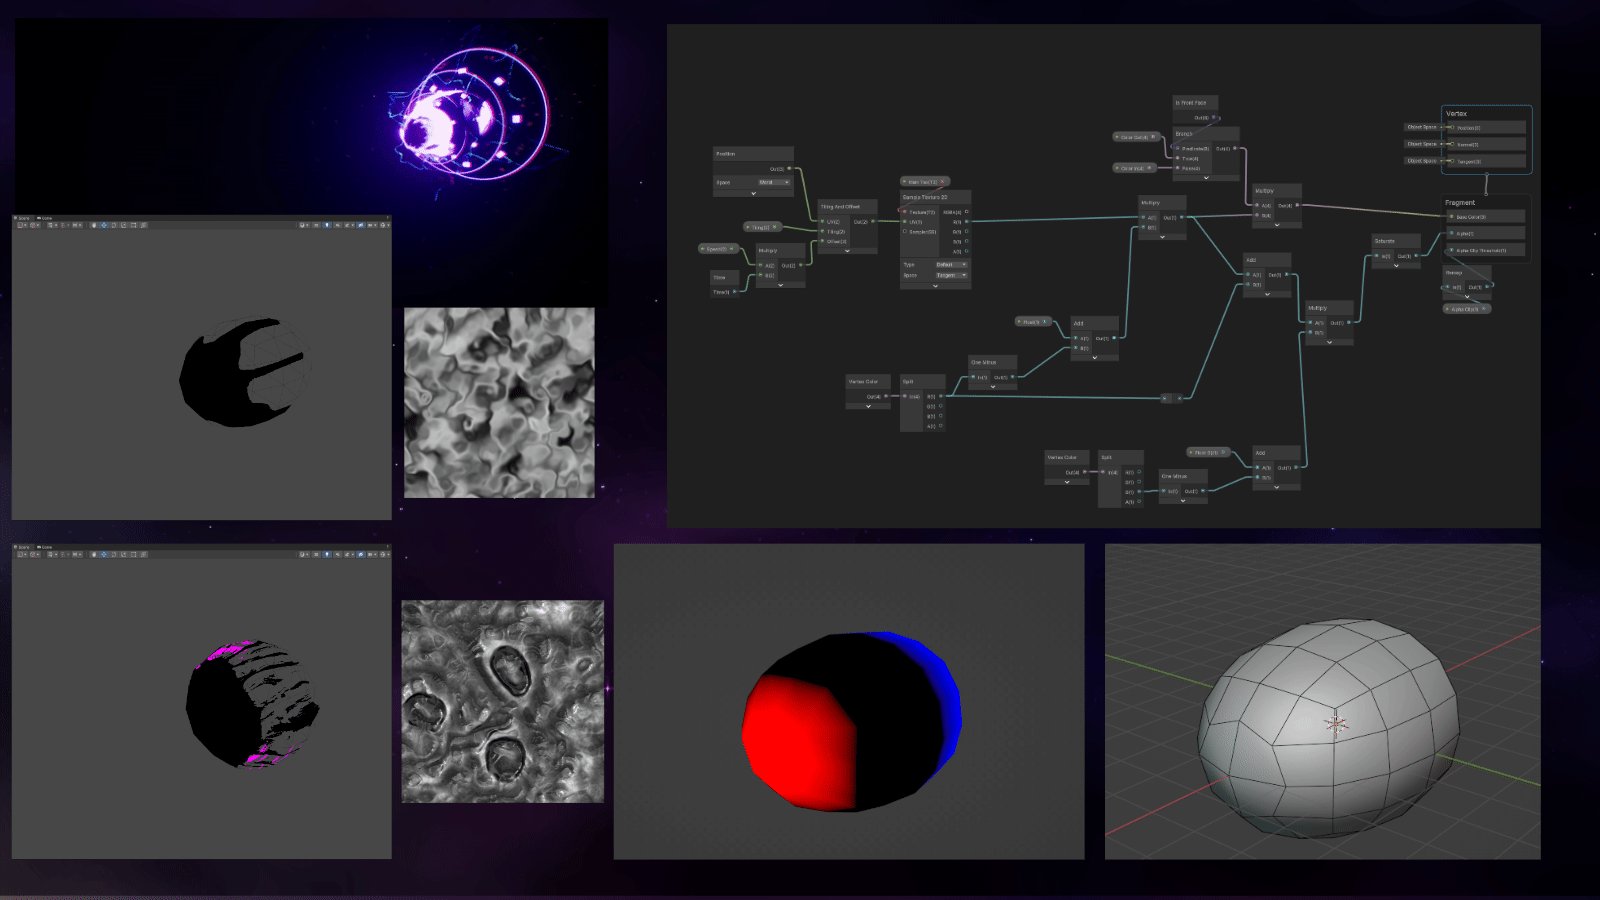
In the blender, I made a mesh and use vertex painting to create a mask to make the front always solid, in the shader graph is a shader with scrolling texturing with an alpha clip.
For the noises, I use this pack made by @pamar
Circles
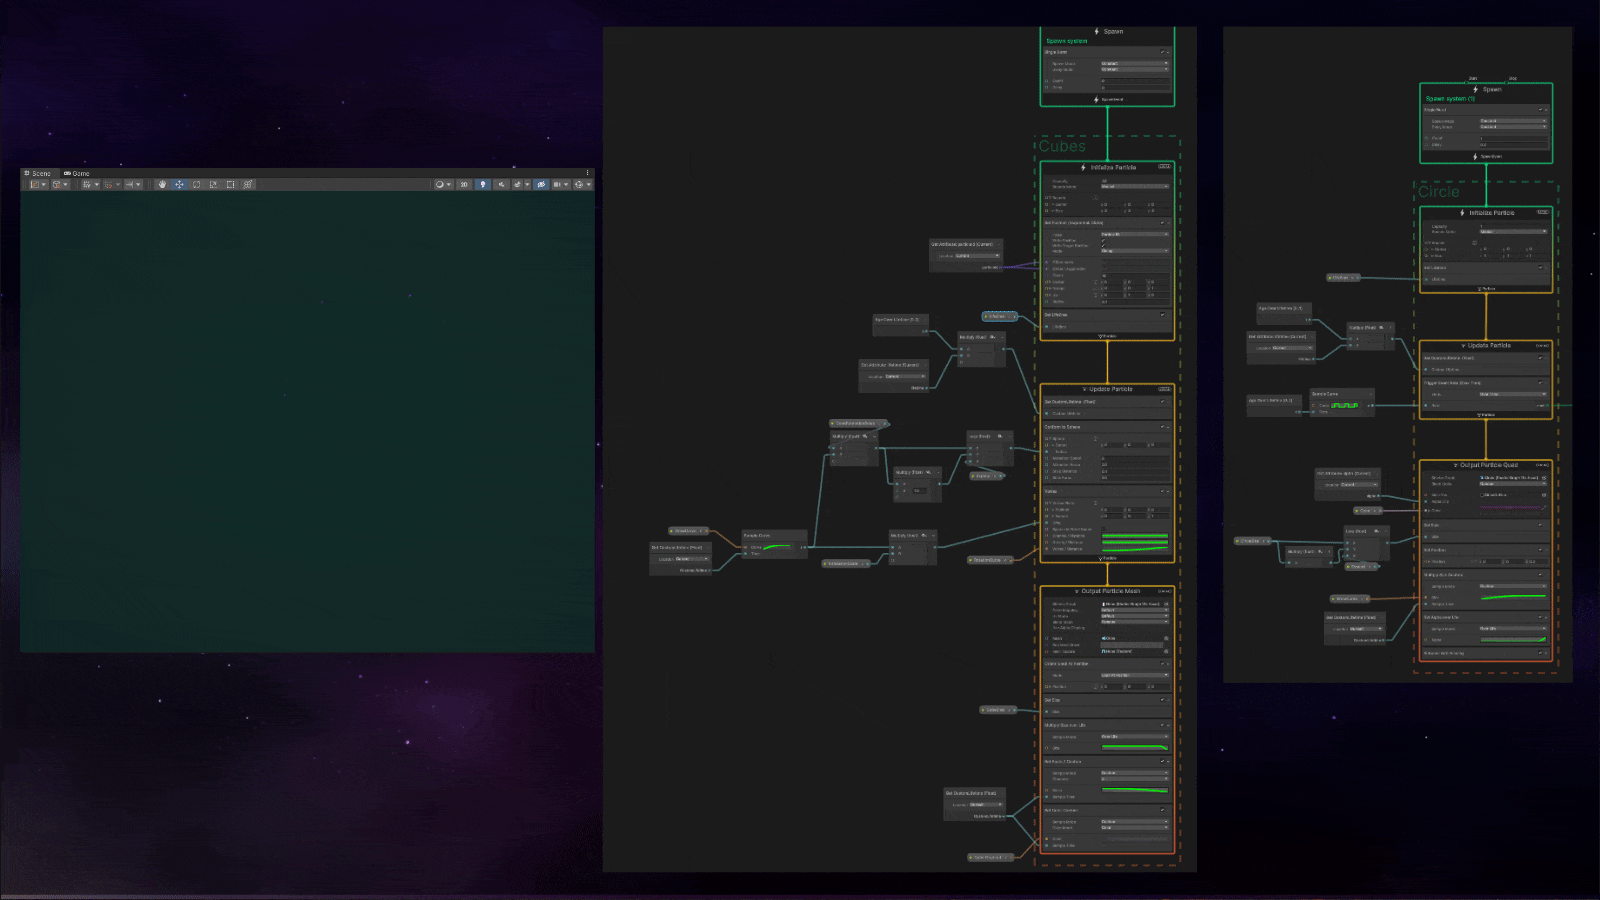
The cubes are spawned inside a circle and make a property for controlling the radius and animate it in the timeline to make it expand and I use the same property to control the circle size. For the sparks, I generated a point cache using the circle texturing in this way the sparks will always line with the circle
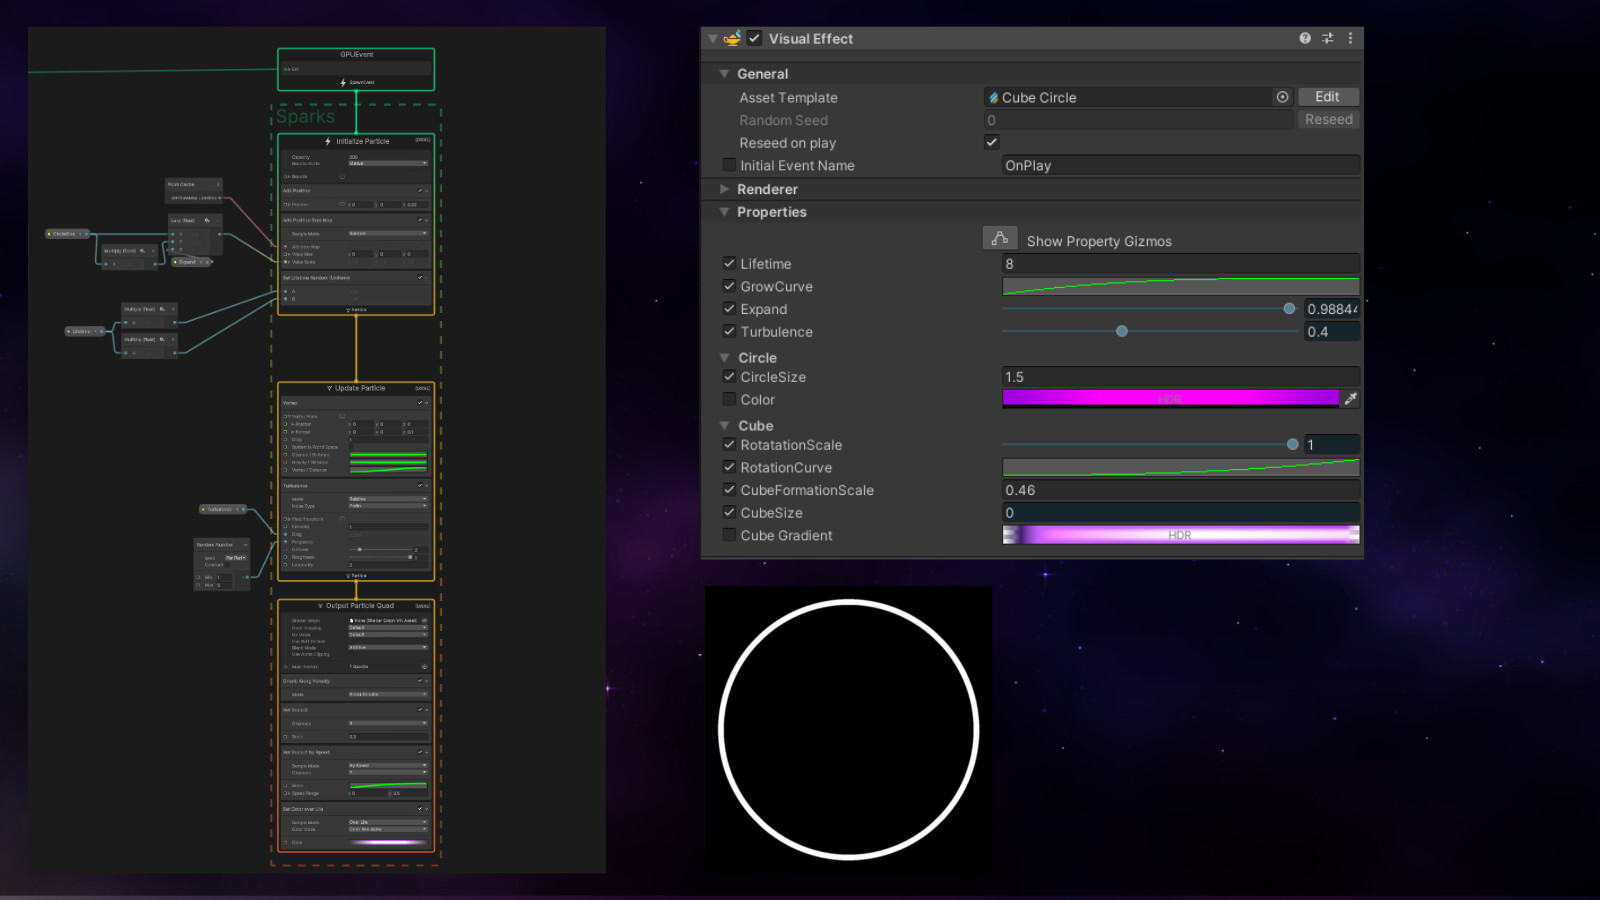
This is the property I expose to control the effect and the circle texturing
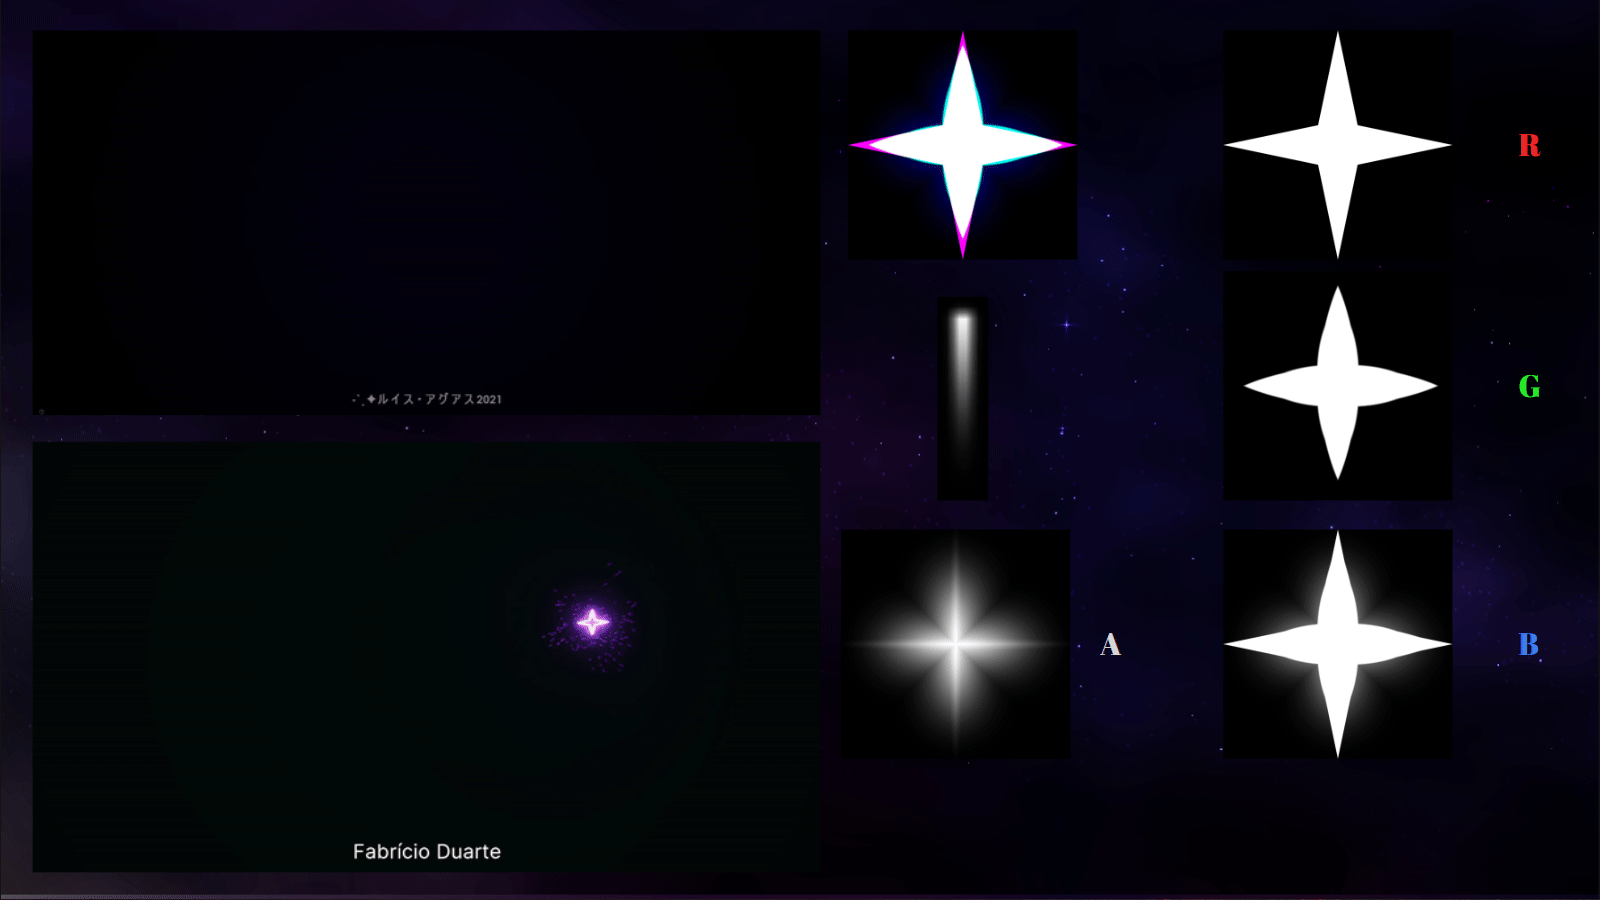
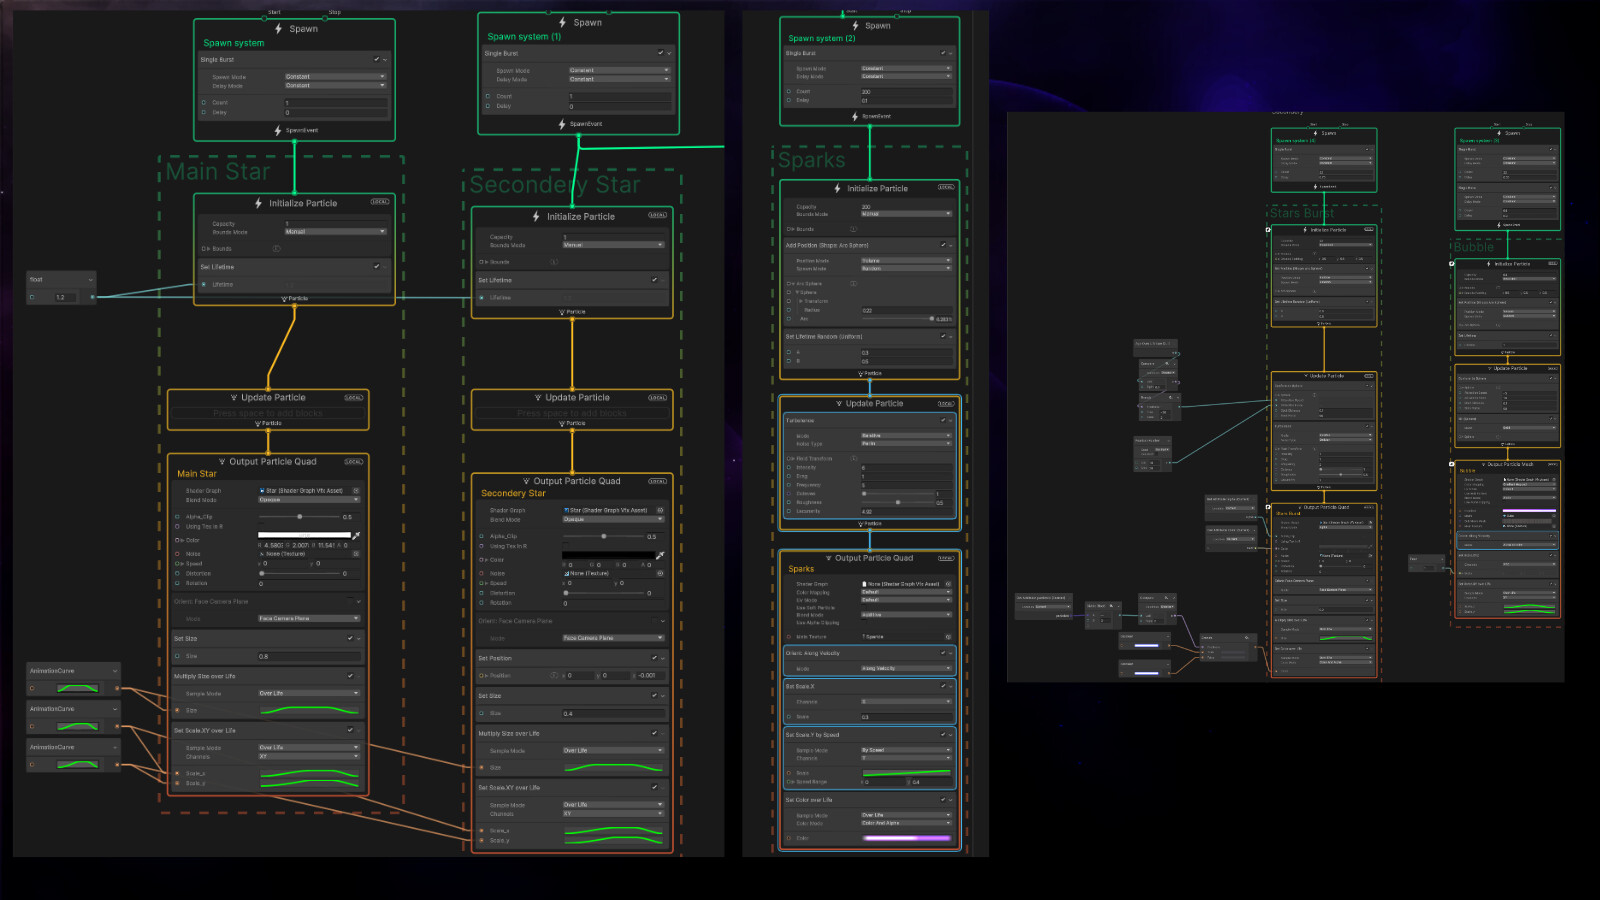
Central Star
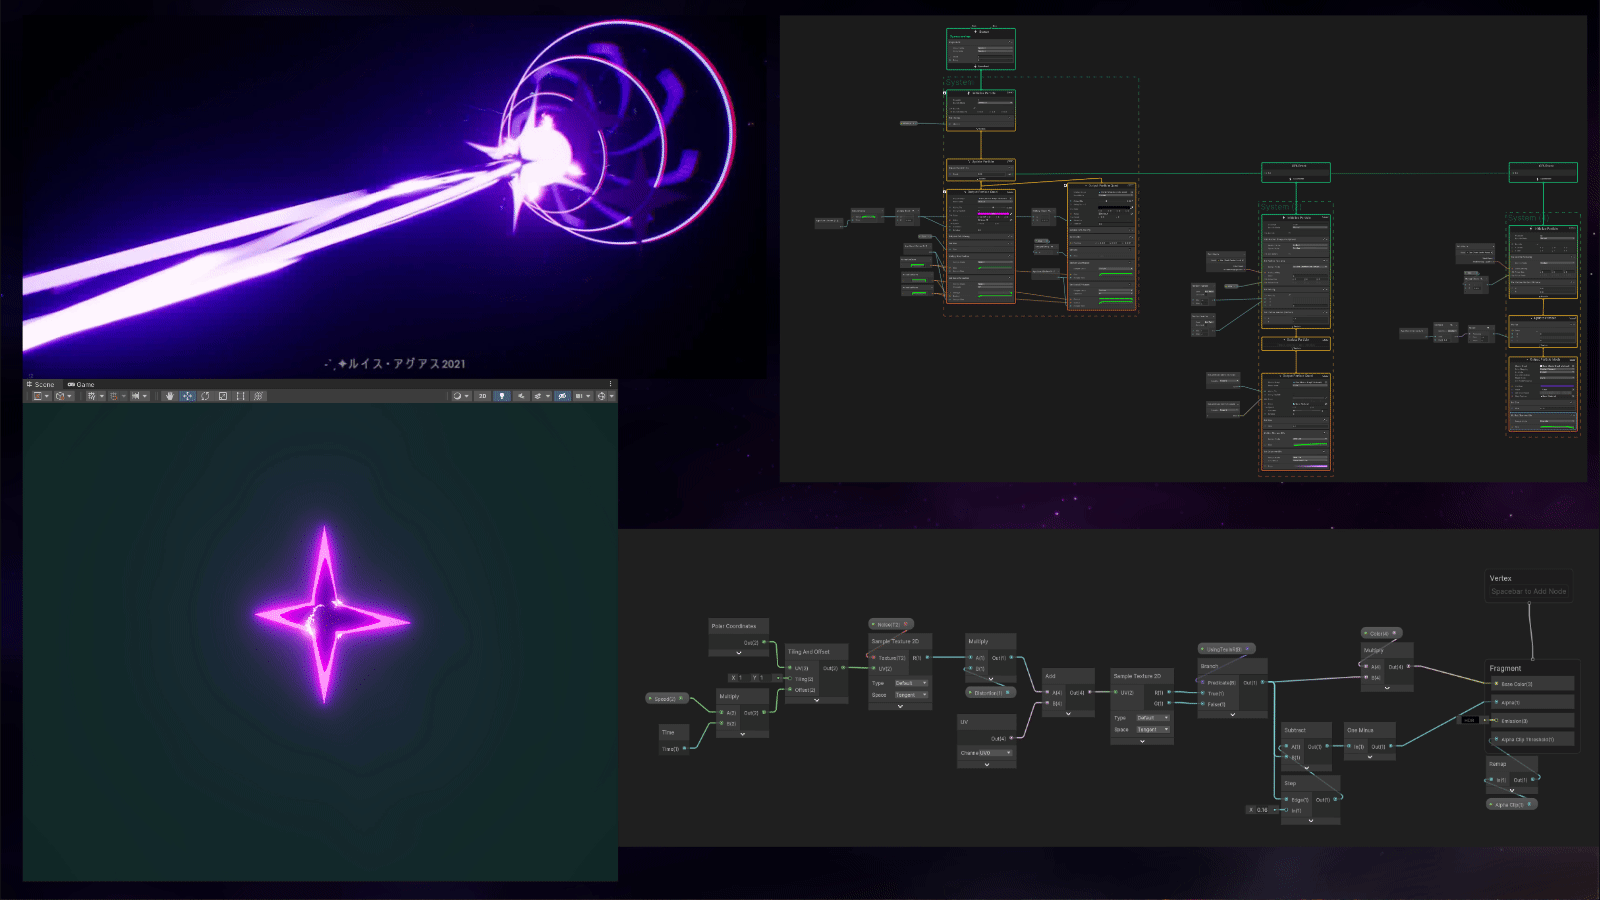
For the star, I started spawning 2 quads with the texture but one is smaller and black to make the inside star, and a distortion shader to show the effect is about to finish.
Big Star/Charge Star
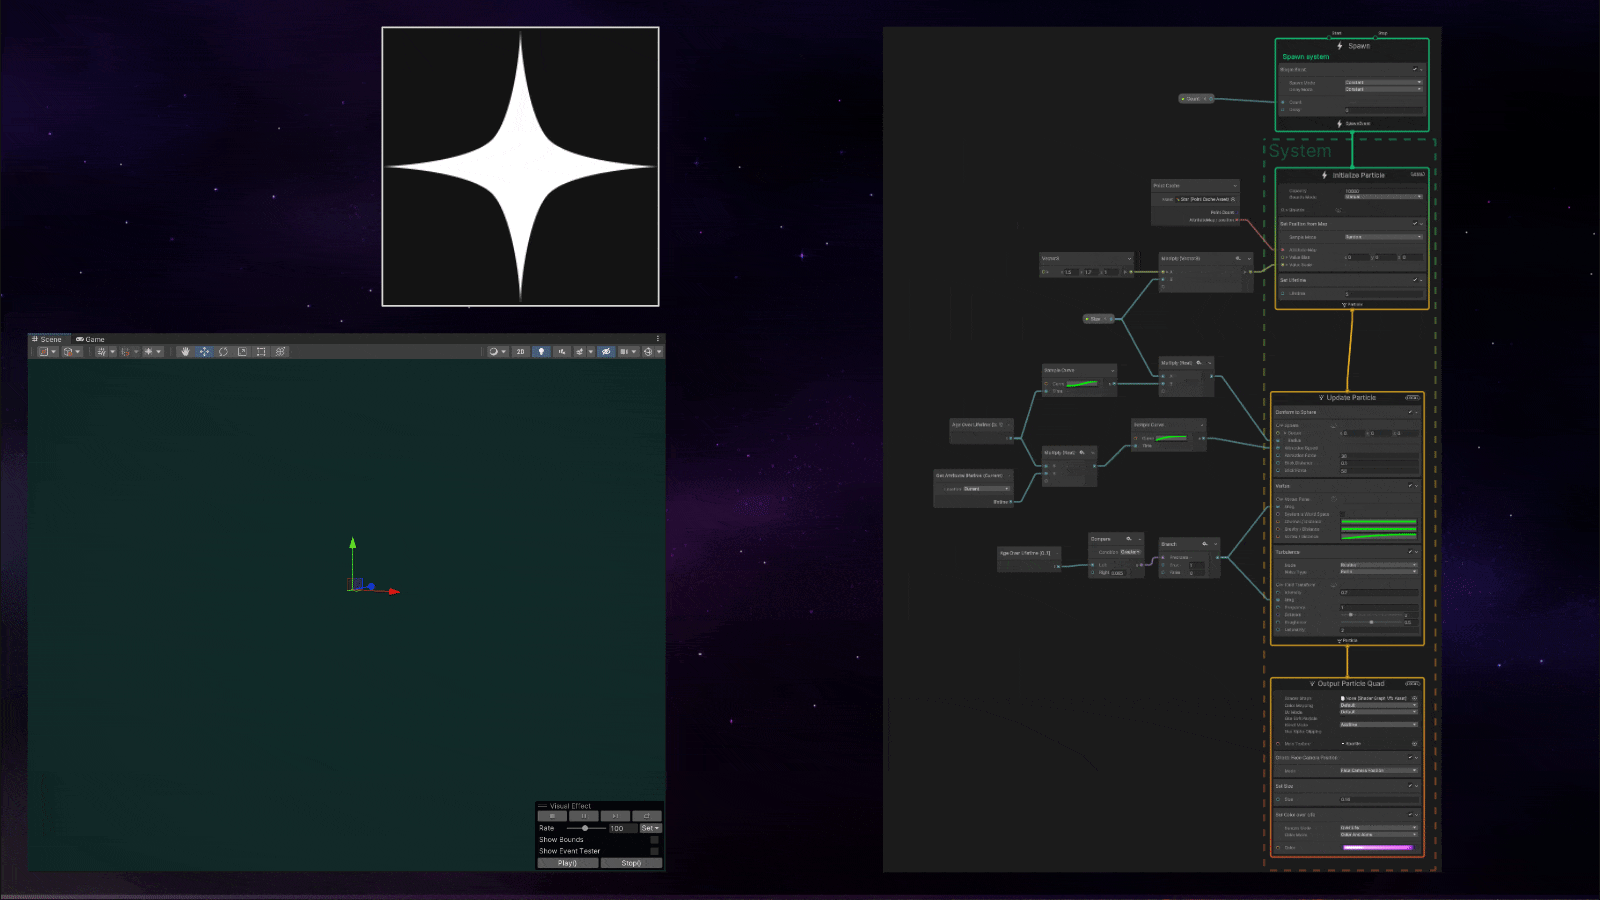
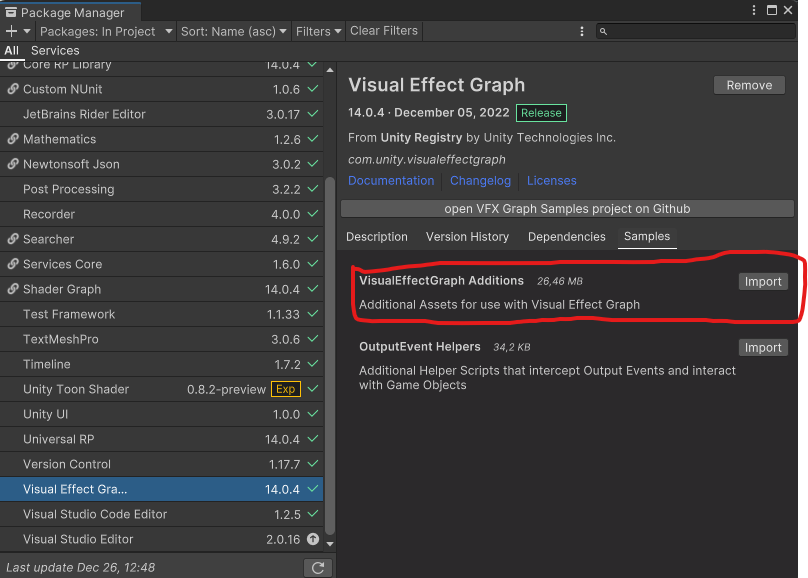
Using the same technic as the circle, I made a point cache with the star texturing and in the visual effect graph, the secret sauce is the vortex node to make it twirl towards the center. To have this node you need to import the visual effects additions.
Beam
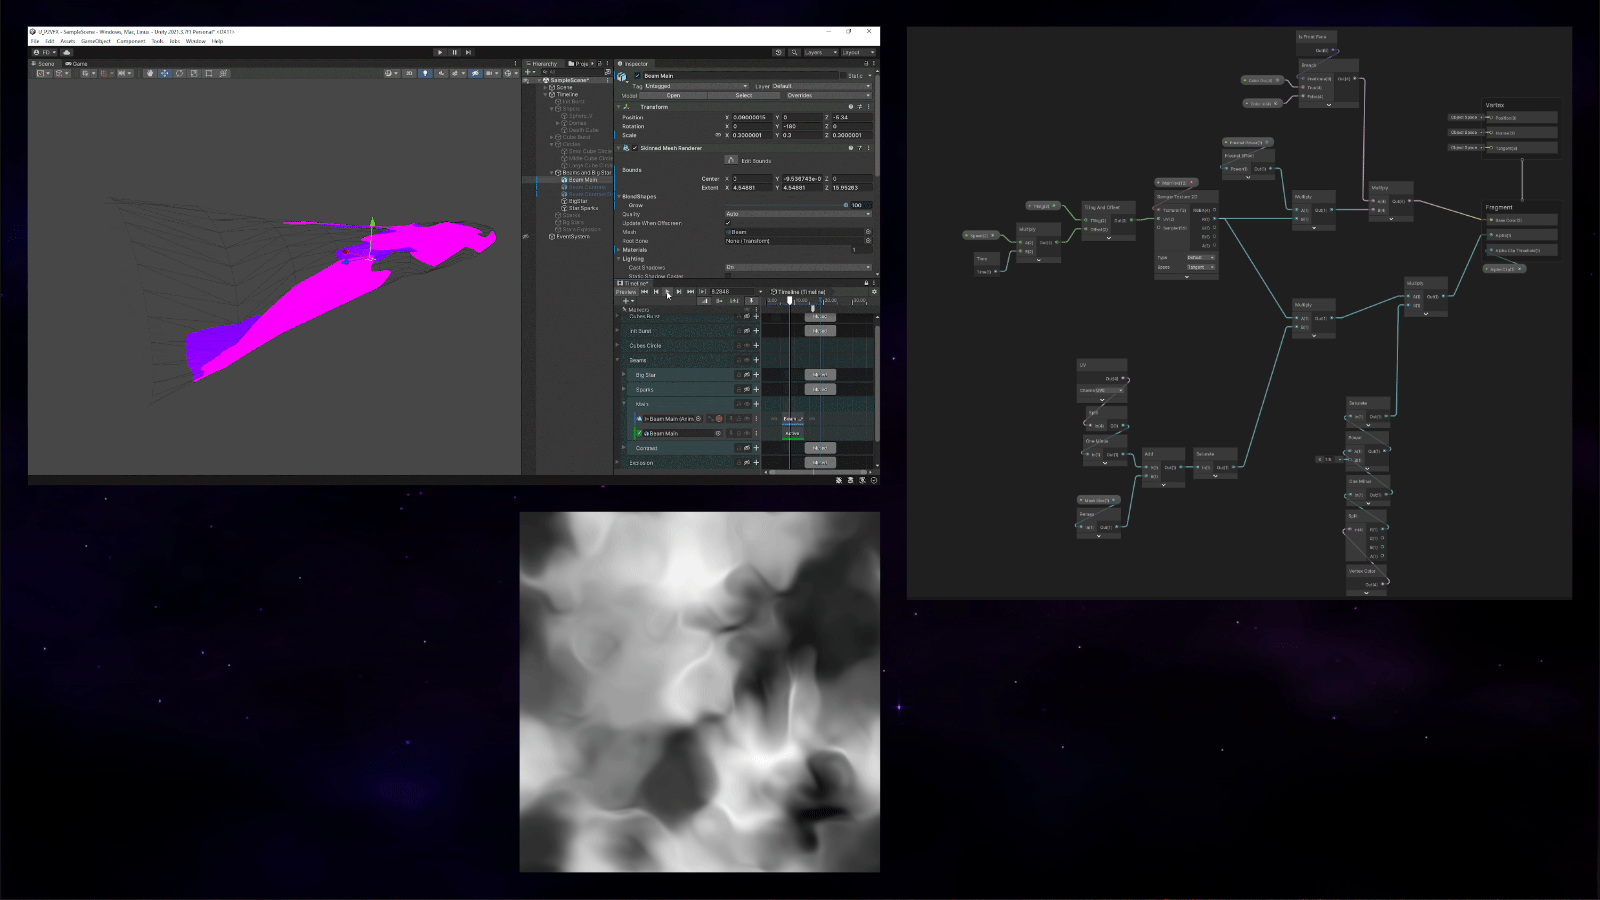
Back in Blender, I made a cylinder and a bland shape with the beam open state and in Unity, I use the timeline again to animate the blend shape.
I forgot to take a print of it, but I use vertex painting again to mask out the start and end of the mesh to make a fade in those parts. The shader is a scrolling texturing with an alpha clip.
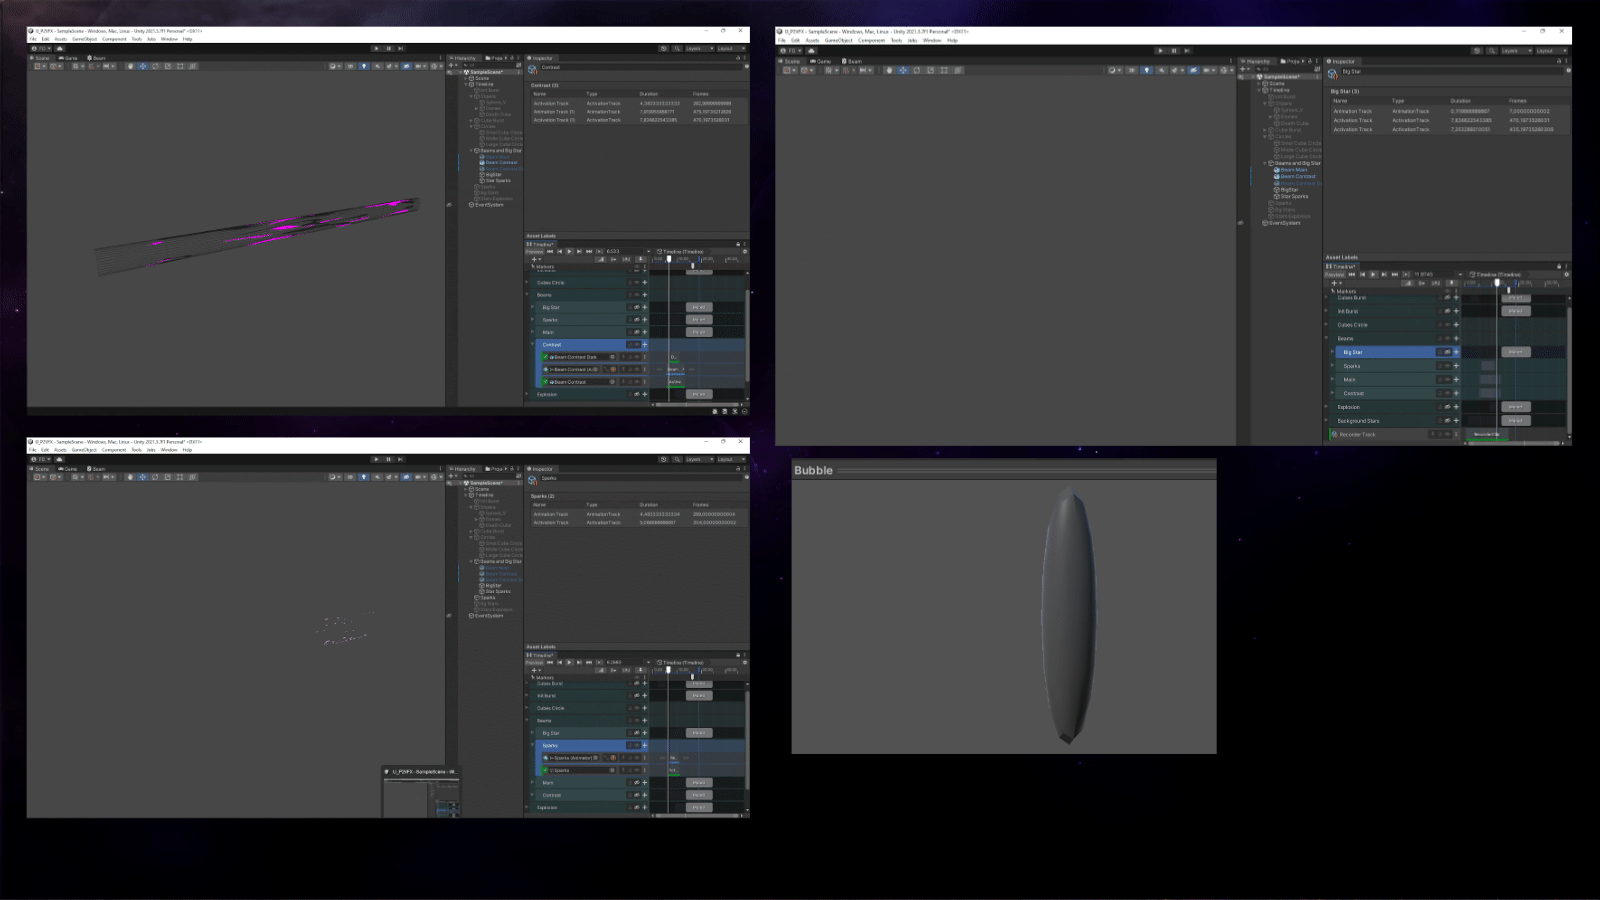
I duplicated the mesh and lower the alpha clip to make it more solid than putting it inside the other beam to make more contrast. And make mesh for the particles along the side beam then use the same material.
Stars Explosion
This is just the same star texturing in some quads, spawning in a sphere with a conform to sphere node with negative attraction to push the particles out.
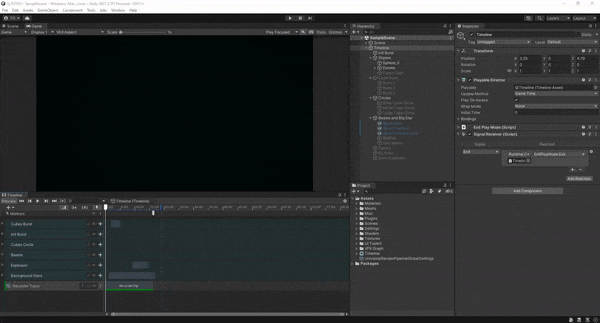
Timeline
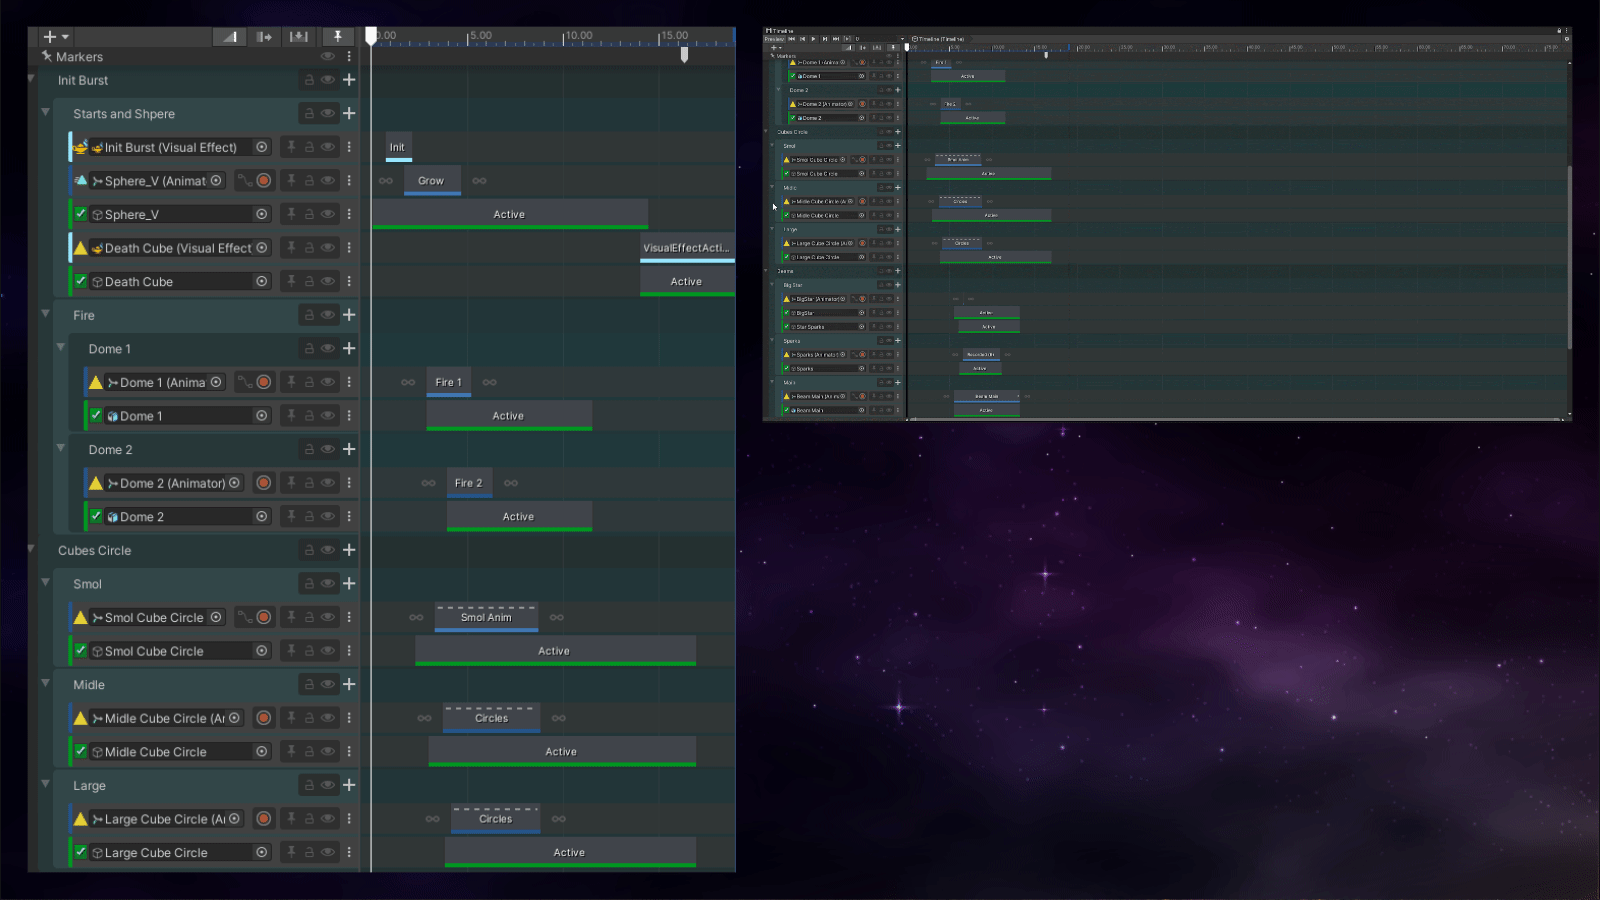
I use the timeline to sync every part of the effect and hand animate some parts, in this way is like editing a video is more comfortable to adjust the timing and re-use an animation clip for other parts of the effect
This is the full effect running in the timeline, showing each part turning on and off.
This is how I make this effect, if someone has a question about the parts I dint show feel free to ask about it.
Like always any feedback is welcome ![]()