This is so cool, im trying to reproduce your smoke, but im not sure how your mixed. If I understand correctly, first you convert the grayscale cloud into a normal (red-green channel). Then you pan it vertically, which is used to displace the UV of the static smoke alpha?
1 Like
Sort of but, there is 2 textures. (You can use the same one, depending on your shader, but you’ll need to sample it twice)
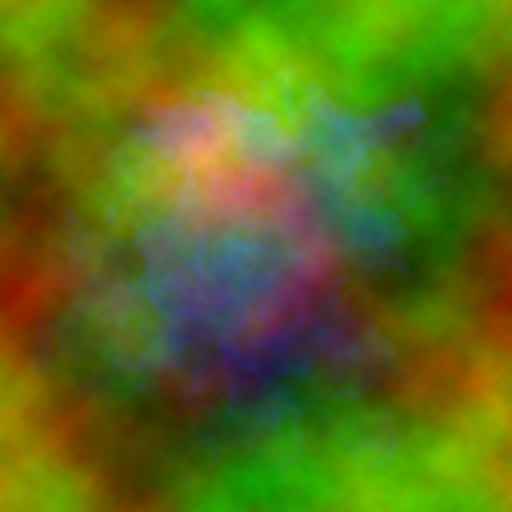
The first texture is the Alpha for the smoke (in alpha channel) and the Normal Map for lightning purposes.
It looks like this:
RG = Normal (really its just Filter > Render > clouds in photoshop, repeat for both channel) , B = Alpha of the smoke. (this one is 512x512 so you can see more whats going on), but you can half size that easily since your distorted uv will generate some pixel level details… )
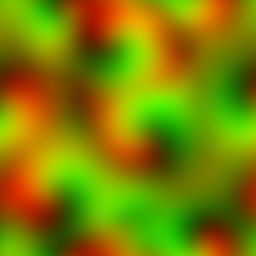
The 2nd texture is just a small noise texture (like a 64x64 with 3 channel RGB of Filter > Render > cloud like the first texture. I reuse that noise a lot in many setup for distorting UVs.
So what you do in the shader is you first sample the noise, with its uv scrolling in some way. Then you convert the RGB output of that texture into -1 to 1 space (take the RGB and multiply by 2, then substract 1). From there you add a multiplier to that to scale the distrotion and you just add that vector (dropping the Blue channel) to the UV to sample the first texture.
9 Likes
Oh I see, thats works good now; thanks Mederic!
I don’t think you can paste nodes if you select the main node…it doesn’t replace.
I just tried copy and pasting the network I put there. It came in as expected. I didn’t copy the main node because I know it won’t paste. That way you can hook it up to whatever you want. ![]() “Works as intended.”
“Works as intended.”
2 Likes
I’m getting an error even in an empty graph…so strange.
“Conflicting nodes substituted during paste!”
I’m getting a lot of mileage out of this one:
I just radial blurred a UV texture, added a circle mask around it and splattered it around in substance. It’s for cartoony effects but I’m pretty sure you could add more noise into it for more realistic stuff.
I was inspired by this right here → https://youtu.be/RdN06E6Xn9E?t=50m49s
3 Likes
ew gross…jpg. ![]()
Did you set it to lossless?
It looks easy enough to make.
How does this differ from regular UV distortion/flowmaps?
1 Like
The only difference is that I’m not using them to blend between flipbook frames but rather scrolling them on top of other textures to break them up a bit. In my shader I can scroll, rotate, scale, animate the distortion amount in the different axes so this lil texture does a lot for me.
@William_Mauritzen of course ![]() I’m authoring them in 16 bit, saving them uncompressed and in a smaller resolution. Compression really messes things up but even if they’re small like 128x128 it works great!
I’m authoring them in 16 bit, saving them uncompressed and in a smaller resolution. Compression really messes things up but even if they’re small like 128x128 it works great!
Yeah, that’s what I meant ![]() It sounds like you are using it as a regular old distortion map, whereas Motion vectors are the same thing, except custommade to blend between frames.
It sounds like you are using it as a regular old distortion map, whereas Motion vectors are the same thing, except custommade to blend between frames.
Not arguing, just making sure I didn’t miss something ![]()
2 Likes
One thing people sometimes forget is that they can hand animate morphing using photoshop’s liquify. You can author your distortions on an image, then save the liquify mesh. Then, load your UV coordinate texture and apply that mesh distortion. It’s an instant ghetto-morph.
Instead of starting a new topic about the same thing I’ll lump it in here. I’ve created a Houdini asset that will generate motion vectors that don’t require much in the way of tweaking in the game engine. What I need now is to stress test it. If anyone is currently playing with motion vectors and uses Houdini hit me up and I’ll send you a link to the asset and a video.
Mike
3 Likes
Ooh yes please, I’ve been interested in the generation of motion vectors in Houdini for a while. I’ve tested it in the past but hadn’t had any luck generating anything that looks promising.
O
That would be cool, Actually, looking into motion vector right now. Would be cool if you could share your link and the video to me. Cheers.
1 Like
There are two major solutions I am aware of for motion vectors from video. One is built into the Slate particle sheet editor. The other is a plugin for aftereffects called Twixtor.
We’ve released a motion vector ROP for Houdini. You can find more details here:
6 Likes
Hello!
It’s been a while since I’ve started this thread. Thanks to you all I’ve discovered things I didn’t know about before. In the end, I’ve settled for generating the motion vector maps via ALU instead of texture baking them. Thanks to the mighty power of Gather(). I’m so glad I came across Gather() it’s mind blowing!
Gather() returns a float4 that returns in xyzw the 4 pixels used for filtering (that isn’t point), you can also specify the offsets. So GatherRed() returns the 4 pixels on red channel, GatherGreen the ones on green channel etc… In my case I specify the
Basically this:
			float gradientX =  (SampleLevelZero(normTex, cFrameUV + offset.x).x*2.0-1.0) +
							   (SampleLevelZero(normTex, cFrameUV - offset.x).x*2.0-1.0) +
							   (SampleLevelZero(normTex, pFrameUV + offset.x).x*2.0-1.0) +
							   (SampleLevelZero(normTex, pFrameUV - offset.x).x*2.0-1.0);

			float gradientY =  (SampleLevelZero(normTex, cFrameUV + offset.y).y*2.0-1.0) +
							   (SampleLevelZero(normTex, cFrameUV - offset.y).y*2.0-1.0) +
							   (SampleLevelZero(normTex, pFrameUV + offset.y).y*2.0-1.0) +
							   (SampleLevelZero(normTex, pFrameUV - offset.y).y*2.0-1.0);
Can be done in 2 samples doing this:
			float4 xSamples = GatherRed(normTex, cFrameUV, int2(g_sampleDistance, 0), int2(-g_sampleDistance, 0), int2(offsetX+g_sampleDistance, 0), int2(offsetX-g_sampleDistance,0));
			float4 ySamples = GatherGreen(normTex, cFrameUV, int2(0, g_sampleDistance), int2(0, -g_sampleDistance), int2(0, offsetY+g_sampleDistance), int2(0, offsetY-g_sampleDistance));
And on top of that, it’s texture size agnostic. so you don’t need to adjust a scaler value for the motion strength. All you need is to do a bit of prep work.
The whole Motion Vector is now as follow: Basically mStrength flips the process on, otherwise it’s just cross blending.
	float4 finalUV = float4(0.0,0.0,0.0,0.0);
		float2 pFrameUV_flow = float2(0.0, 0.0);
		float2 cFrameUV_flow = float2(0.0, 0.0);
		if (mStrength > 0.0)
		{
			// Setups UVs and Blend
			float2 pFrameUV = UVtemp1;  					// UVFrame1
			float2 cFrameUV = UVtemp2;  					// UVFrame2
			float frameDiff = uvAnimBlend;					// UVBlend Timer

			//This is made for RGB packed flipbooks.
			float2 texSize = float2(0.0, 0.0);
			uint xxx = 0;
			uint yyy = 0;
			normTex.tex.GetDimensions(xxx,yyy); //Tells you the number of X and Y pixels your texture is.
			texSize.x = (float)xxx;
			texSize.y = (float)yyy;

			// calculate gradient of time.
			int offsetX = int(pFrameUV.x*texSize.x); 		// Need for later
			int offsetY = int(pFrameUV.y*texSize.y); 		// Need for later

			//Scale for varying texture sizes.
			float2 texScale = float2(numberOfXframes/texSize.x, numberOfYframes/texSize.y);
			float g_sampleDistance = 2;       				// Width of sample.

			float4 xSamples = GatherRed(normTex, cFrameUV, int2(g_sampleDistance, 0), int2(-g_sampleDistance, 0), int2(offsetX+g_sampleDistance, 0), int2(offsetX-g_sampleDistance,0));
			float4 ySamples = GatherGreen(normTex, cFrameUV, int2(0, g_sampleDistance), int2(0, -g_sampleDistance), int2(0, offsetY+g_sampleDistance), int2(0, offsetY-g_sampleDistance));
			xSamples = (1.0- xSamples) * 2.0 + ( -(float4)1.0);
			ySamples =  ySamples * 2.0 + ( -(float4)1.0);

			// Create Gradient of motion
			float gradientX = 0.5*(xSamples.x+xSamples.y+xSamples.z+xSamples.w);
			float gradientY = 0.5*(ySamples.x+ySamples.y+ySamples.z+ySamples.w);

			// Magnitude accounting texture size
			float gradientMag = length(float2(gradientX*texScale.x, gradientY*texScale.y));

			//convert gradient into motion vector
			float2 velocity_p;
			float2 velocity_c;
			velocity_p.x = (frameDiff) * (gradientX*gradientMag);
			velocity_p.y = (frameDiff) * (gradientY*gradientMag);
			velocity_c.x = (1-frameDiff) * (gradientX*gradientMag);
			velocity_c.y = (1-frameDiff) * (gradientY*gradientMag);

			pFrameUV_flow = velocity_p;
			cFrameUV_flow = velocity_c;

		}
	float4 tex1 = Sample(normTex, UVtemp1+(pFrameUV_flow));
	float4 tex2 = Sample(normTex, UVtemp2-(cFrameUV_flow));
    finalTexture = lerp(tex1, tex2, uvAnimBlend);
You may have to invert X and Y channels on line xSamples and ySamples depending on your engine’s preference…
Result (Crappy texture… but you get the idea hopefully…)
https://drive.google.com/file/d/0B1VFiE1HRdtNTnMxQmtzR0xNM2M/view
3 Likes
Thanks for posting about Gather(), it’s definitely a missing piece of the puzzle. I love that you can specify individual gather sample offsets, although looking at the disassembly in Renderdoc it looks like you do pay a similar cost as if you were offsetting manually (in your example, the two Gather() calls are 8 instructions).
9: gather4(2,0,0)(texture2d)(float,float,float,float) r2.x, v2.zwzz, texture0.xyzw, sampler0.x
10: gather4(-2,0,0)(texture2d)(float,float,float,float) r2.y, v2.zwzz, texture0.xyzw, sampler0.x
13: gather4_po(texture2d)(float,float,float,float) r2.z, v2.zwzz, r3.xyxx, texture0.xyzw, sampler0.x
14: gather4_po(texture2d)(float,float,float,float) r2.w, v2.zwzz, r3.zwzz, texture0.xyzw, sampler0.x
15: gather4(0,2,0)(texture2d)(float,float,float,float) r3.x, v2.zwzz, texture0.xyzw, sampler0.y
16: gather4(0,-2,0)(texture2d)(float,float,float,float) r3.y, v2.zwzz, texture0.xyzw, sampler0.y
18: gather4_po(texture2d)(float,float,float,float) r3.z, v2.zwzz, r1.xyxx, texture0.xyzw, sampler0.y
19: gather4_po(texture2d)(float,float,float,float) r3.w, v2.zwzz, r1.zwzz, texture0.xyzw, sampler0.y
However, if you don’t specify manual offsets, Gather() is only a single instruction.
1: gather4(texture2d)(float,float,float,float) r0.xyz, r0.xyxx, texture0.xyzw, sampler0.x
Next steps would be to look into a rework of your method that can take advantage of that fact. Definitely something to ponder. On some textures it looks like you can get away with a single 4 tap sample also which is interesting.
I have been working on an alternate method which is more limited use as it make some assumptions about the velocity vectors and magnitude, it’s mostly meant for simple explosions as it is better at silhouette preservation. It’s cheap though, currently about 15 or 16 instructions. Here’s a WIP.
4 Likes
Hi Wyeth! I’d be very interested in your alternate method… As one of the problem I am facing is the silhouette preservation between frames on explosions…