If you want to change the width of the soulcoaster via parameter, you can do it like so (I multiply with Time->Frac to visualize the behavior in the GIF, this can be removed and the LERP directly multiplied with the tangentBasis):
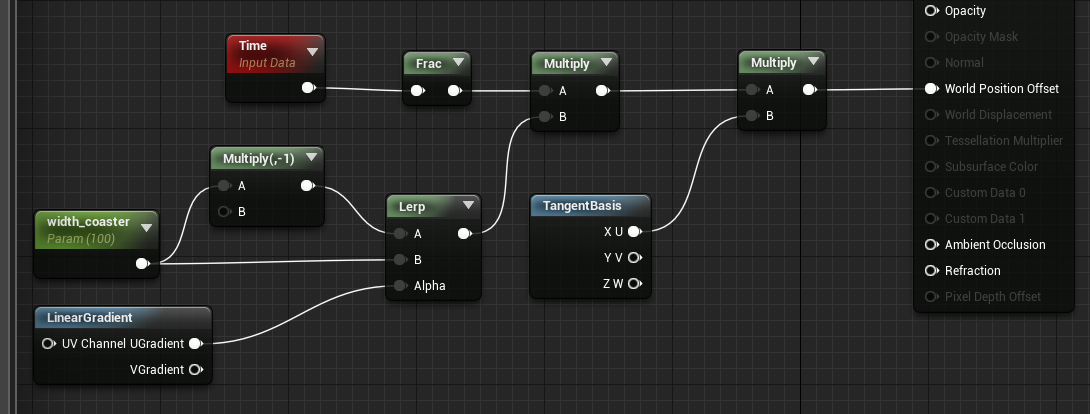

If you want to change the width of the soulcoaster via parameter, you can do it like so (I multiply with Time->Frac to visualize the behavior in the GIF, this can be removed and the LERP directly multiplied with the tangentBasis):
Hey guys i need some help on this, when i extrude my planes edge and add the divisions like the video, the UV’s are all on top of one another rather than the image in this tutorial at the very start.
you need to layout your uv’s and then shrink them back down to fit in that 0-1 space. here’s a trick that i used in maya to do that.

Thats great thank you so much that helped a tonne! I’ve got it working in engine now, going to try a few different shapes! ![]()
just a quick one, i noticed you used a plane, when i use a plane and i create the effect, at certain angles you simply cannot see the material swirling around, is there a way around this or would it literally be making a cylinder instead of a plane?
Are you not seeing the plane because you look at it from the backside ? You may need to enable double face in the software you use.
Whenever I do these, I usually use a curved mesh (about 1/3 the roundness of a cylinder), and I make the material double sided. That way you can see it from different angles and you are cutting the polycount and overddraw of a full cylinder.
thats a good idea, i have double sided turned on with the material but its hard to see from certain sides, so i will try this!
Woah I just saw this. This seems very cool/useful and I’ll definetly give it a shot. I had been using vertex colors to fade out the edges. Which way do you think is better? Vertex colors or this? I assume the way you mentioned because you get more control over it?
I’m sorry dude…but i can never forgive this portmanteau…you are dead to me.
![]()
For anyone still passing through that may be getting stuck, here’s a quick list of what to do that will hopefully further clarify what to do.
I was stuck on this for a bit being fairly new so i hope this will be able clear things up for someone that might need it ![]()
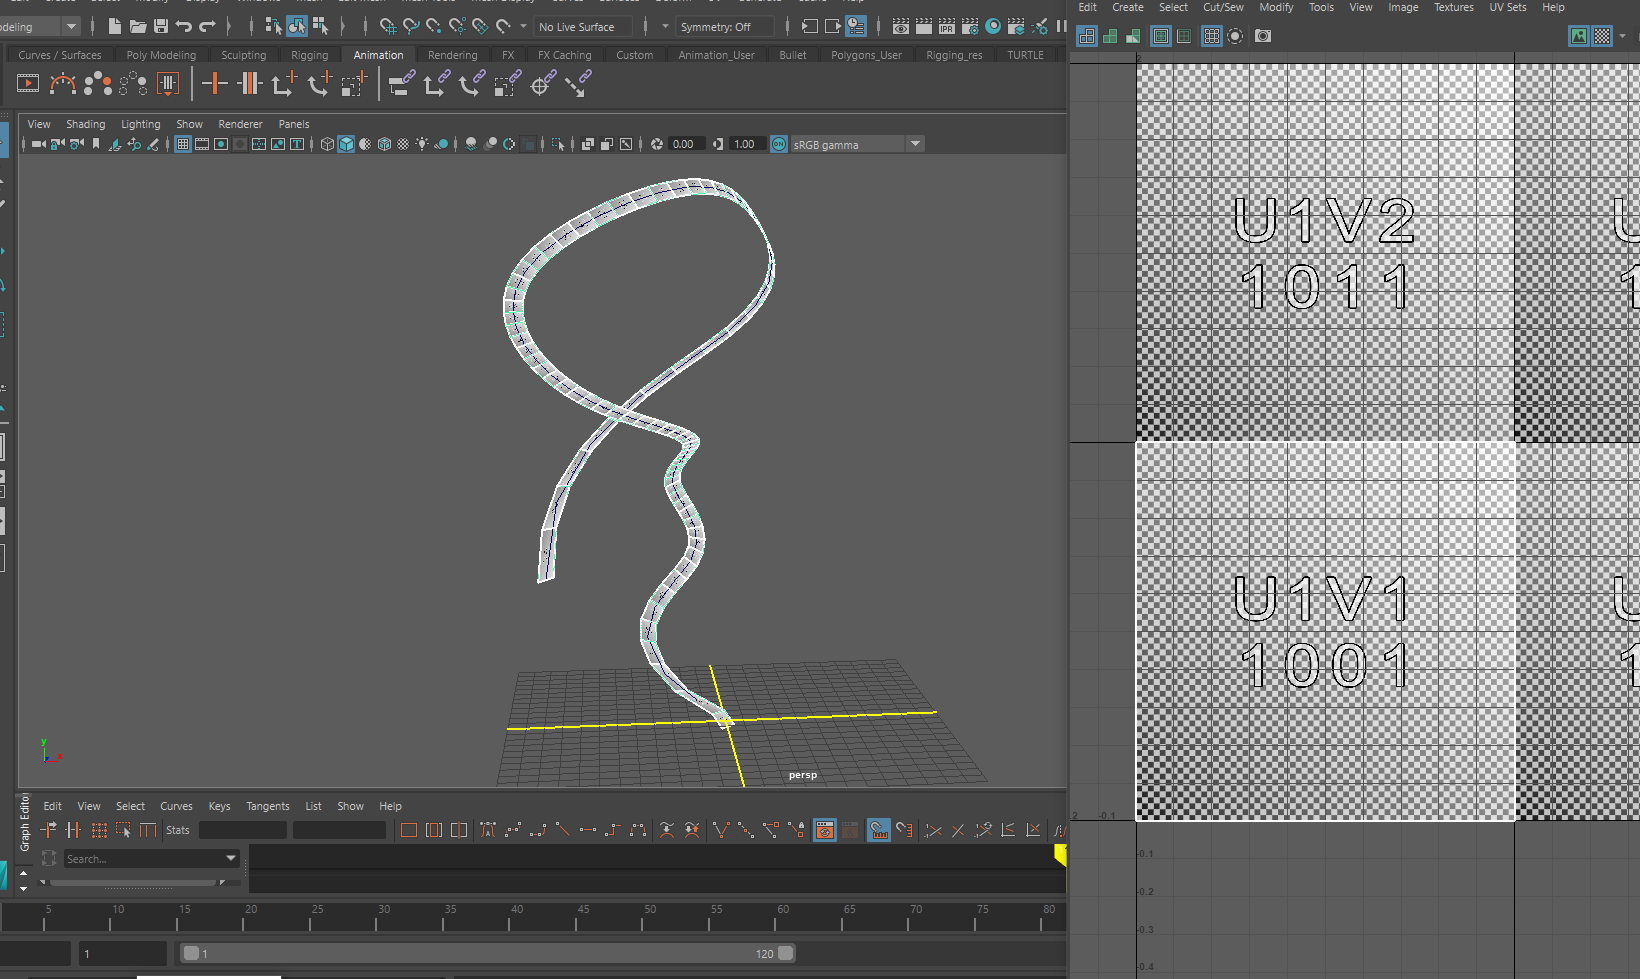
I wrote a tool for Maya to aide in creating these types of trails off of animated objects. You can use a regular transform or multi select vertices, etc. Pretty fun script. Allows for pretty extensive tweaking of the curves based on their thickness over length as well as rotation around the curve spine. Also handles the UV layout of the trails. Bonus as well, you can optionally tell it to create perpendicular trails.

Seth
Ohh, that looks really nice. Any chance that you can share it on gumroad or something?
awesome bro… share it
Enjoy.
To execute:
Place this in your scripts folder and source it then run one of the below commmands. I recommend making two shelf buttons, one with each command. One for execution, one to load attribute editor.
shPlotCurves 0;
shPlotCurves 1;
0 = Run the script with something selected to generate your trails.
1 = Run the script with a generated trail selected to edit the curve warp properties.
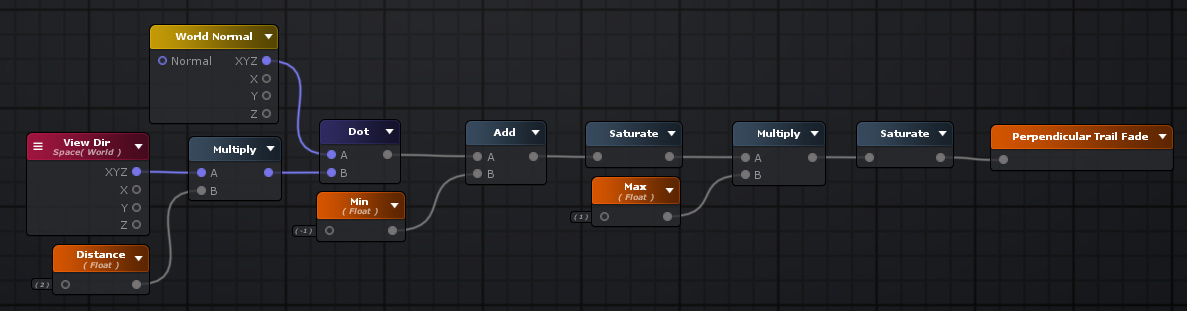
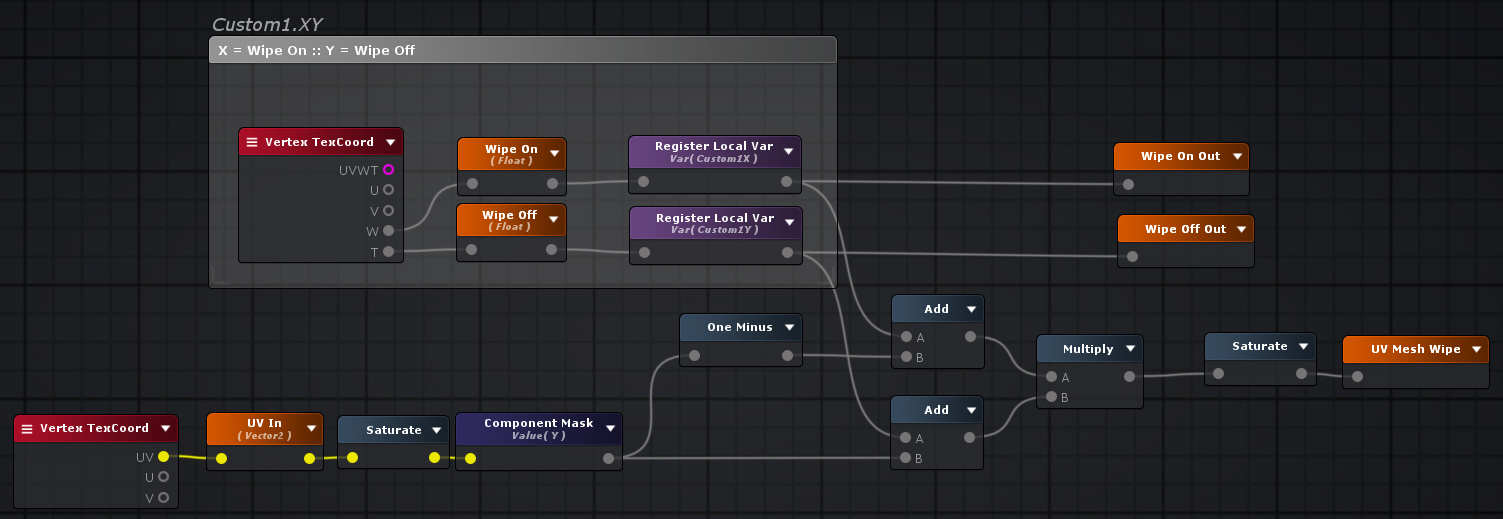
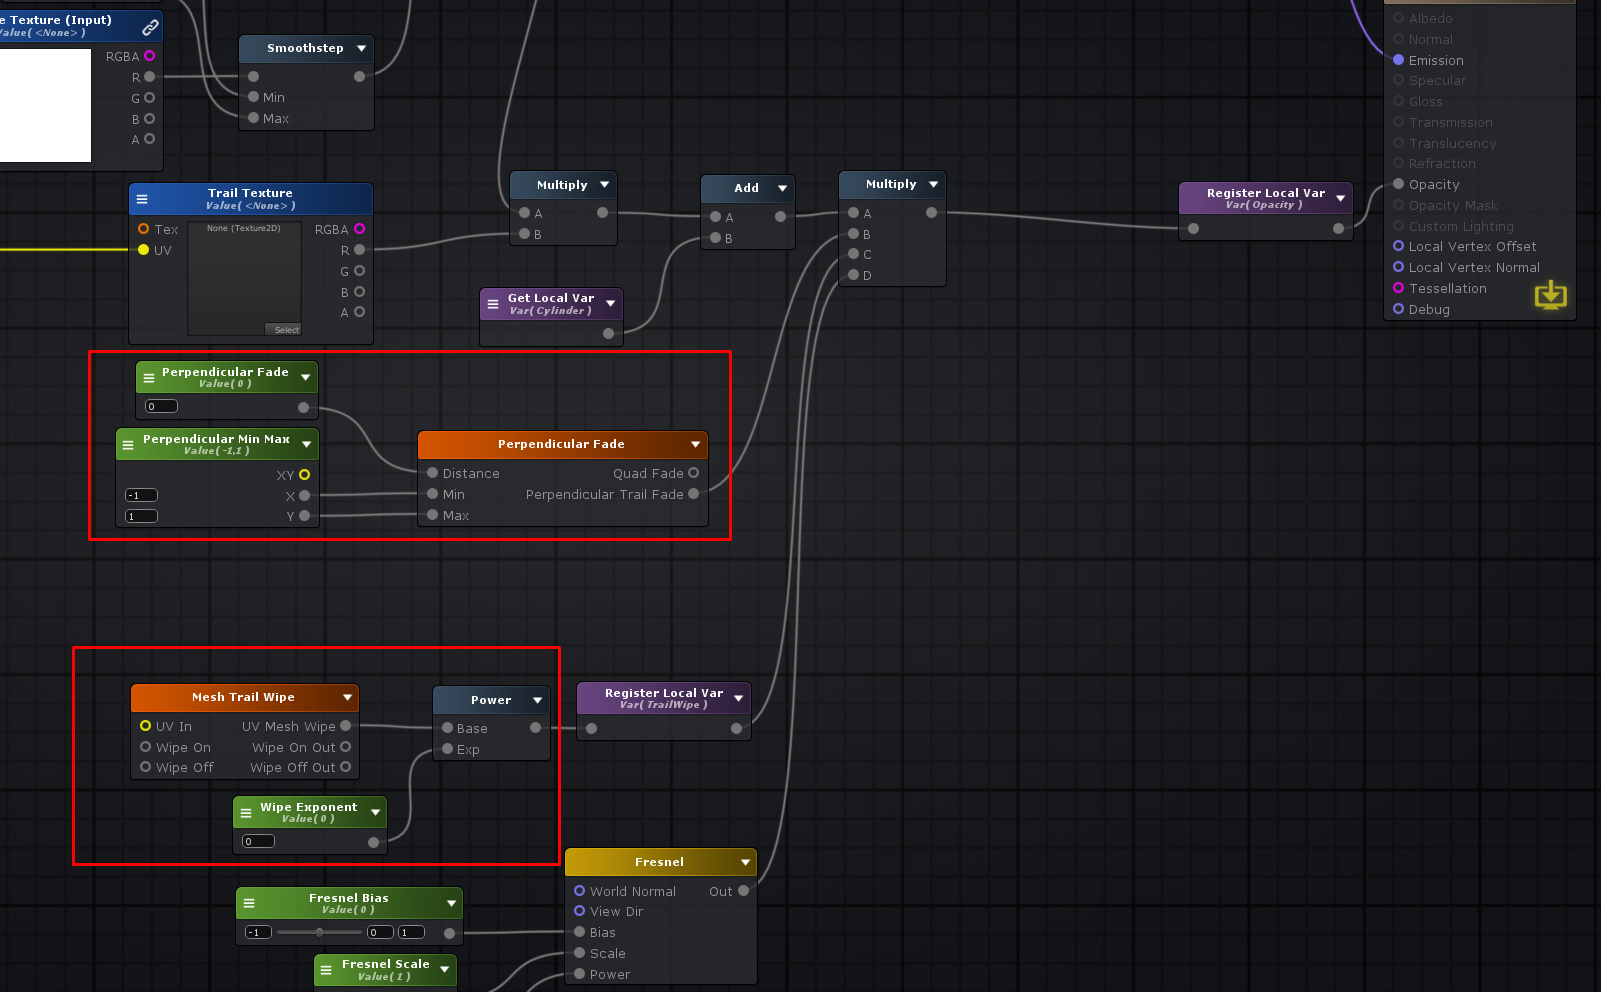
Should have included this, if you end up using this. Here is a little Amplify Shader Function I created to help with the fading of the trail mesh if you use the Perpendicular trails.
Perpendicular Angle Fade
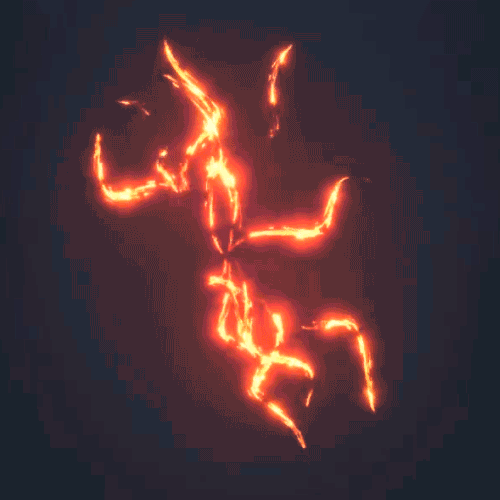
Mesh Wipe Function - The point of this function was to make the mesh trail act as an attack trail as a Mesh Particle. I was wiping the mesh on against hte characters attack so it looked as if the trail was streaming off of their limbs. Sadly, I cannot show that work however it looks great!
Which when used, I just slot it into the Opacity chain since I was doing some alpha blended shit.
Seth
So i have my curve and i add a plane (Polygon or nurbs) and what exactly do i need to mark to get planes attachted to it along the curve? If i mark the single edges of the plane it does the effect but it’s wrong cause it adds new planes with the length of the curve and the width of the edges.
Oh! That’s a super handy tip. I had trouble from some angles sometimes too. I will make sure to use that from now on >:^D
Thank you very much! Very helpful!