Hey Simon, thanks for joining my post.
I tried changing my settings and I also thought that the lost leader particle might have been the cause for it, but still I didn’t succeed fixing it. It’s crazy that something this simple can waste my whole day ![]() . Also The UV thing might be coming in handy, but i don’t really know yet what specific nodes i’ll need in my material to be able to something with it (haven’t really done research yet).
. Also The UV thing might be coming in handy, but i don’t really know yet what specific nodes i’ll need in my material to be able to something with it (haven’t really done research yet).
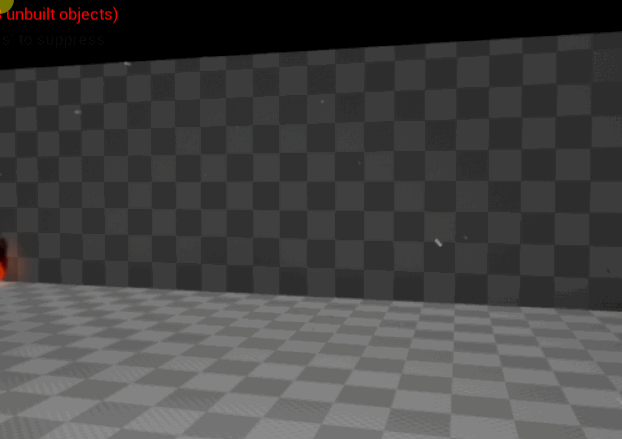
You are going to want to have a value in the Max Frame Distance field under SpawnPerUnit. That will make it so the ribbons don’t warp back to the start when the effect loops.
You’ll want to play with the number since it will depend on how far your particles are travelling but if you set it to 5 or something to test it that should work. At least that is what has worked for me when I have had that issue.
1 Like
Fixed! Thanks! Makes so much sense.
7 Likes
I have something now, thanks for the help! Any feedback is much appreciated.

2 Likes
Looking really cool so far! You are definitely getting the look down.
Couple of quick thoughts:
-
The effect dies off really quickly and all at the same time. Add some more time for some more falloff.
-
It’s looking a little firework-like right now, I would reduce the amount of debris trails that are shooting out, vary the gravity that is on them and vary the size a bit more to replicate different chunks flying away.
-
Have the colors change over time. Notice the BotW effects go from whites and yellows and gradate to oranges and reds as the flames cool off.
Looking forward to seeing more!
1 Like
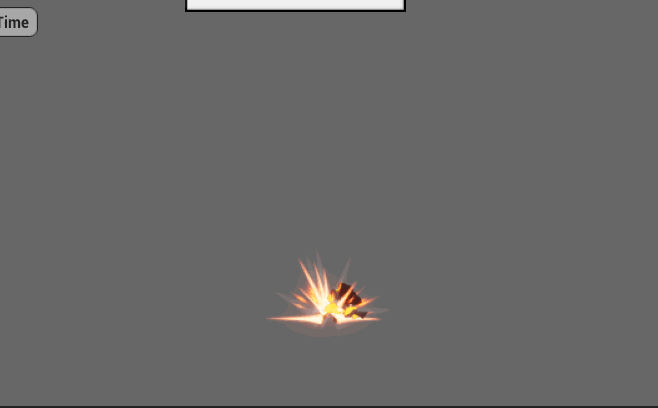
I have been creating variants from this explosion:
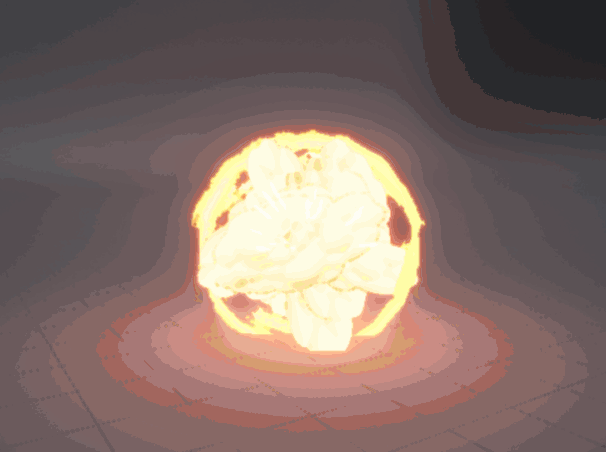
However I’m not happy with the smoke, I can’t get the colors right (glow effect). Am I using too much saturation? Any tips?
The chunk trails should scale with the variation on the chunk scales, but I don’t know how to do that.
Rght now I have 2 emitters for the chunks (1 smaller and 1 bigger) and 1 emitter for each of them for the trails
2 Likes
Hey ! what a impressive work ![]()
I think maybe your emissive that may be a bit to powerfull is killing all of your colors
From your Zelda reference, the fire color is veryyyyyy saturated and a little more orange, so i don’t thnik the saturation is your problem
Also maybe you can make your yellow color progrssively turning red
I have one question about the smoke animation. How do you do to have differrent colors inside your particule ? How do you get the yellow and brown color that can be seen in your smoke ?
1 Like
Thanks! The yellow is the particle color and the brown is just a parameter (3 colors to be exact) from the material itself.
If you want to be able to also tweak the brown color than you could still use the hueshift node and a dynamic parameter. (I might try that to solve the issue with my smoke colors)

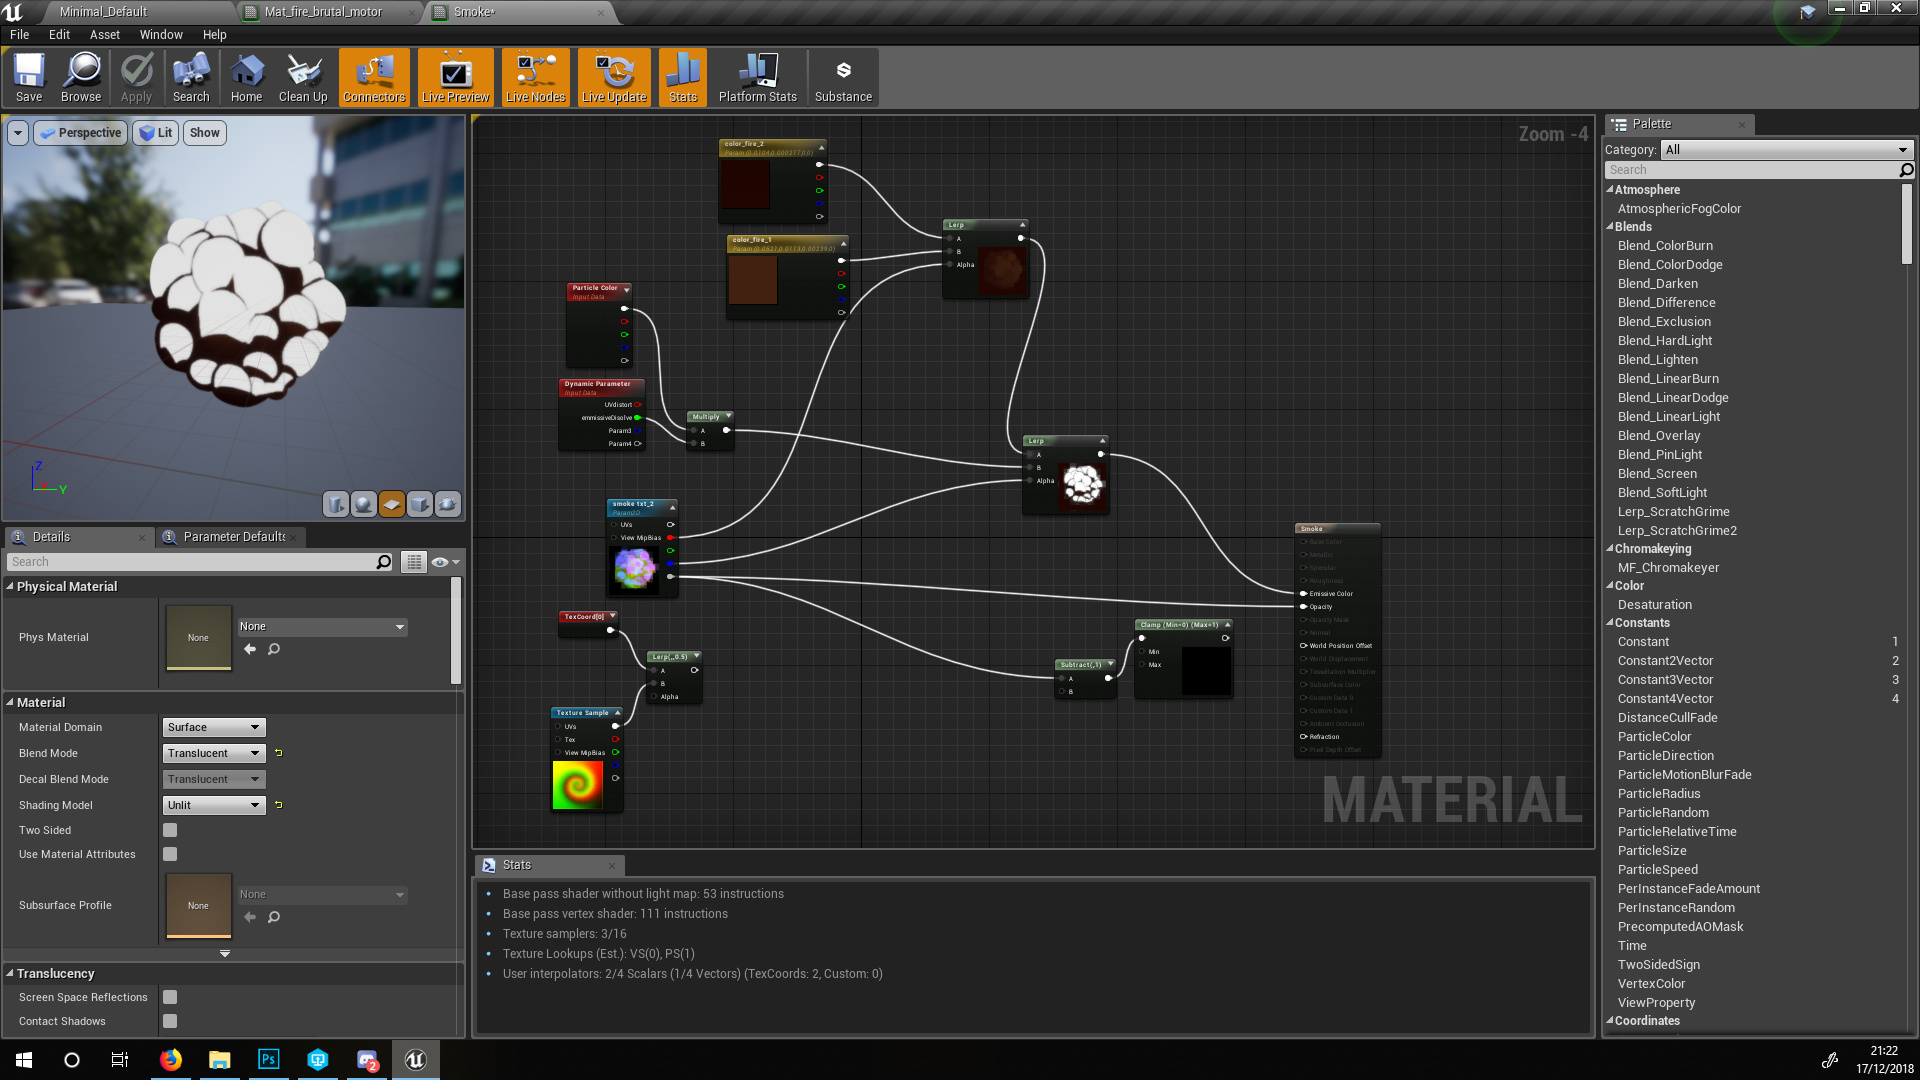
I use the B channel to lerp my base color with the dark color and then I use the R channel to lerp that result with my Bright Color. (maybe try to also combine the G channel so you still have some volume)
I use the dynamic paramters to control the smoke dissolve and the emmisive dissolve. For the smoke dissolve I lerp my standard UVs to this UV texture that I created in PS>Distort>Twirl

Let me know if something isn’t clear and show me what your result looks like ![]()
5 Likes
Thanks a lot, I think I understand the way the smoke works.
I figured how to blend the colors with the Lerp and I think it is working well, thank you ![]()
But I am still not quitte sure about how you managed to controle the dissolve of the emmisive and the smoke
2 Likes
this is for the emmisive. I simply subtract the dissolve time from this result:
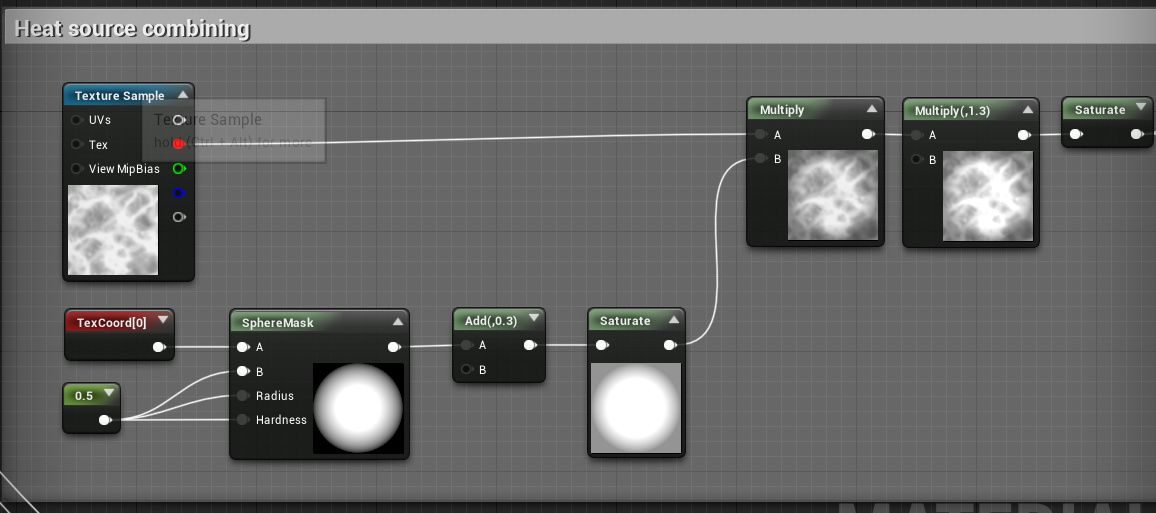
I do the spheremask so that the missive will dissolve towards the center
There is more methods of dissolving. Like this one:
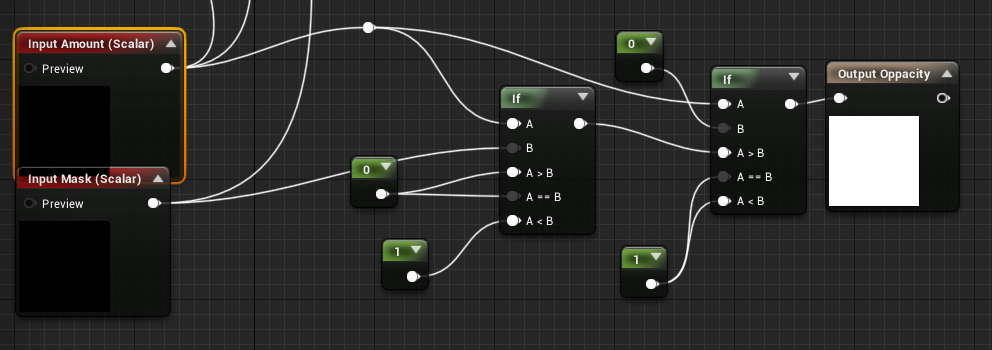
Which is literally just a masking technique (replacing values with 0 or 1).
I use the combination of both (using max node to combine the out coming results). But make sure to offset the time for the 2nd technique so that you still have the soft gradient for the around the edges of your dissolve.
So I do this:

I combine them because the substractive result isn’t nice in the center but is nice on the edges and the opacity mask isn’t nice from the edges but is nice for the center.
You can still choose whatever technique you want to use.
I do sort of the same stuff for the smoke but than I use the dissolve on the distorted UVs and I also multiply or lerp or combine that noise first with my smoke texture G channel
This is my noise:
3 Likes
I made a new impact effect ![]()
3 Likes
Nice, the Fire is ending with a good Orange/ Red color. I think your embers flying in the air need to die in motion, actually they stop mid air before dying and it’s kind of weird.
1 Like
Thank you for your help. I think now I understand more how your shadder works. But it’s a much more complex shadder than I tought. I’m not sure if my current skill in shadding is good enought to achieve quitte a strong shadder like this. But still i learned quite a few things thank you ![]()
4 Likes
Working on it ![]()
Just let me know if there is still something you wanna know
1 Like
No problems, I think I will come back on this FX later
1 Like
Explosion showcase in action

1 Like
Game progress:
")
8 Likes
Awesome, really great explosion !!! I have made the shader with shadergraph (after some days with a lot of trouble for nodes) and everything working perfectly now ! Thx for the tips !
1 Like
Thanks man! ![]() I’m glad that it’s been useful to you, I’m curious to see your result.
I’m glad that it’s been useful to you, I’m curious to see your result.
For Now this is my V1, i’m gonna change some things into the RGB but the shader is done ![]()
8 Likes