The intention of these mini tutorials is to have easily searchable reference for implementations of some of the newer (or altered) features in Niagara.
Here’s a cool thing you can do with collisions in Niagara. It is slightly more expensive then previously discussed techniques, but it opens the door to some really cool possibilities.
We will be using Niagara’s collision trace logic on the CPU to find surface positions near our particle system. We can then use this information to exclude particles from spawning, and setting their initial position.
Like last time, there is two ways to follow the tutorial, either you make it yourself using the descriptions and images, or you copy over the contents of this pastebin to a new module script, and then just use my steps as an explanation of the inner workings
Here is a pastebin to the raw code of the module, you can past this inside of your module editor and it will convert it to nodes.
don’t forget to plug into the Output node after copying.
Also in case you are not going to follow the rest of the tutorial, this will only work on CPU in this form.
Step 1.
Make a new module script and call it something cool.
Step 2.
Open up the module.
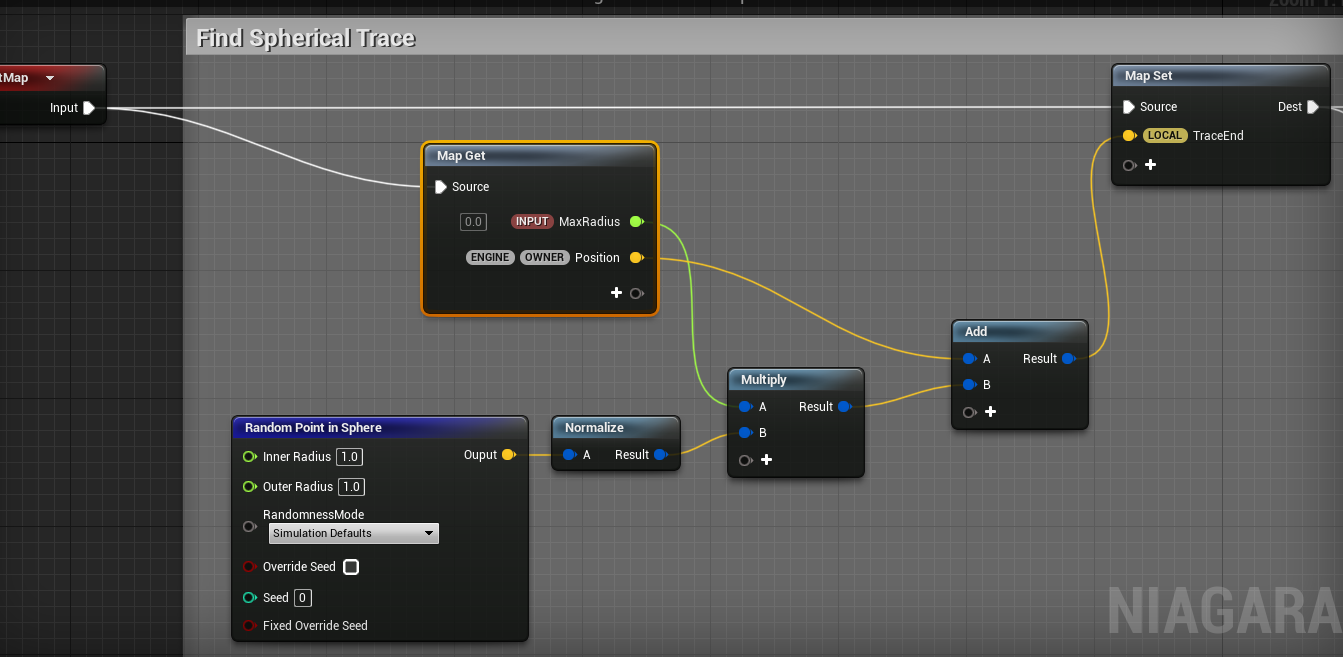
Add a new float input for MaxRadius
Also bring in Engine.Owner.Position, this is the world position of your particle effect.
Add a Random Point in Sphere node, this function will generate a random direcion. It comes with the engine and is used in Sphere Location, so it is thouroughly tested
We are going to want to normalize this just in case. (I set the values to 1 so this shouldn’t be nececary, but the normalize doesn’t cost much, and not having the vector be normalized will seriously mess with the code)
Next, Multiply this direction with MaxRadius and add Engine.Owner.Position. This will be our worldspace endpoint.
You could drag this value straight into the next Step, but I like to add it to a local for readability
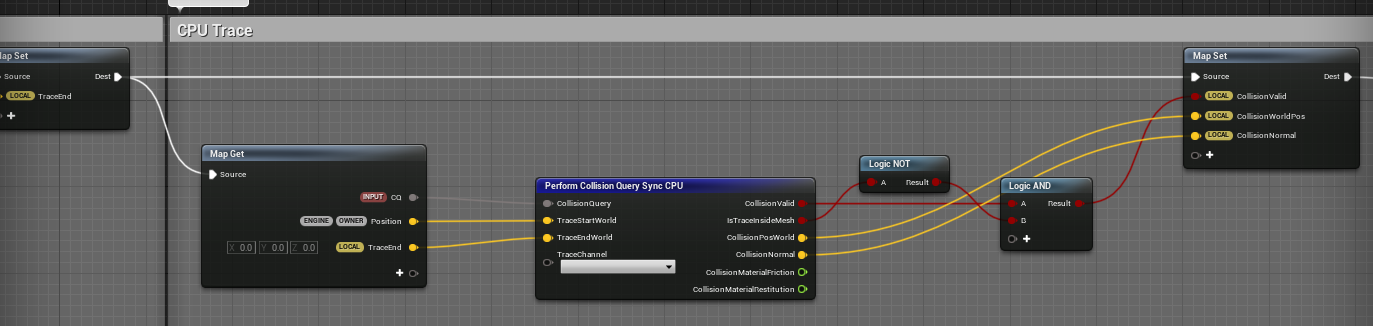
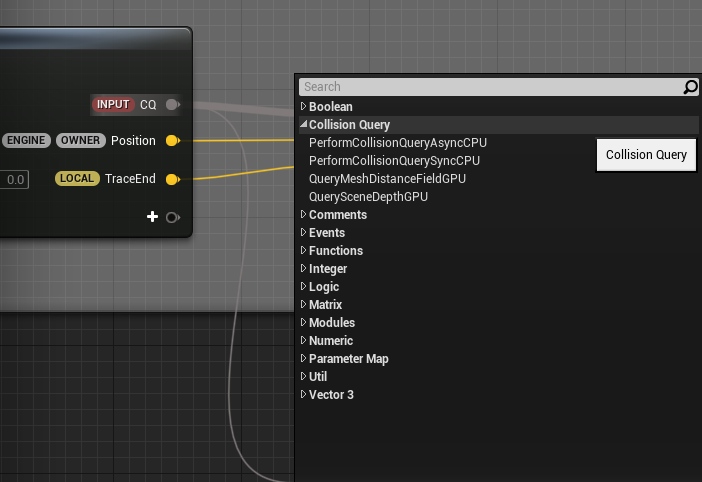
Pull out a new map get node and add a Collision Query Parameter to it.
Also add Engine.Owner.Position again, and Pull out the local Trace End. It is possible that adding the Engine.Owner.Position node twice has a small perfornance cost, I’m pulling it out here to make our spagetti slightly more readable.
Call the “Perform Collision Query Sync CPU node”, this is the big one. We want our particle system position in Start, and Our calculated end Position in End Trace.
This function will Raycast between Start and End and give us some results.
We want our collision to be valid if the trace returned valid and is not inside a mesh.
For now we just save the values we are interested in to the map. The new valid bool, the collision position and the collision normal. For this tutorial, you will not need the normal, but it is usefull nonetheless.
If you want the most barebones implementation, you can skip this step, Just connect Collision world Position to Particles.Position and this will work; However it never hurts to have some options when creating.
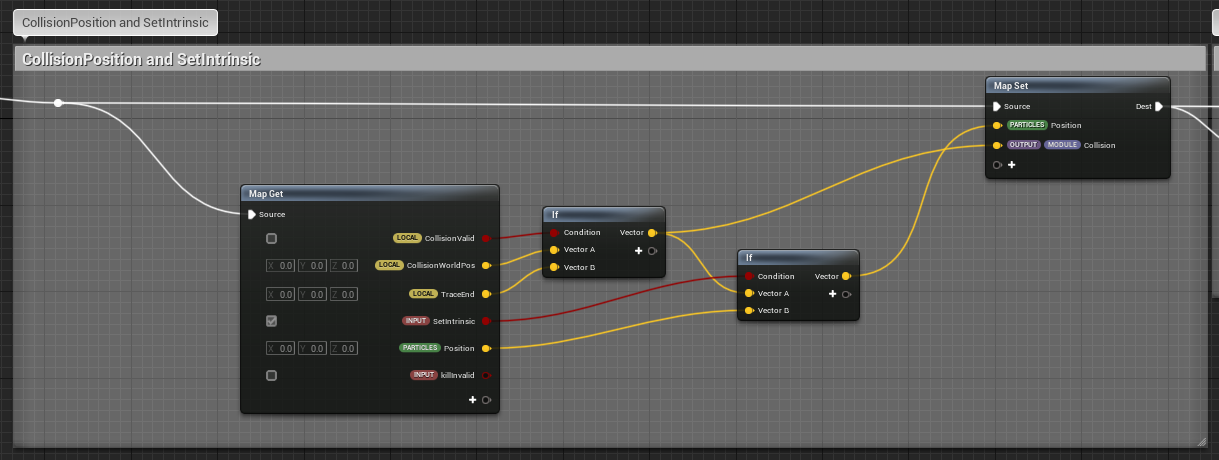
Pull out the local collision valid bool as well as the position and normal from the last step.
Also add a set intrinsic bool input and the Particles.Position
To make sure we have a reasonable in case of an invalid collision, use an if node to set the position to TraceEnd.
I’m also adding this seperate set intrinsic check in case I want to calculate all the values and have something to read from, but don’t want to change the position of my particles when I call this module.
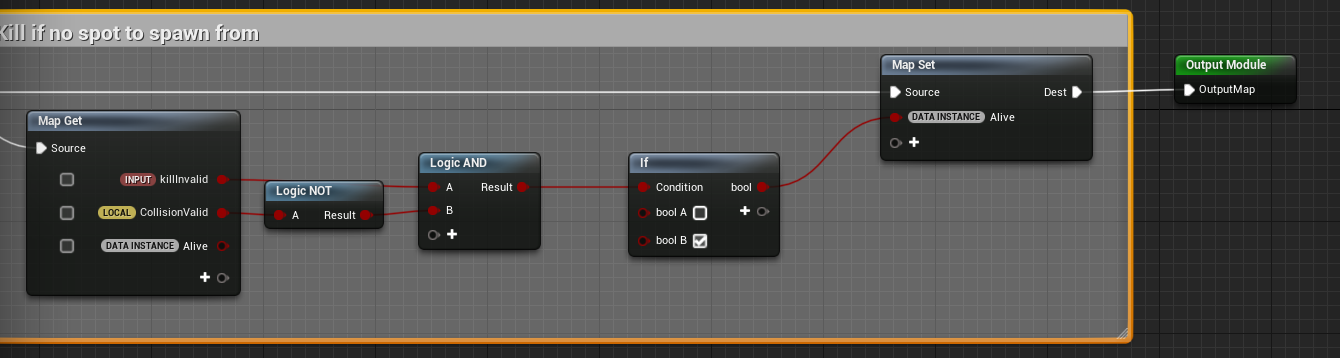
In case KillInvalid is set, and The collision is indeed not valid, we can set DATAINSTANCE.Alive to false. That way particles that do not have a surface to spawn from will not spawn.
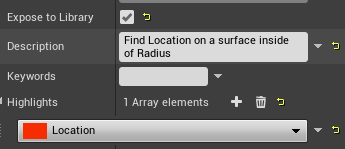
It is useful to expose this module to the library under Location
The highlights will help you identify the type of module in the emitter stack.
And the description is useful for your teammates, or yourself in a few months
Please let me know if you don’t understand something, or if I made a mistake somewhere.
Excellent explanation, I love these, they’re super helpful!
Question: In the above gif, that just looks like some particles with trails being spawned in a spherical location with a point attractor, What is the surface location module doing there? Could you maybe briefly highlight a usecase or 2 where it would be effective? Thanks much again!
I must admit in hindsight that the gif I posted doesn’t demonstrate this super well.
The particles don’t spawn in a sphere, they spawn only from nearby geometry.
The most basic usecase is any scenario where particles spawning in mid air feels weird. For example you might want your grass ambient effect to spawn the grass from the ground so it doesn’t feel like it is coming out of nowhere.
It could also be used in electric effects where you want your electricity to arc between physical surfaces instead of stopping at arbitrary points. I’m hoping to make a better example for this uses case at a later point
Here’s a slightly better look. In this case the only surfaces within the given radius are from these poles, so the particles spawn from the surface of the pole.
Ahhh ha! Ok, that makes a lot more sense, I understand much better now, thanks! So if the emitter were attached to a player, would it pick up the nearby surfaces and emit particles from them? Would it work dynamically like that? I should test that out.
Hie,
The way you explain is really nice.
I just started learning Niagara, wanted to make an effect of sparkler.
Can you please guide me, like how to create sparklers effect in it.
Thank you.
Hi,
Thanks for sharing ur knowledge with us
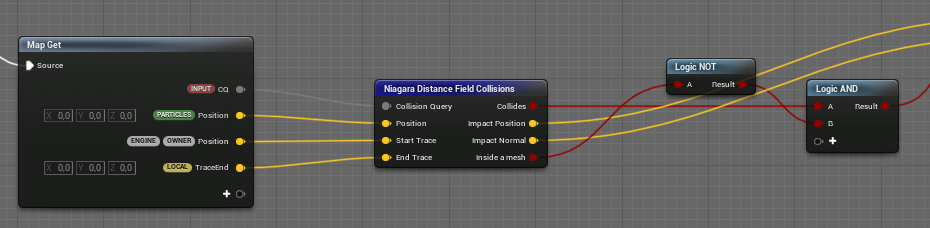
I got a problem tho, i cant find the Perform Collision Query Sync CPU node.
I tried to find it with version 4.25.3 and 4.26.
Can u please help me, would mean alot to me.
While i was waiting for an answer, i spend some time finding a way around that node and i found this work around. It seems to work, but since i am just a beginner i dont know if it is a good solution, can u tell me ur thoughts about it?
Distance field collisions only work on gpu, they are cheaper, but less accurate, also you need to have global distance fields enabled which increases the memory footprint of your project.
Except for that they are pretty much equivalent.
One thing you can do is make a sim target switch which selects results from either this node or the cpu one depending on if you are using cpu or gpu-compute sim targets.
This tutorial looks great and I think it could solve an issue I’m trying to figure out right now (ie, connecting lightning beams from my character to the ground or walls, etc) but I don’t understand the final part. KillInvalid is just a bool we created, correct? I don’t see what it’s actually doing, or where it’s being set. Also, it seems like “If” nodes don’t exist anymore, so I essentially can’t finish the last part of this. Also, and I realize this is a noob question, but how do we actually use this module after creating it?
Yes, it’s in the input namespace, so when the module get’s added to the stack and you select it, it will create a little bool input for you to use.
They have been renamed to select/if their use mostly the same, but they are now universal (and epic did a bunch of other stuff as well probably, but I’m not sure about that stuff)
You can set the module to be exposed in which case you can add it from the + in the module stack.
If you don’t want to expose it to all Niagara users in your project, you can also set it to be unexposed in which case you’ll need to deactivate the library only filter.
Finally, you can set them to hidden in which case they cannot be found from the + in the module stack.
You can also drag and drop the modules from the content browser. (in this case it does not matter if it is exposed or not)
Great explanetation Niels! One thing I’m figuring out is how this would be setup in the Niagara System itself after after attaching the module to the Niagara Emitter.
I’m trying to figure it out but can’t seem to wrap my head around it, if you could give some insight of how the Niagara System setup looks like would be awesome!