thanks for the detailed breakdown! awesome! <3
3 Likes
I’m happy you enjoyed!! ![]()
![]()
1 Like
Welcome back guys! I missed being able to write an EOD!
I have great news!!
I got my first job as VFX Artist as a contractor at Navigator Games Ltd !!
And I couldn’t be more happy about it, it’s the job I’ve been dreaming about: Stylized Elemental VFXs, because we are going to work on Avatar: The Last Airbender!!
This is a huge achievement that I need to readress to the help that I have been given by the community.
In the first place @TonyManzi introduced me to the VFX world and helped me along the way nearly everyday, but without the VFX Apprentice Community this wouldn’t have happen, thanks a lot guys, every single one of you.
A new challenge arose the very moment I accepted the job offer, and that was: translate all my recently acquired knowledge to Unity.
In the past days I’ve been sick and didn’t really work much, but @White_Intoner has been a lighthouse in the dark and helped me hugely already.
@Saiel provided me with tons of super useful resources to learn from but I have to say, a very solid point where to start from is always Gabriel Aguiar . Thanks a lot if you’re reading this @GabrielAguiar !!
I want to show you a very cool effect I was able to achieve today thanks to one of Gabriel tutorials.
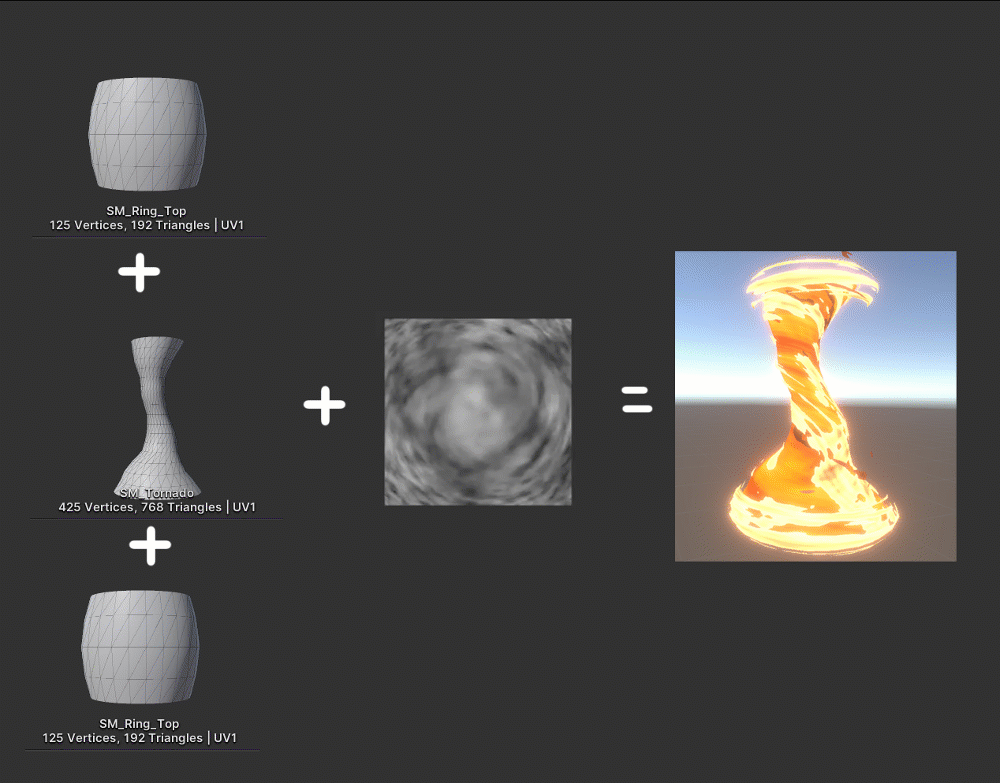
FIRE TORNADO
This effect is mostly achieved in the shader, which is how I love to work.
Even in Unity I didn’t lose my habit! ![]()
Let’s see what is cool about this and why I love it, since in Unreal I was going to have much more difficulties trying to make something like this.
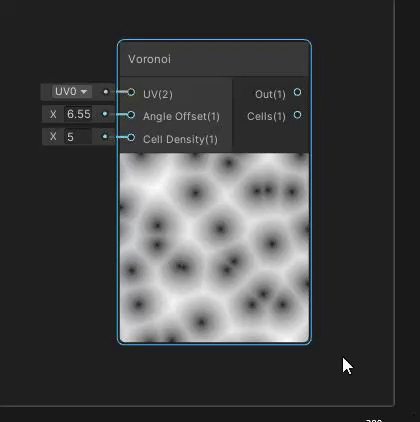
In Unity you can procedurally generate noises from the ShaderGraph itself! I know it to be pretty expensive feature but for fun and speedrun purposes, this is so good.
(I especially love the voronoi)

It looks pretty disgusting doesn’t it? Like bug eggs
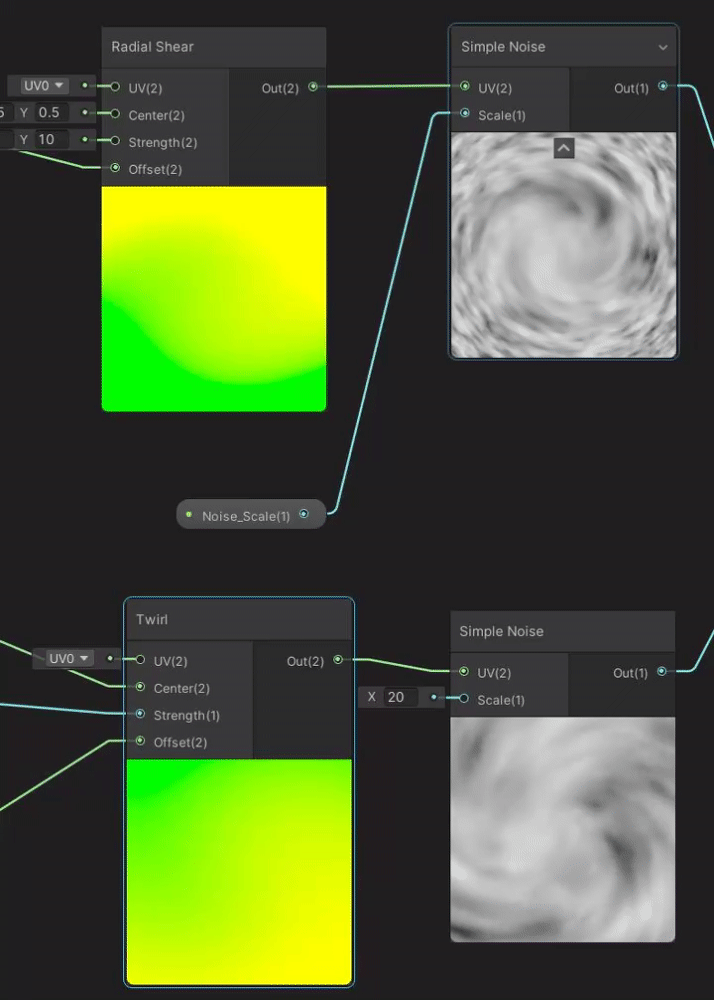
Distorting these noises has never been simpler.
There are 2 amazing nodes in ShaderGraph called Twirl and Radial Shear:
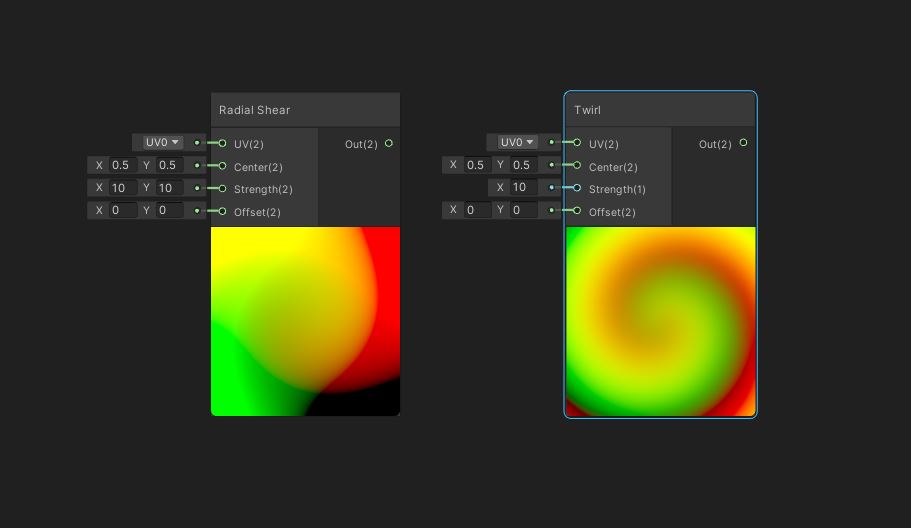
Both of these nodes are UV Distortion nodes as you can see from the colors, and they do so very well!
(Here you don’t see them in full action, but you can crank the values up and obtain amazing results)
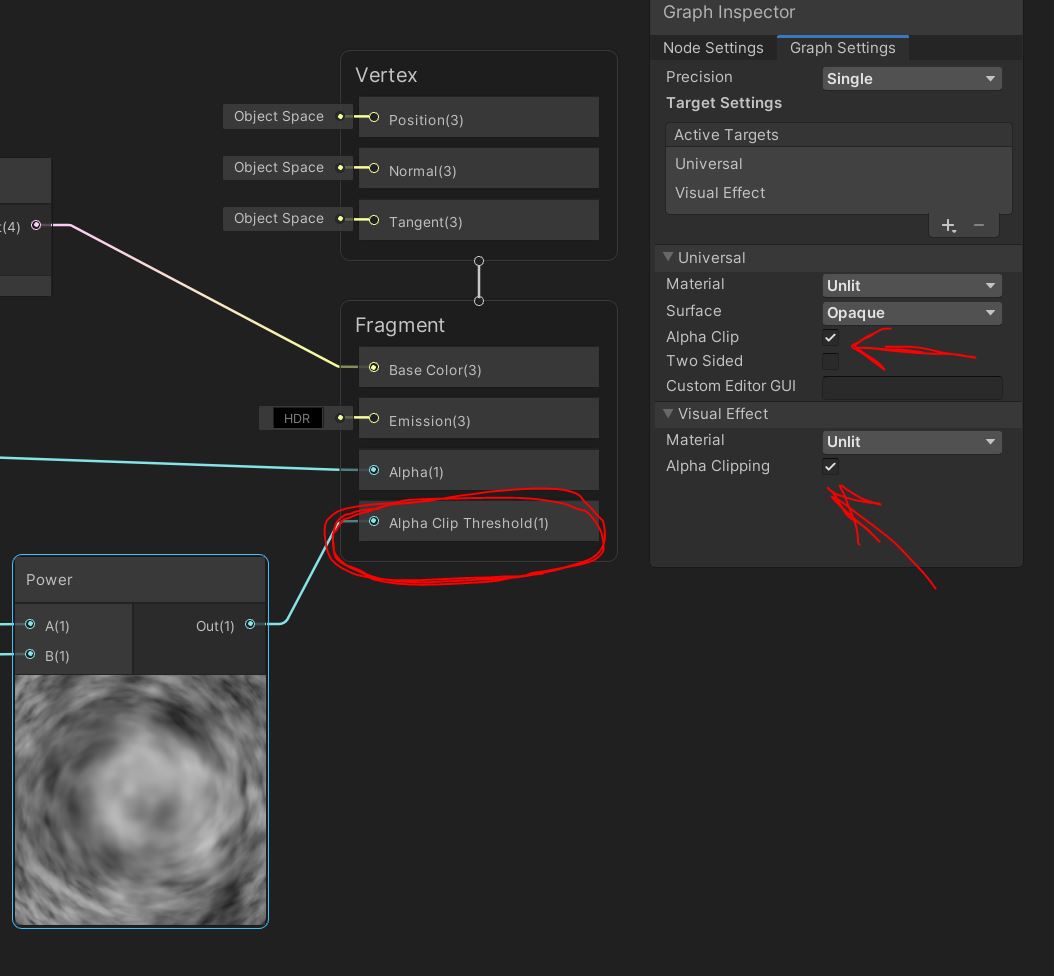
The coolest part has to be the fact you can check a couple of boxes and use a noise to produce a cool Dissolve effect! The Alpha Clip Threshold is an amazing output!
You know what this means right? I Simply slapped this material on top of a custom tornado mesh I created, with some rings around the top and the bottom, then duplicated the tornado mesh to have 2 different colors (Core and Outer) and here we go! Fire Tornado.
In conclusion!
I’m pretty happy with Unity so far, it doesn’t put you in front of a lot of decisions, everything is pretty easy and straightforward, but SOME decisions are actually important (Shadergraph or Amplify, VFX Graph or Shuriken).
If there is ONE thing you take away from my post today be it this:
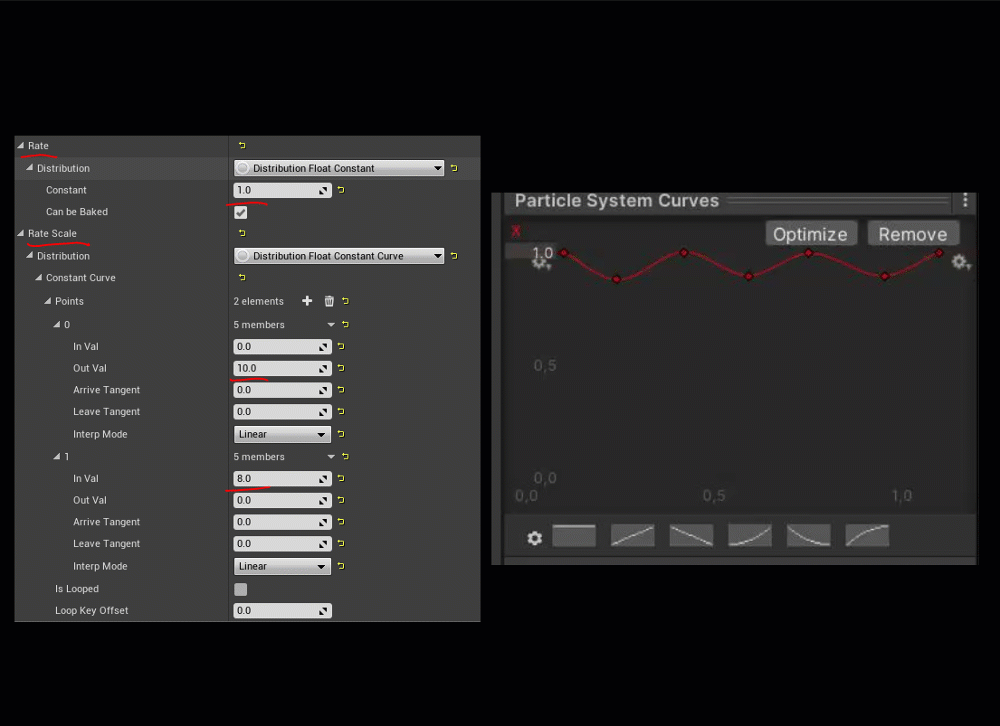
I was complaining about how in Shuriken Particle System (Unity) you can’t interact with the curve the way I used to interact in Unreal (With Elements Array). I was able to nail pretty good timing with it.
So I naturally looked for something similar and luckily I found it.
Simply right click on a key you created on the curve, and you can manually edit its time and value!
Time to end my EOD.
I hope this was cool, and I look forward to bring you news!!
Until then, CIAO!
11 Likes
So cool to see this detailed explanation. Very nice ![]()
Ey hope you are feeling better dude and good luck with the new job, seems exciting!
Appreciate the mention, peace!
1 Like
Thanks a lot for everything ! I’m new to unity and i’m enjoying discovering these little features ![]()
1 Like
These breakdowns are super interesting!
Keep it up!
1 Like
I?m super happy to be of any help! ![]()
1 Like
Hi everyone! I’m so happy to be able to comfortably spend time working on fanarts…it took me a while to get comfortable at my new job.
Now that I had time, i decided to cultivate both of my passions together: 2.5D Environment and VFX!
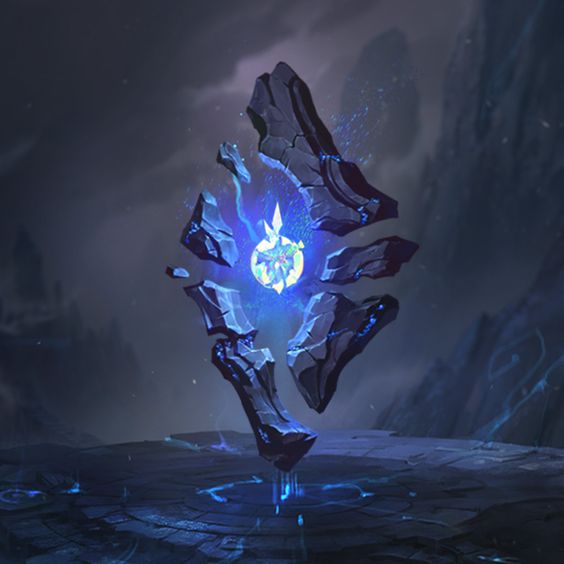
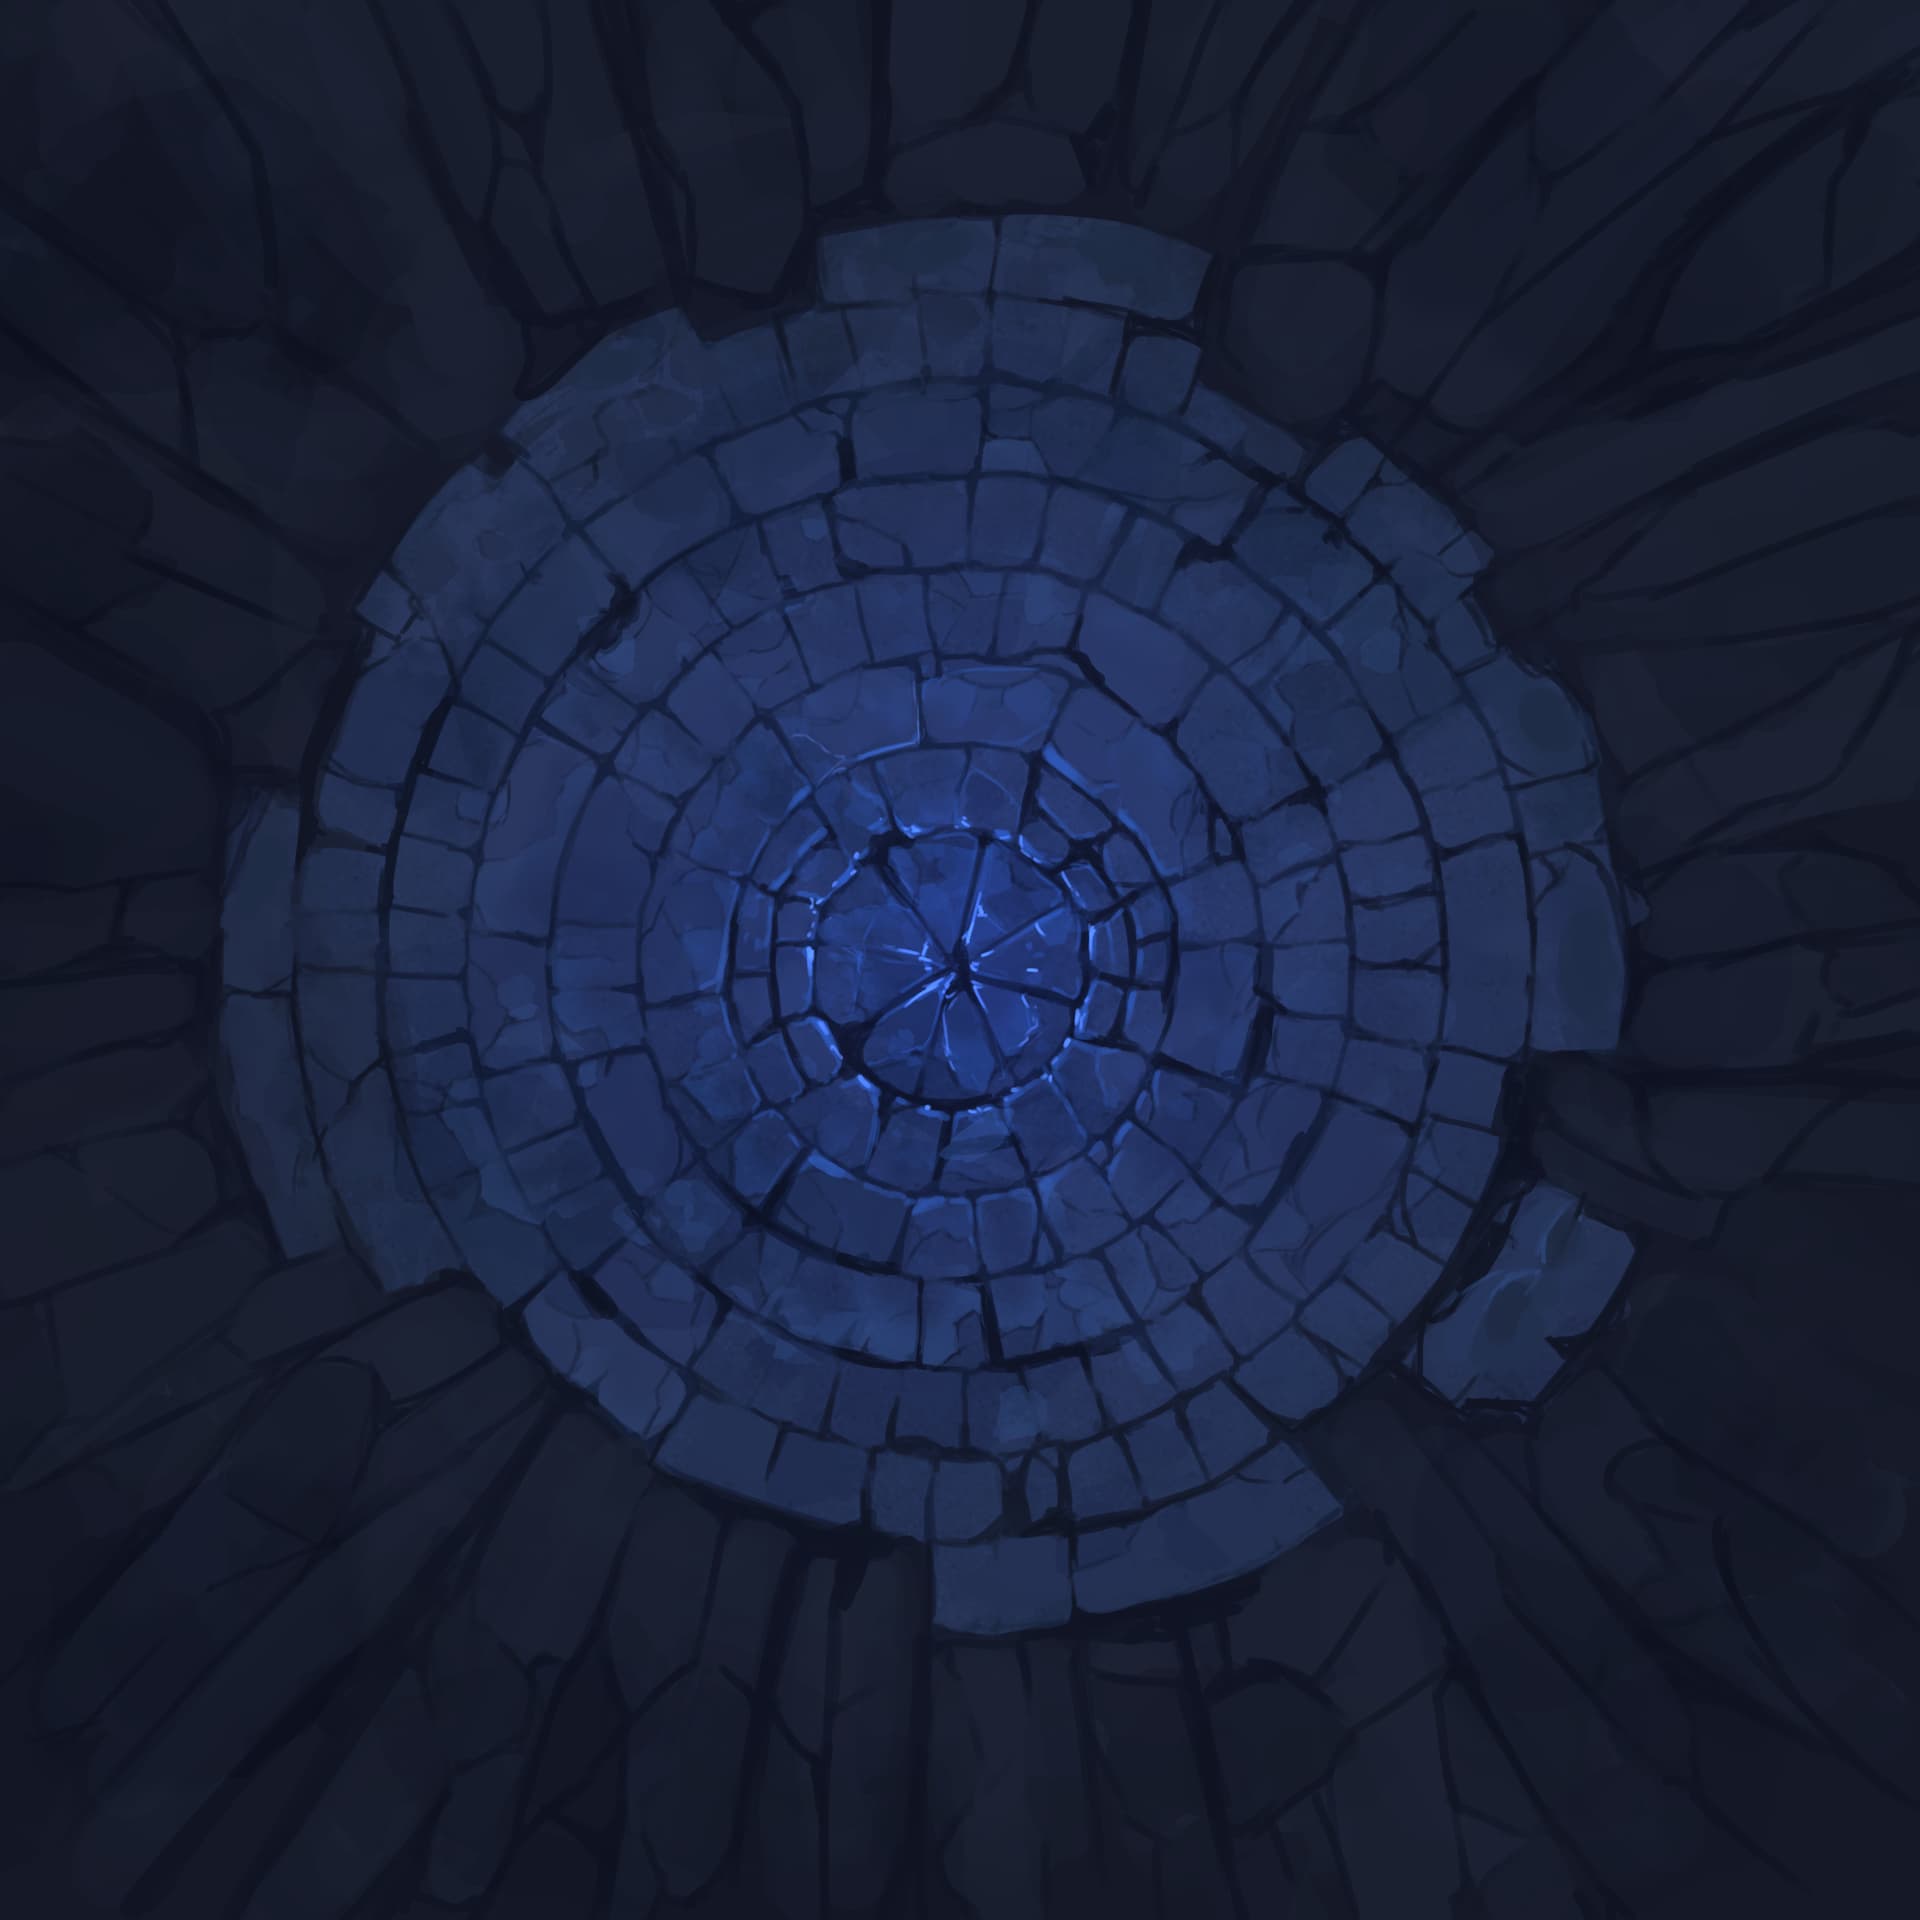
Here is a funny little weekend of work on an original piece that is actually in animated 2D from Mathew DeSanctis (Please correct me if i’m wrong) on LoL runes page.
I wanted to show how I made it, it may seem simple but i find pleasure in explaining how I do things!
First of all, I took the reference and observed how I could achieve the result…
Creating a Rune 2.5D was only the first step, because I loved the idea of creating the entire environment, not only the rune and the effects.
-
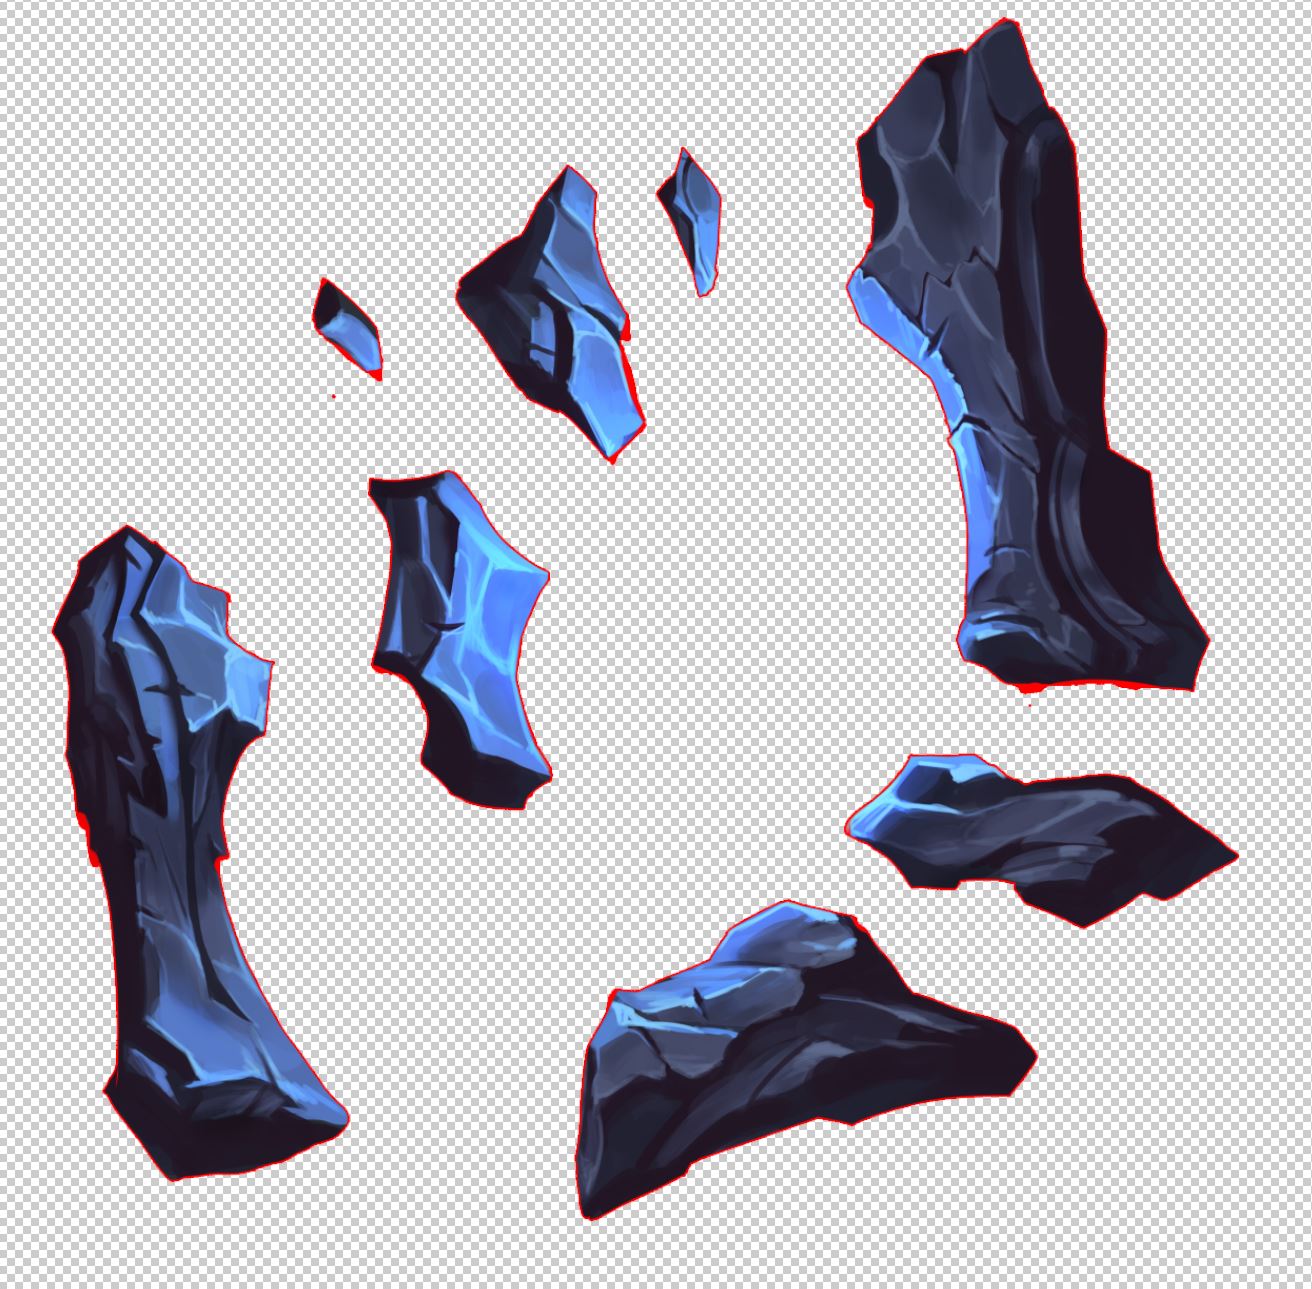
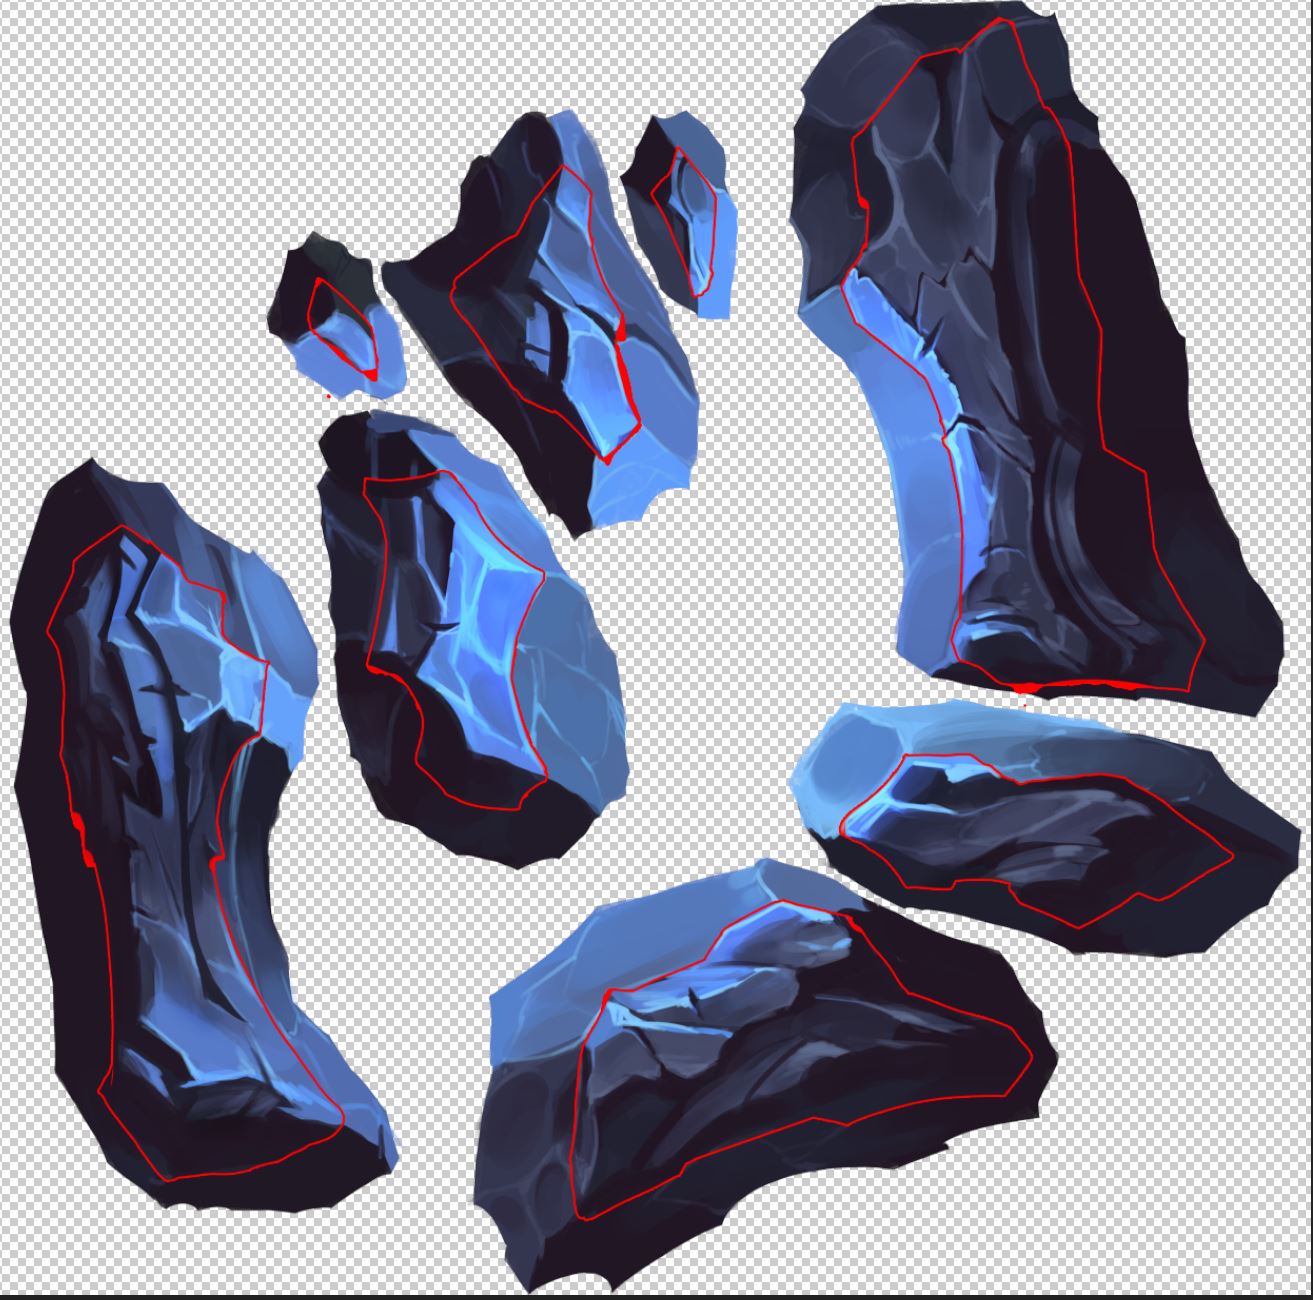
So I went ahead and carefully painted it piece by piece.
-
Then I applied a red outline to the shapes.
-
And painted outside of the shapes, because I needed some room to bend those pieces backward in modeling phase.
Export in TGA with its alpha channel properly created, make sure the shapes are white and BG is black.
-
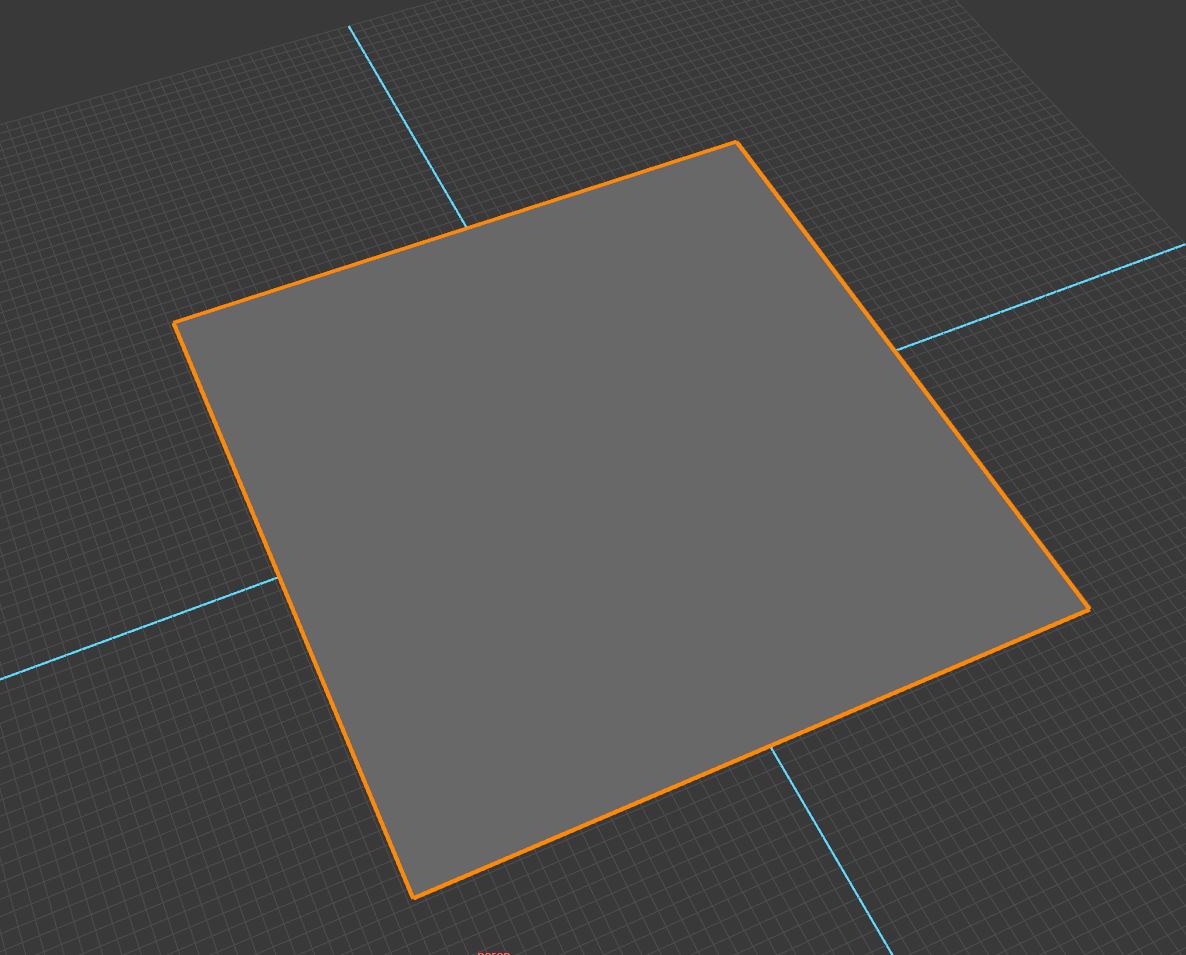
When modeling, start from a simple plane,
-
Make sure the shader looks something like this, and
-
It will look something like this:
-
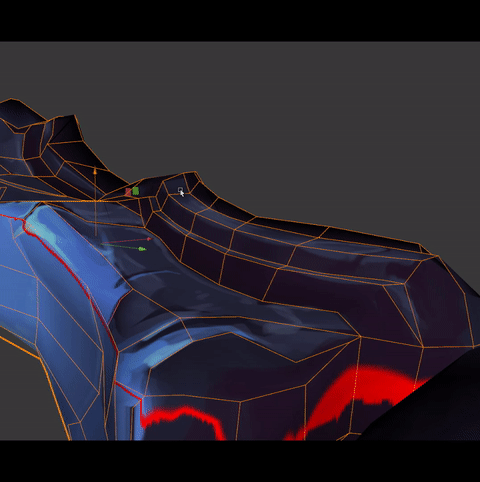
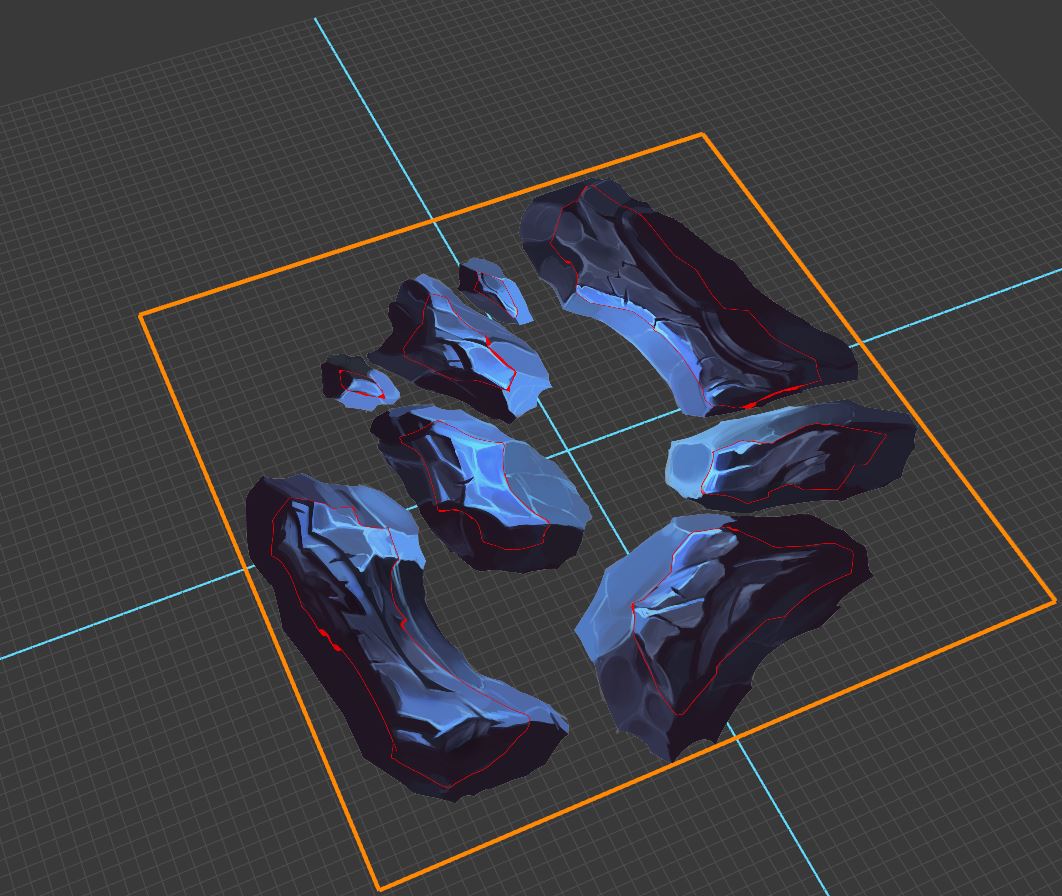
Now with the multi-cut tool start breaking down the plane following the red lines we created before and radiate out some cuts, so it will bend organically.

-
Warp the structure and start modeling by cutting more and more pieces into the shape.
9)Also create height starting from the shapes you already painted as a guide.
-
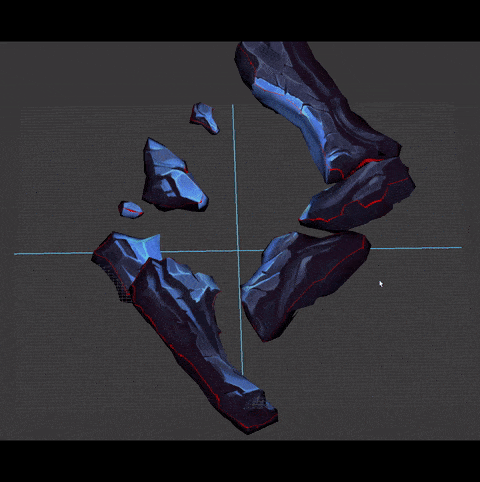
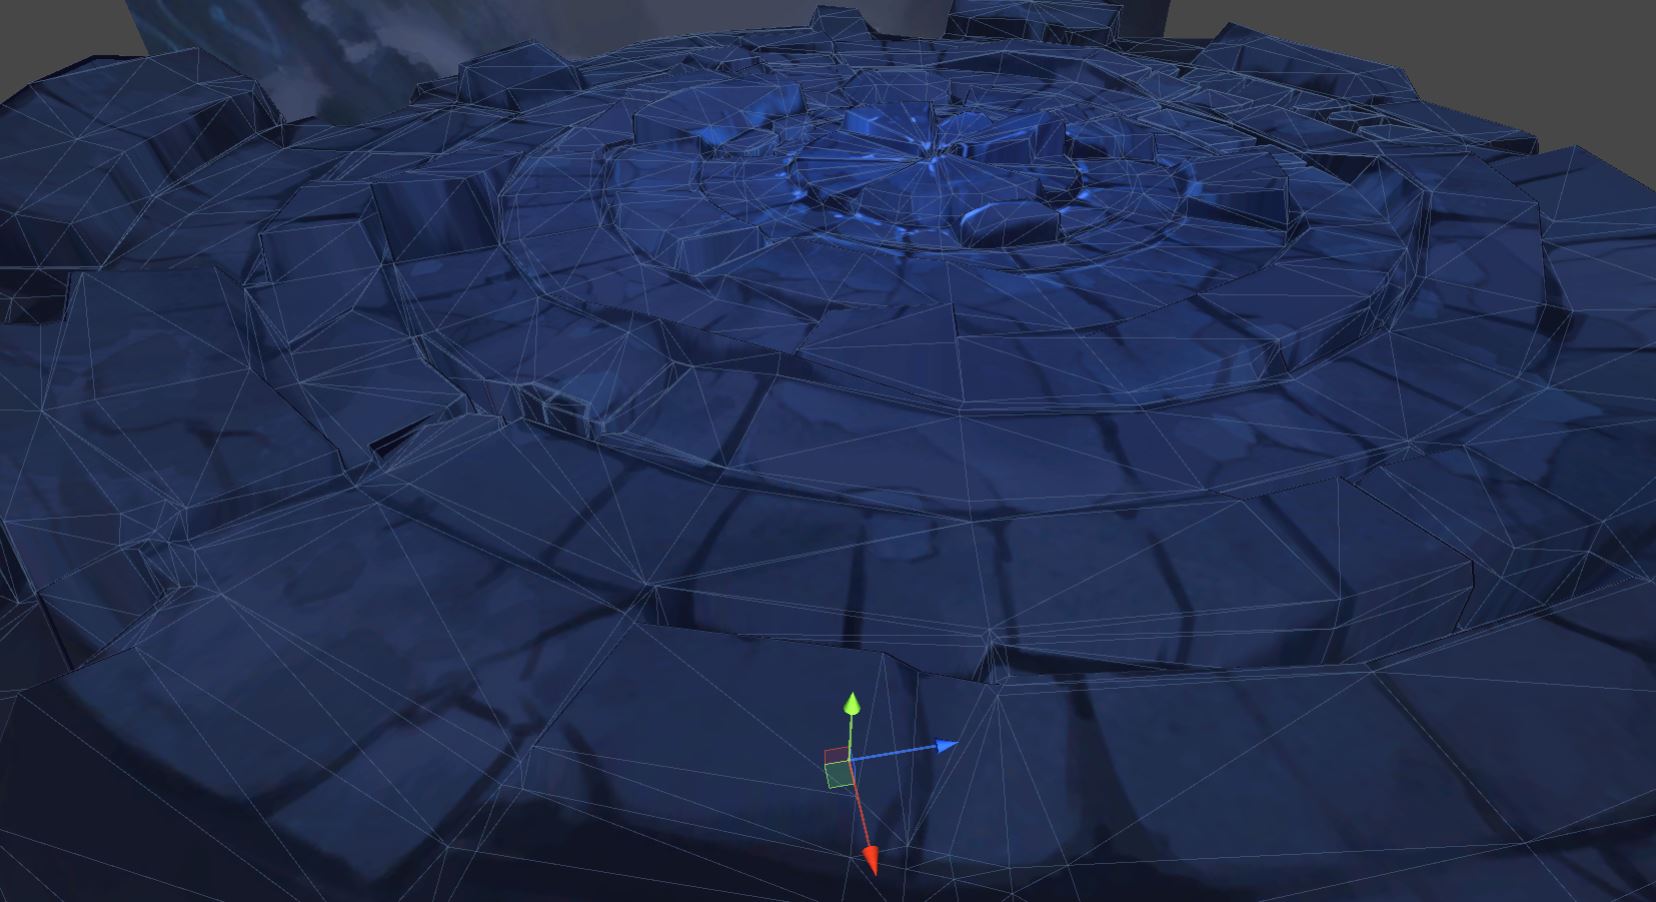
After some hours of work you’ll have the entire shape, but it will hollow behind. Perfect!
-
From here, you need 2 more elements, the base and the background. Both are handpainted. For the base, follow the same principle of painting over the “limit” to be able to bend the geometry down.
All the geometry was pulled up, pushed down, all starting from a plane!
-
For the Background, it’s a simple plane. I literally copy pasted the background from the original art and painted over it at a higher res to make it look less pixelated, i was a bit rushed in this.
-
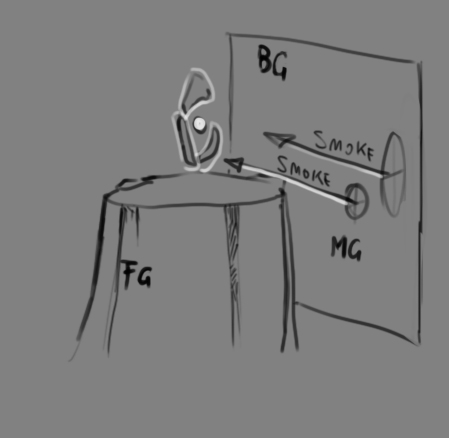
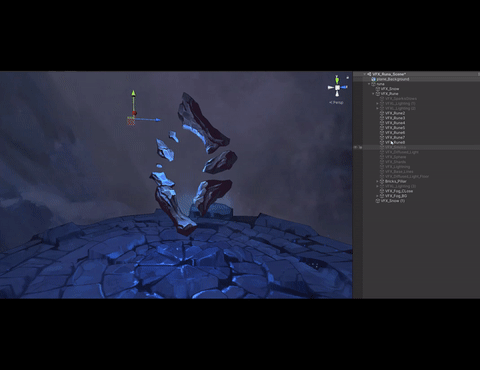
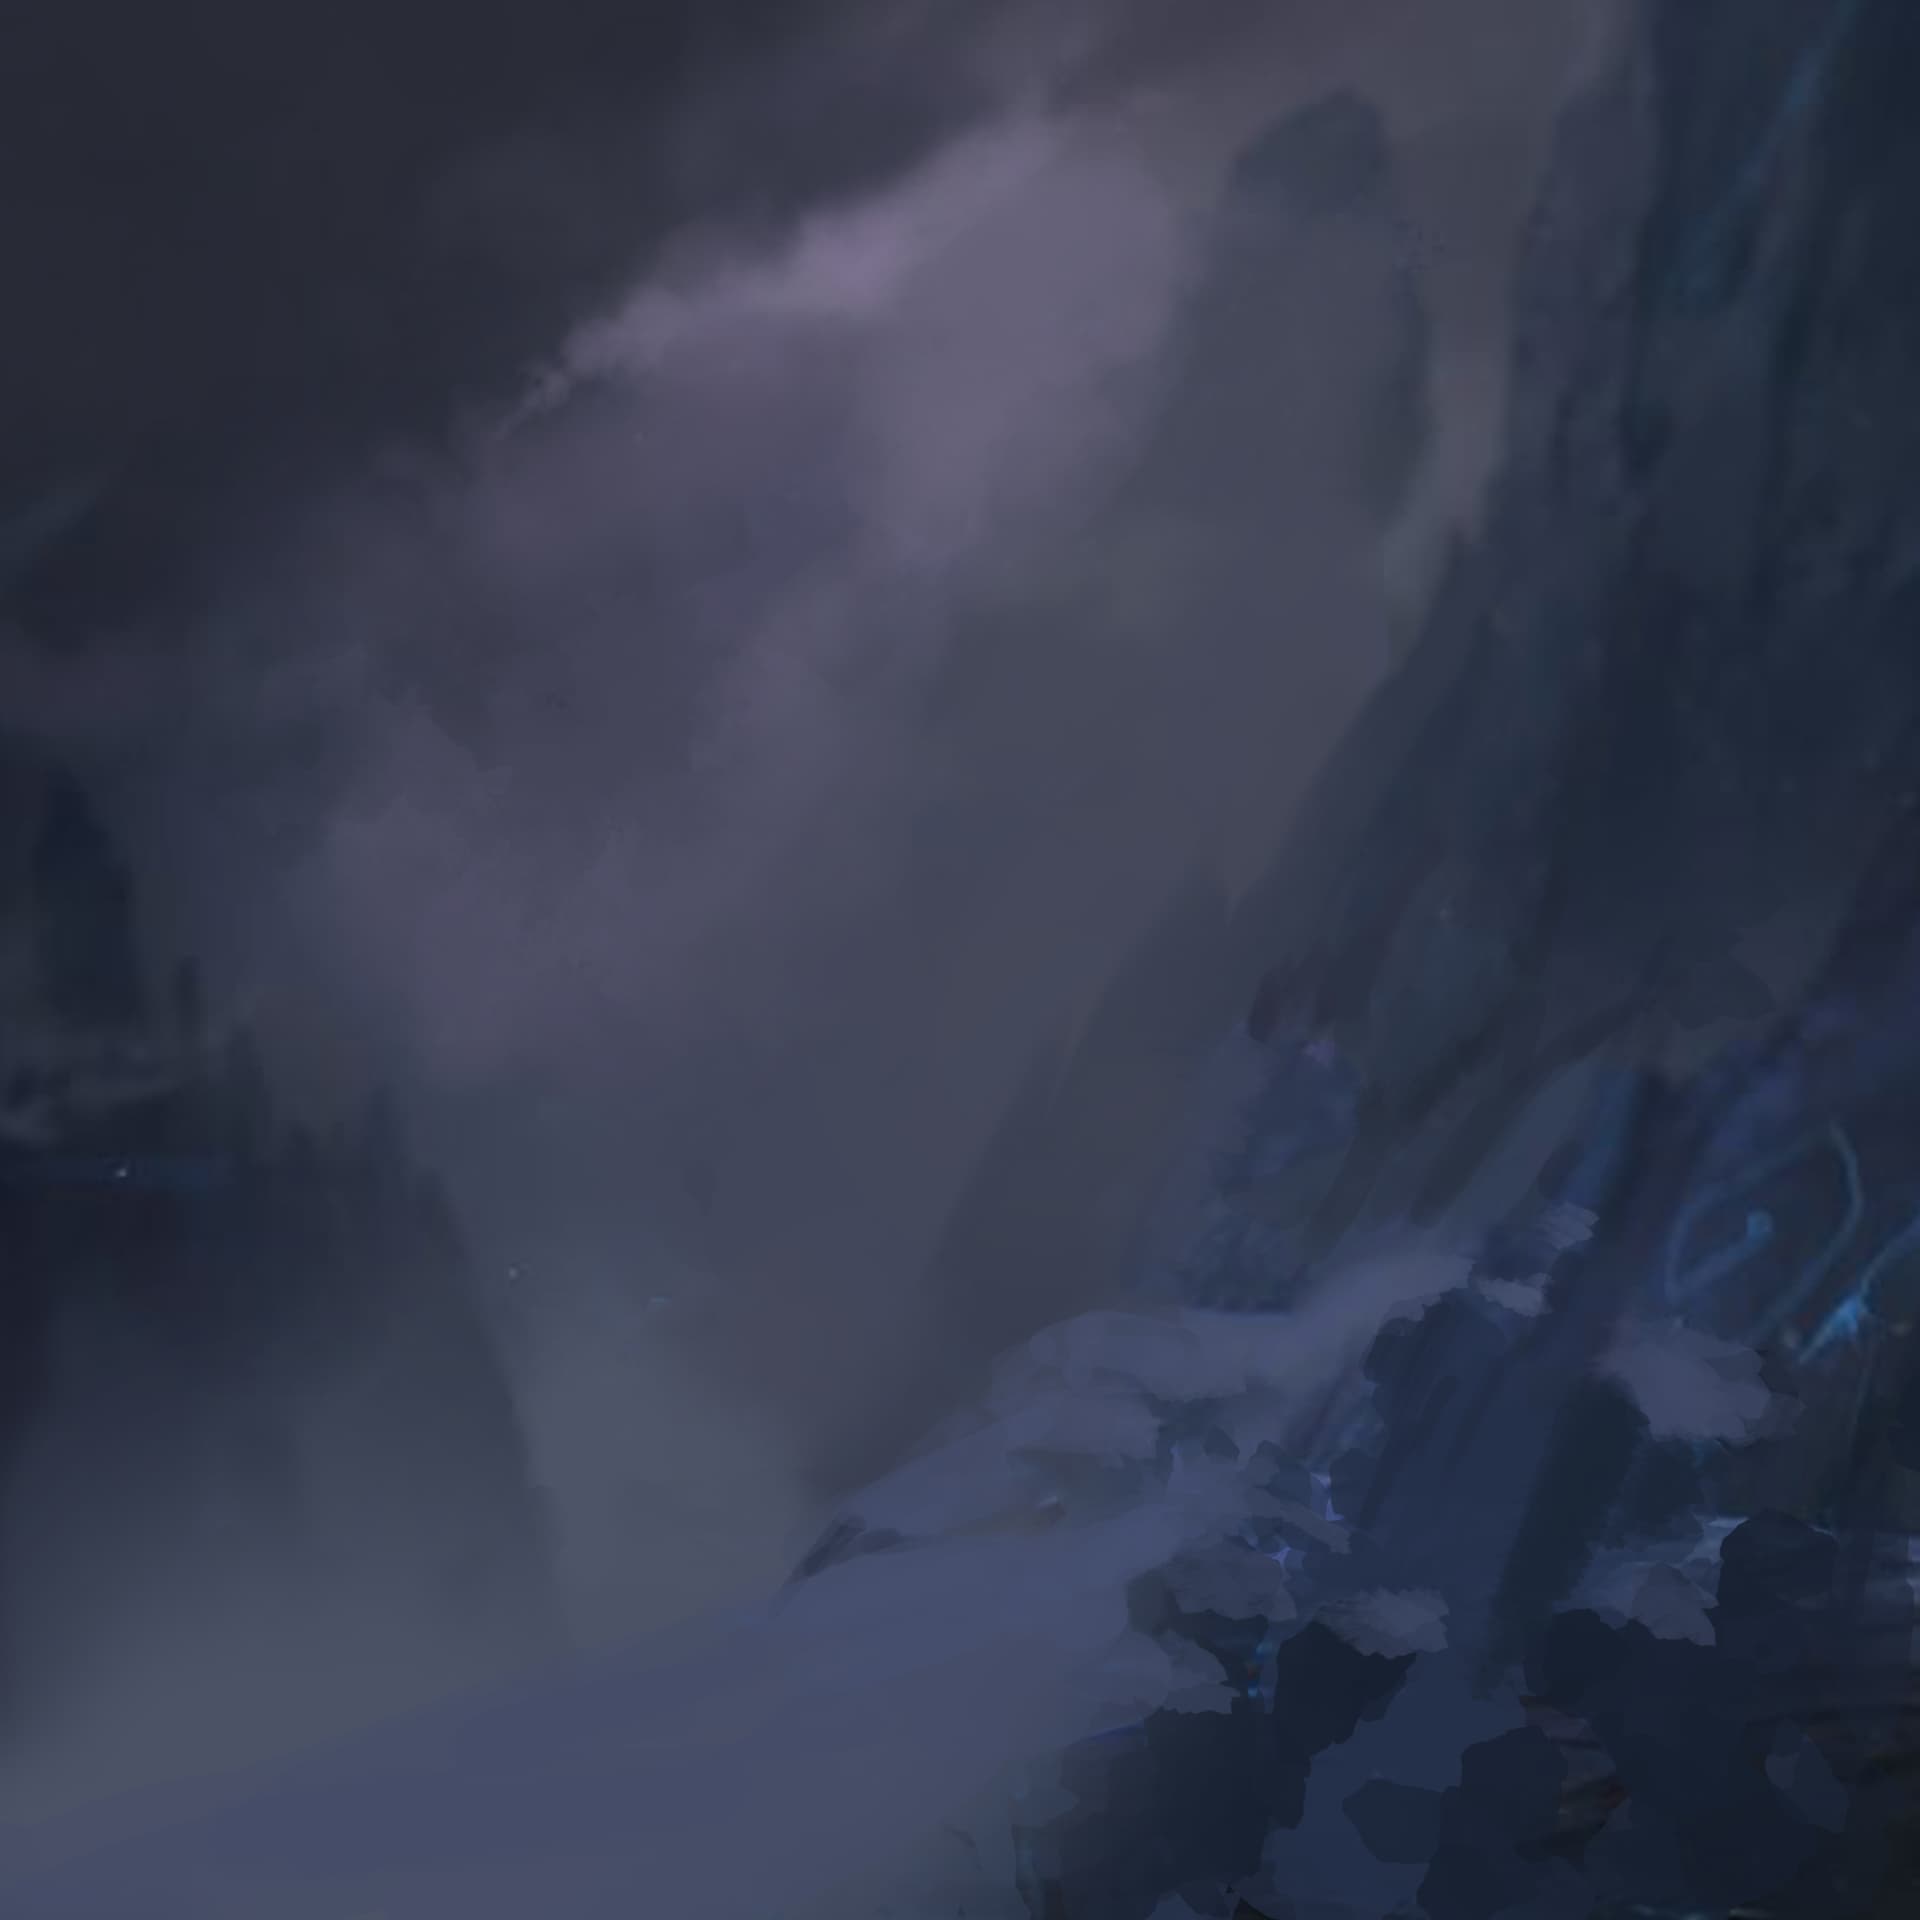
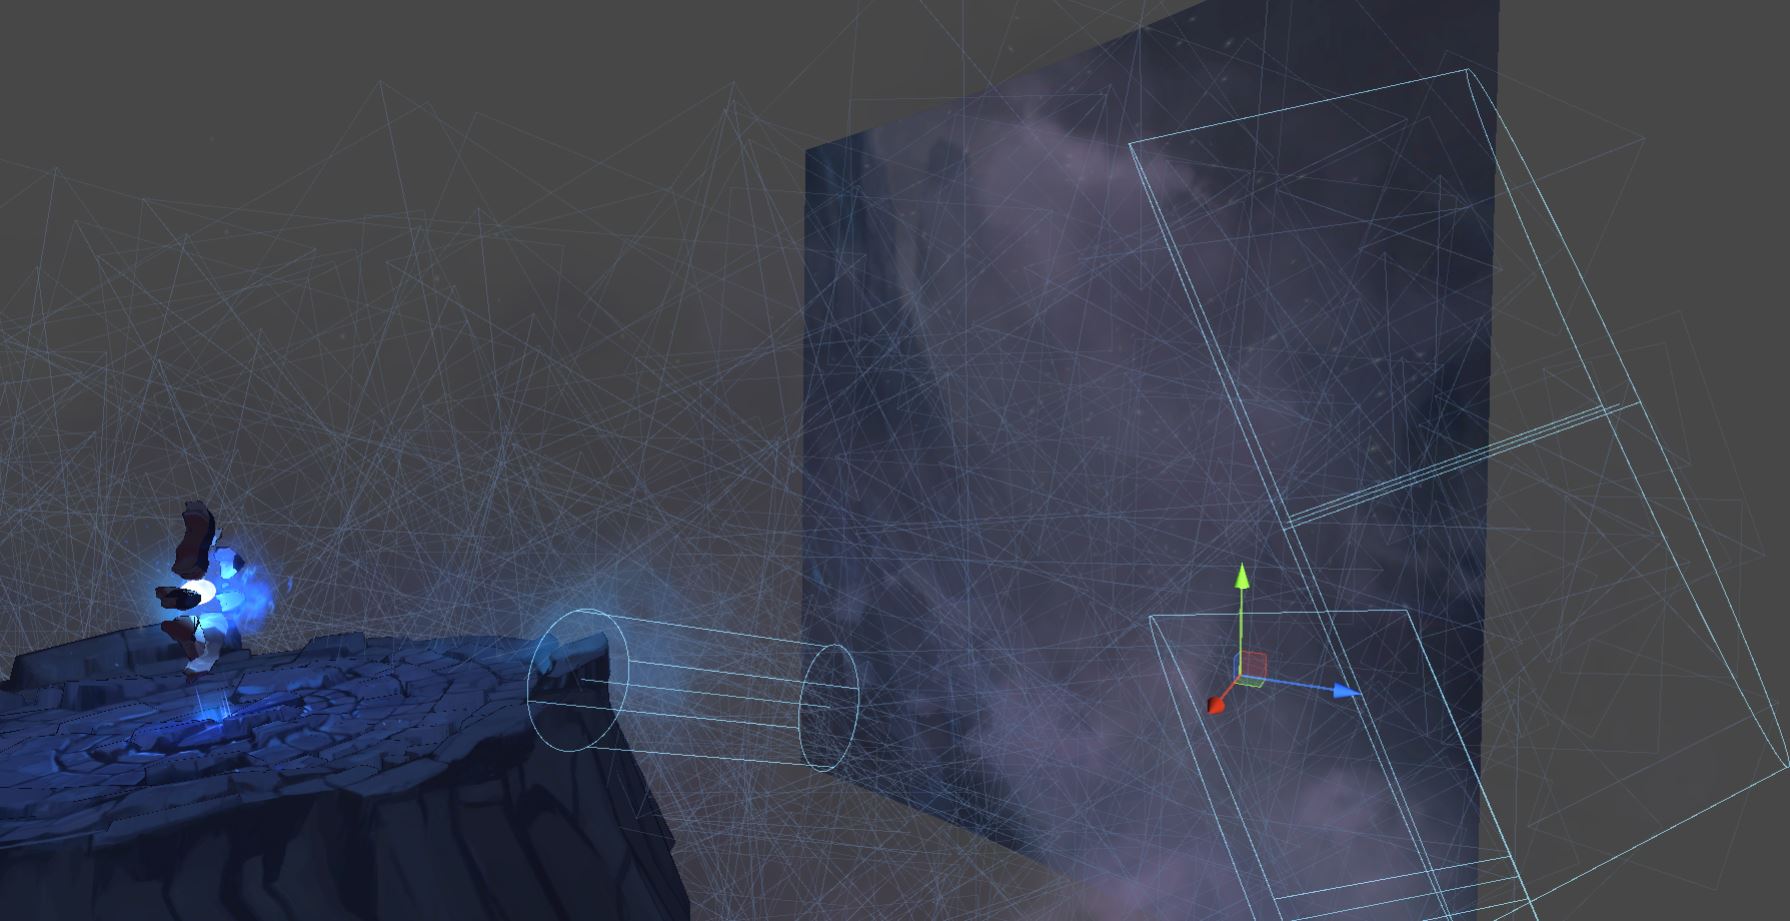
When positioning things in Unity, I made sure to space them enough so that i would have room for clouds and fog.
-
The effects are fairly easy and simplistic, i did want to have fun but didn’t want to spent too much time…you know how they say, the game is fun when it’s short.
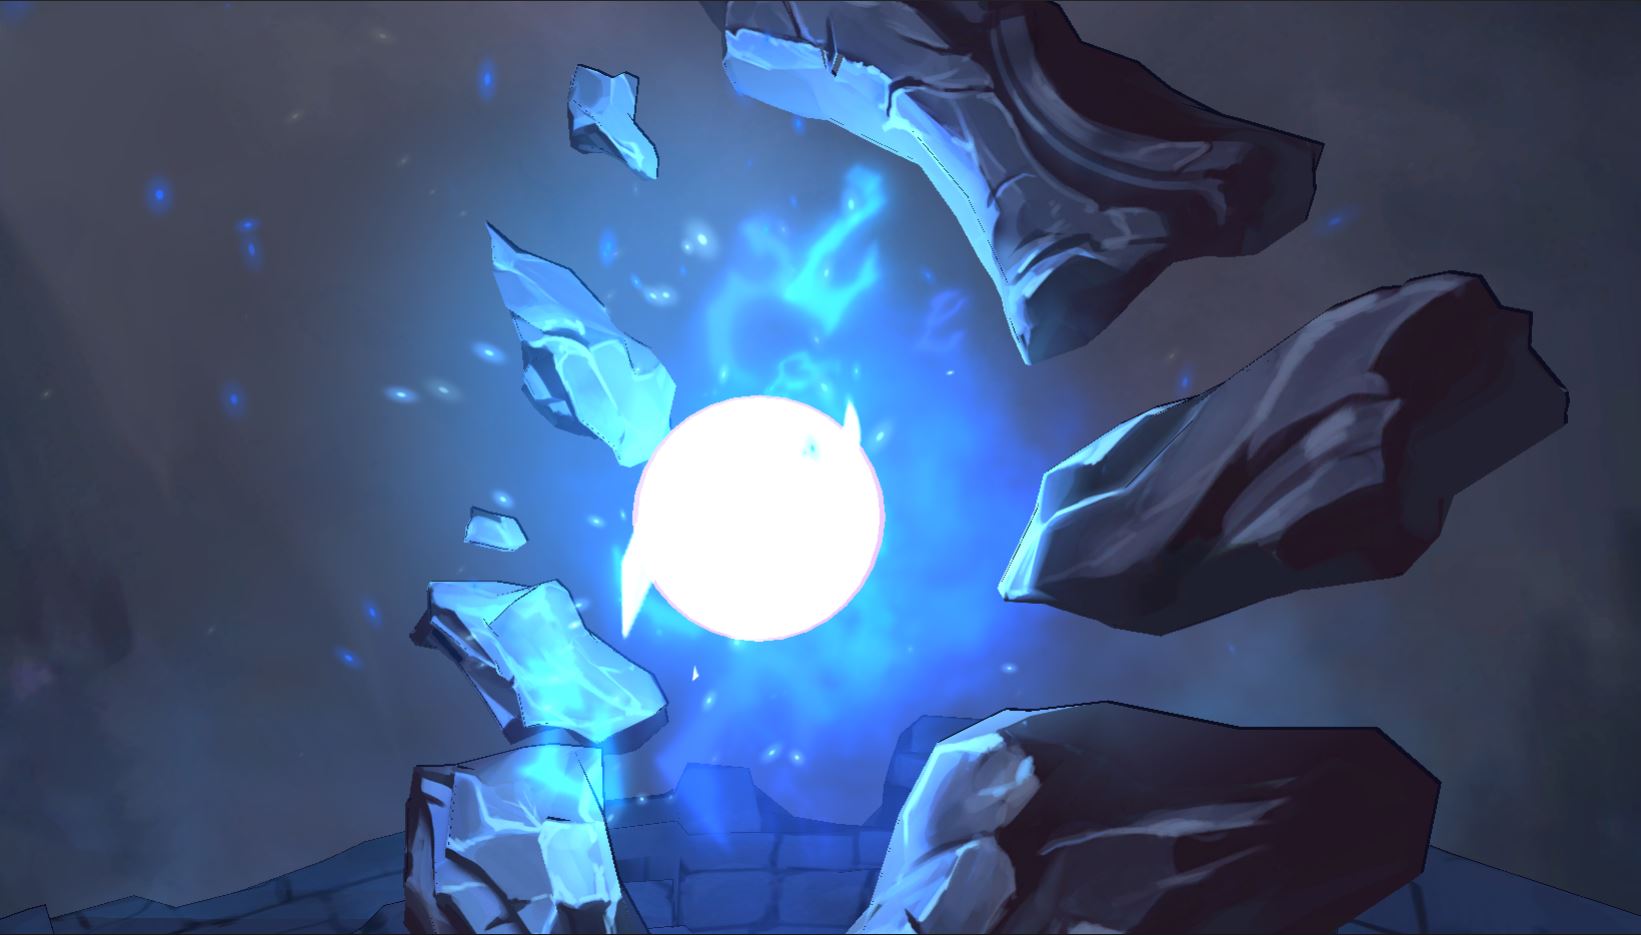
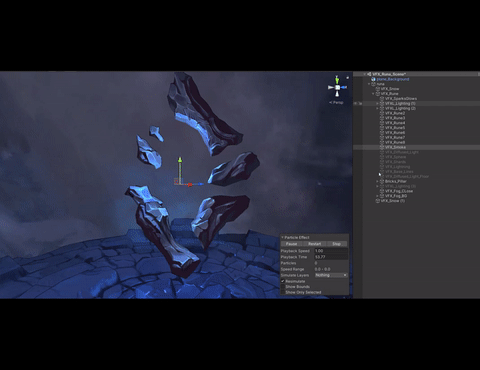
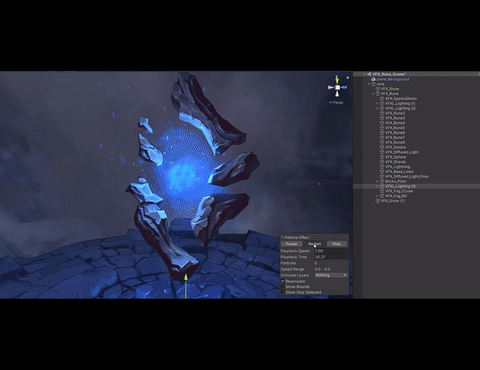
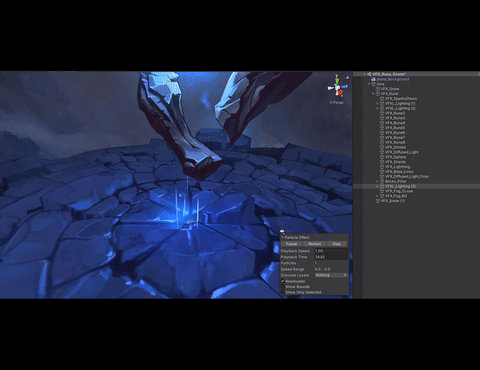
So here it is the model, it has a noise on it so it will wobble!
-
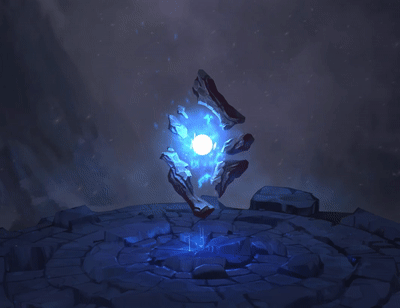
in the middle you can see some simple smoke particles and embers that have velocity over time.
-
The sphere in the middle was actually a sphere with a white shader on, and the little shards are particles facing the camera with limit velocity over lifetime, so they stop once they get around the sphere. Also i Added a couple of Point lights, one small close to the core, and one bigger more faded, and they do the “breathing” effect.
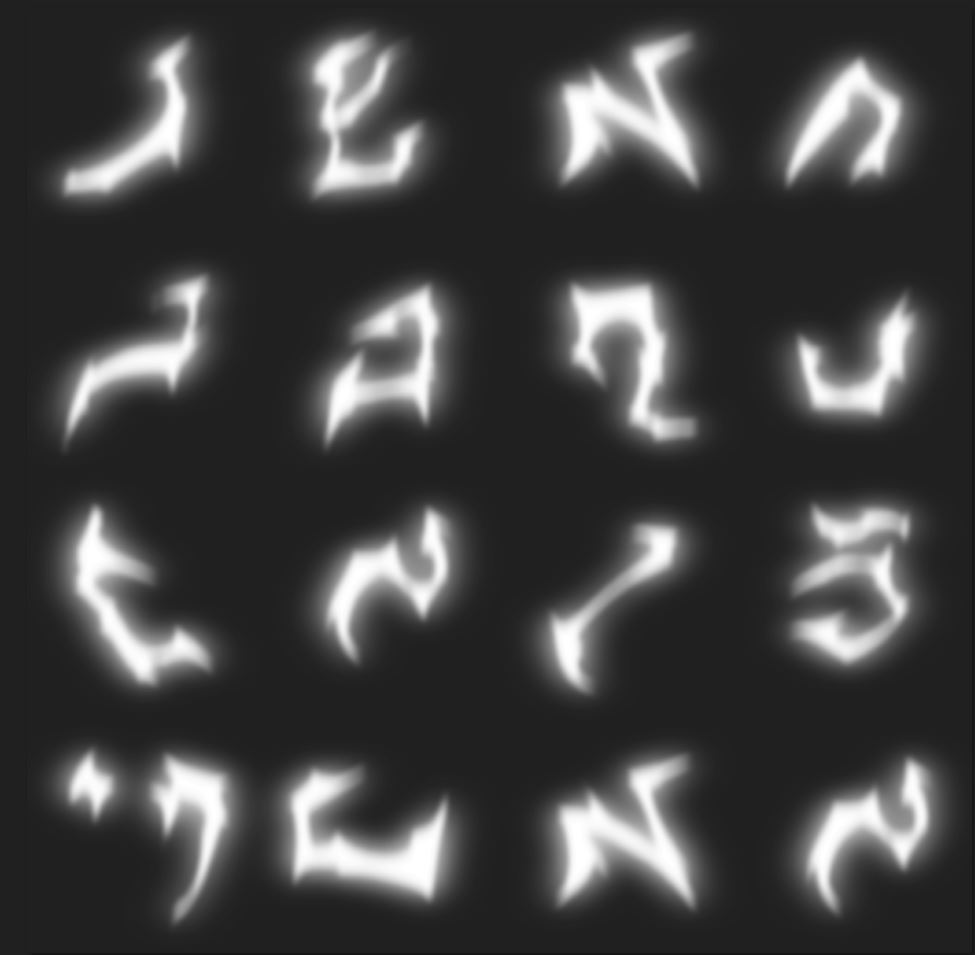
Those lightnings are placeholders. The final ones look different, here they are handpainted by me.
-
For the base these are stretched billboards that follow direction of movement, and have a brief life, aided by a light and a phew more soft particles.

The Explanation is over!
Ask away anything and until next time make awesome effects, cause i love to sneak in and peek here form time to time! Thank you for reading ![]()
11 Likes
Really cool watching your modeling process off of the original textures!
1 Like
It’s very relaxing, you just have to follow what you painted before ![]()
2 Likes
I’ve never thought to approach it that way before. I really like the idea of that method. Thanks for sharing your process on all your projects. I appreciate all the effort you’ve put into posting each breakdown
1 Like