Hey, can you share full shader map please? I’m a newbie and I’m trying to implement it on Unity. ![]()
![]()
I’ll definitely do a breakdown of the more interesting techniques when the project is finished, more geared towards beginners to vfx. I’ll likely have that out after January 31st when the contest itself is all wrapped up.
In the meantime, I highly recommend checking out this article on 80 level: VFX for Games in UE4 its geared towards Unreal but it can easily be applied towards Unity. Much of the my effects used in the spell can be reduced down to Alpha Thresholding, UV distortion, Manipulating UV’s on 3D Meshes, Soulercoasters, and fun panning textures, all of which I learned from right here on the forum.
1 Like
May I have the shader you finished?
I’m very curious about how gradient mapping works.
Thank you.
Update!
Recently got a nice free Sunday afternoon to work more on the spell. Focused on improving the general timing of the effect and introduced more elements at the moments of impact to make them feel more punchy. Additionally, I intensified the colors at key moments to try and guide the eye better during all of the many phases. With the contest wrapping up in a few days I’ll likely be tinkering with pieces here and there with the remainder of my time and hopefully getting this spell to a point I’ll be happy submitting it in.
I’d try to break the silhouette of the charge-up portal a bit more, now it’s more of a black border with a fade-out gradient. Everything else looks really cool!
1 Like
Just submitted to Blizzard! Thank you everyone for the awesome feedback over the coarse of this project, really pleased with the finished result. I’ve learned a lot about VFX since starting the contest and am honestly excited to work on a new project now that this one is coming to an end.
I’ll make time this weekend to do a breakdown of the spell to all of the people starting out in VFX or just generally curious about how I pulled off certain parts of the effect.
3 Likes
Really cool effect, good luck!
1 Like
Super informative thread! I didn’t know about the cascade camera offset module.
1 Like
Good stuff, best of luck!
1 Like
Good luck in the contest!
1 Like
Breakdown Time!
I said in a previous post how most of the effect can be broken down into Alpha Thresholding, UV distortion, Manipulating UV’s on 3D Meshes, Soulercoasters, and panning textures. Today I wanted to breakdown specifically the use of Manipluting UV’s, Soulercoasters and how they can be combined with panning textures for cool results.
Hopefully if anyone is new to VFX they can get some new tools for their real-time toolbelt.
First thing I wanted to show was Soulercoasters, most prominently seen in the Fel Healing projectiles.
https://gph.is/2S4IcYx
Side by side of the real material and a simple panning textures on the Meshes.
https://giphy.com/gifs/46zFtN0OSZE88EA3Pz
The main idea behind soulercoasters is that you make a 3D mesh of the projectile’s path and then use a panning texture to mask out everything but the projectile as it goes along the ‘path’. In this case, I made 5 meshes and applied the same material to each of the meshes.
To learn more about implementing them, there’s a great post from @Augie about them here VFX Basics - Mesh Soulercoasters
The same idea of panning and masking textures is used in the ‘Healing Wisp’, with the added use of UV manipulation to play with the timing of the wisp.
https://giphy.com/gifs/5hmJb0KdULSdn117OX
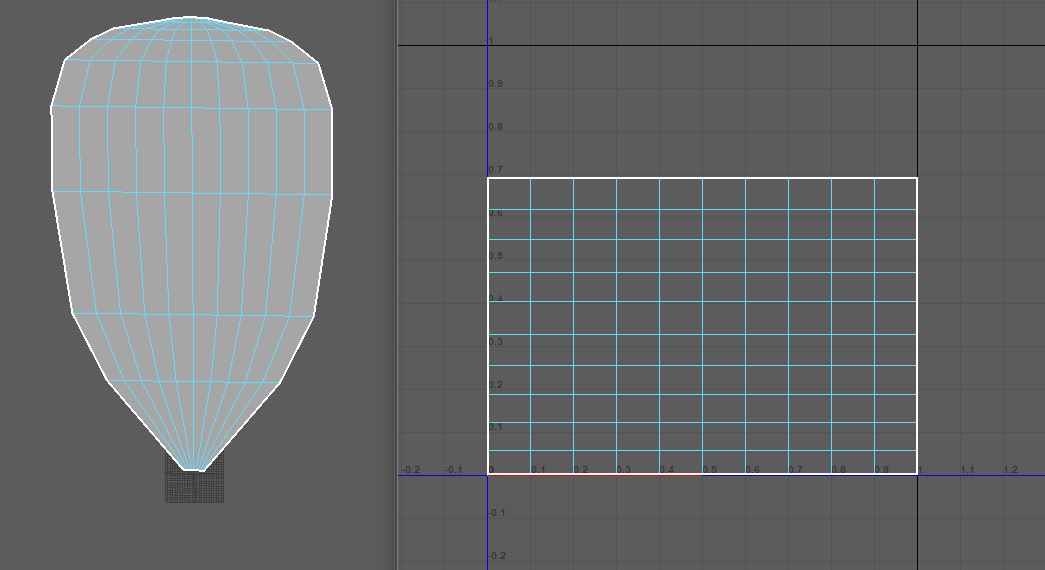
My goal with the wisp was to have it slightly ‘hang around’ the character rather than having it enter and leave at the same speed. To do that I scrunched up and widened the edges near the top and bottom of the mesh and largely left the UV’s the same, all to have it speed up and slow down during portions of the panning.
This technique with manipluating UV’s on a simple mesh is then pushed further in the summoning portal
https://giphy.com/gifs/dsVpeRZhKKwZFcWkiG
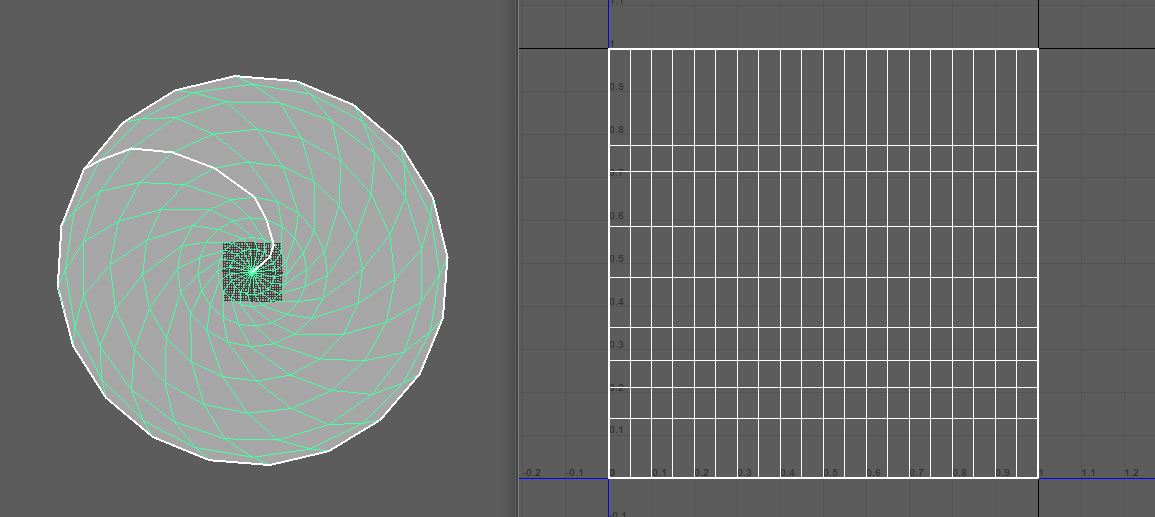
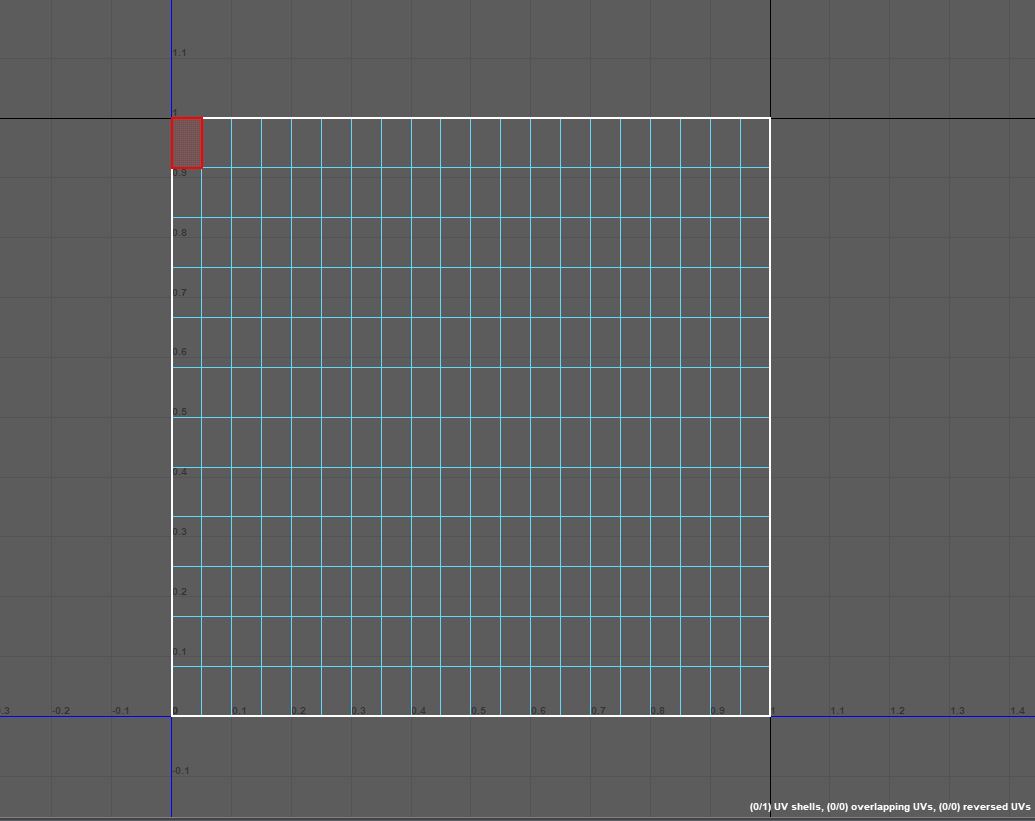
The spinning portal is made up of a circle mesh with ‘spun up’ edges and manipulated UV’s, when panned over, gives the vortex like visual. To see how to get a Circle mesh with nice UV’s check out this snippit from Shannon Berke’s mega post Shannon McSheehan - LoL FX + Knowledge Share - #64 by ShannonBerke
Hope this breakdown of some of the techniques was helpful to somebody! If anyone has additional questions on a specific part of the spell I’ll be super down to help. I won’t be posting full shader maps but I can definitely point you in the right direction ![]()
20 Likes
Hey, I really love your effect and was confused how you got to twist your uvs on a circle mesh but have straight uvs. When i use the twist defomer on a circle, and cyclinder the uvs did not twist on the mesh in maya
Thank you, and my way of getting the clean UV circle in all likleyhood could be done smarter, but its just the way I found while messing around in Maya.
I start the way Shannon Burke shared in her post with a primitive cylinder and taking off the top and bottom face, followed by the use of a flare deform tool and scaling to get the disk shape with clean UV’s.
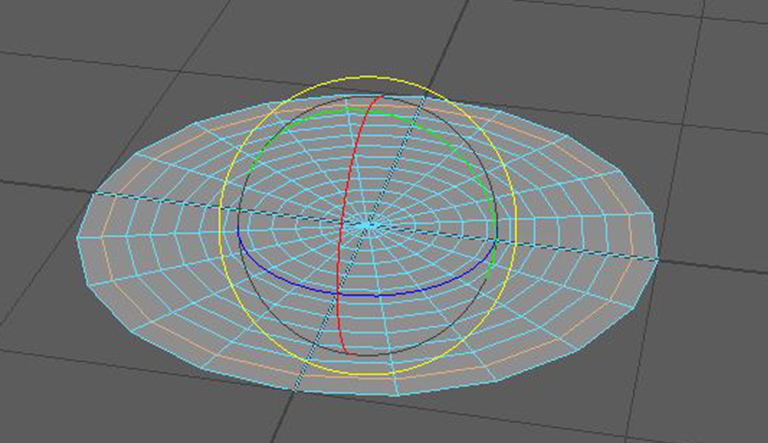
To get the spun up edges, I literally select one of the inside edges and rotate it by hand a few degrees.
It took me about a minute to do this for all edges of this example mesh.
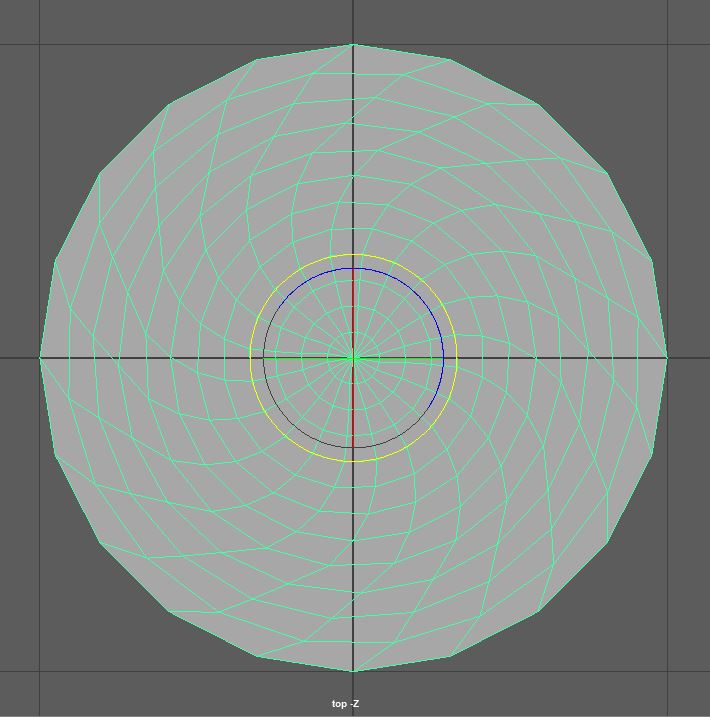
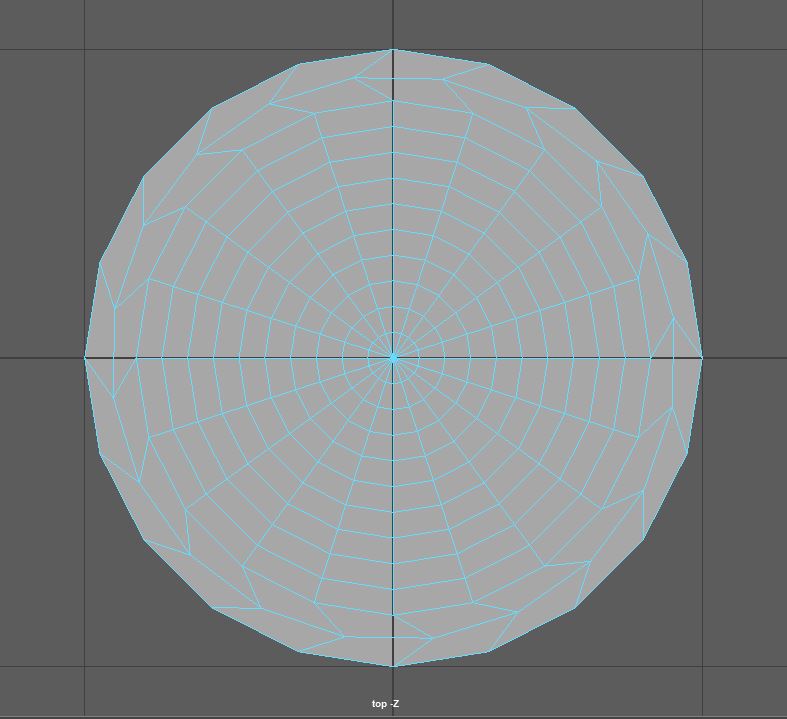
By the end, the UV’s are still clean and super usable for a bunch of effects.
Hope that helps!
4 Likes
Cool effects! As a note on this technique, in Maya you can use soft selection and just the rotate tool to do the whole mesh at once so you don’t have to go row by row. Just turn on soft selection and select the outer edge (or alternatively the inside point) and rotate. ![]()
Make sure your soft selection distance gets the whole way, and you can mess with the falloff to get different effects, a linear falloff will make it an even spiral, but some other falloffs can be cool too.
3 Likes
Really cool stuff, and i love the rotating UV’s based on Shannon’s technique.
I’m curious, for the smoketrail when your portals close, what technique did you use to achieve that?
1 Like
https://gph.is/g/wamMAja
The portal’s wisp of smoke is actually a copy of the orb smoke material I did a break down of before, with slight adjustments.
Like the orb smoke material from before, all that it’s composed of is UV distortion applied to a texture and then hitting it with a gradient map to give it the varying shades of purple. Only difference is in this smoke, I amped up the UV distortion amount and swapped out the texture to a longer smoke I drew up in Photoshop.
Granted, the smoke doesn’t look great when singled out, but felt right in context. ![]()

UV Distortion Breakdown
Gradient Map Breakdown
2 Likes
Thank you so much for the detailed explanation, really appreciate it!
Sorry for the follow up question, how exactly is the gradient map reference used? i’m having some trouble finding a good source of info on this.
Thanks again!
No worries, another person asked about the technique as well. Gradient maps are super useful and really easy to implement tool, as seen above.
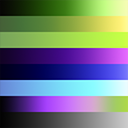
Basically gradient maps can be thought of as Look Up Tables that checks each RGB value in a 256 x 32 image, in this case a color range from black to magenta and finally to a sickly green, and remap the color value of their own color range, in this case from black to white, to match the new color scheme. That sounds like a lot, I know.
![]()
![]()
In this example, we have the black values look at the new gradient map and ask what color they should be, in this instance, a very dark purple. Half way through we have the gray values check and find that they should be magenta, and similarly, the white values should be green.
The reason, and benefit, of using the 256 x 32 dimension for our gradient maps is that we can stack multiple maps of different color schemes on top of one another into one mega gradient map, allowing us to save on space and still sustain those powers of 2 that computers love so much.
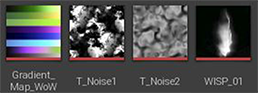
For the Warlock Spell, I made this guy, which includes 8 different maps in a 256 x 256 image.

These are really easy to make in photoshop, and a few google searches should get you what you’re looking for.
What makes it way more useful is when you use this logic on a texture.
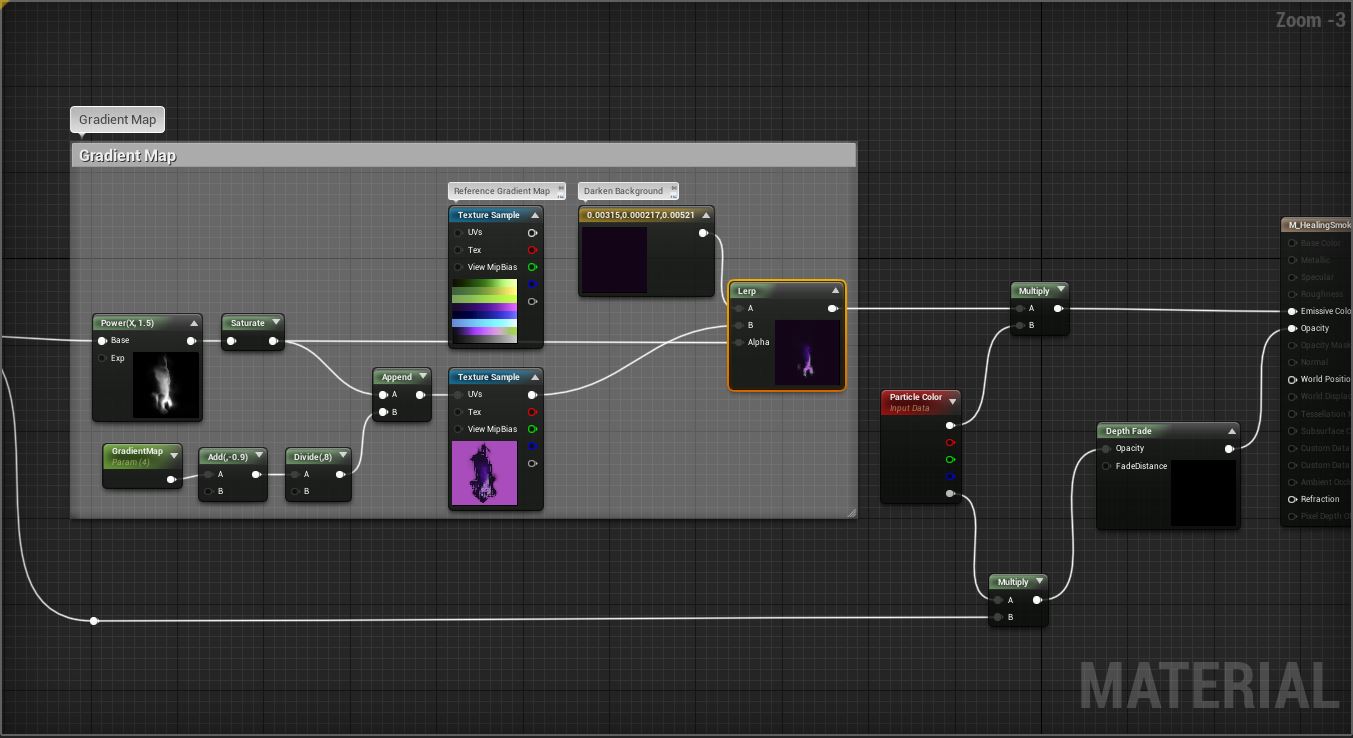
Using the smoke example, we have a slight alteration from Luos’s implementation found here Particle Gradient Mapping - #2 by NateLane
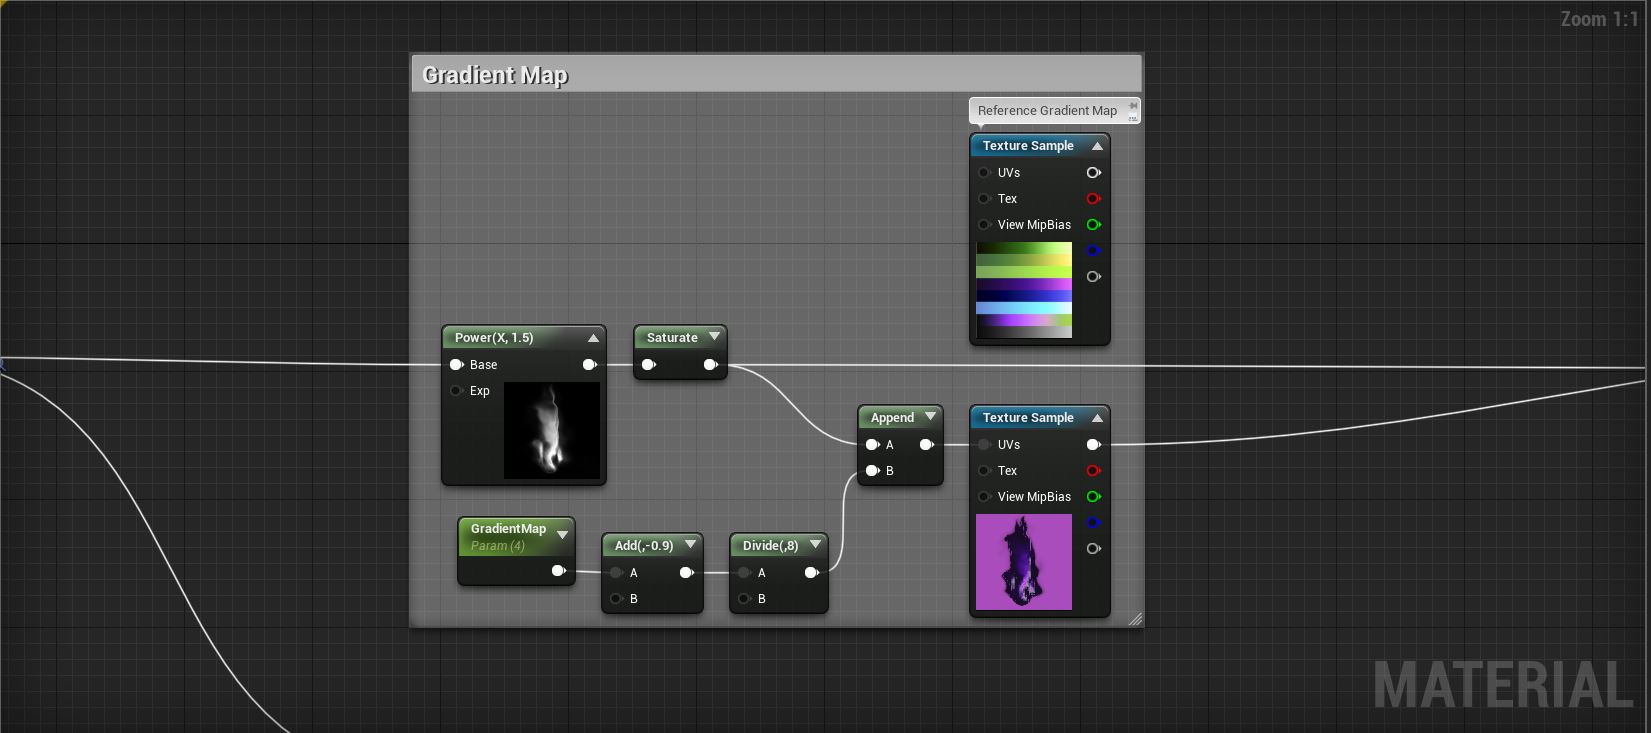
Starting from the left, we take our grayscale version of our smoke texture and saturate it, which basically normallizes the RGB values, or set them to range from 0 to 1. The green node called “Gradient Map” from the screenshot is a parameter I set so that I can easily swap out which gradient map I want to to use at that moment.
In this instance want our smoke to be dark on the edges and light pink at the center, so we look at the Warlock Gradient Map and see the 4th row down, the one that goes from dark purple to light purple.
Starting from the top, a value of 1.0 would give us the black to green color scheme, while a value of 2.0 would give me the off green to bright yellow color scheme. We input 4.0, remapping the texture we give to now take on the purple color scheme.
The floating “Reference Gradient Map” node in the screenshot is literally just there to show me the order of maps, and is intentionally not plugged into anything. And that’s it!
TLDR; Gradient maps let you change the color scheme of a black and white texture. Copy that unreal code and apply it to a grayscale image. This stuff is way easier to get by doing than explaining in text form. ![]()
Again, this post is great if you’re wanting to see much smarter and more qualified people discuss them Particle Gradient Mapping - #2 by NateLane
1 Like
Sorry for the delayed reply on this.
I really appreciate the in-depth explanation, it helped me out a lot! ![]()
1 Like
Obviously this looks fantastic. I too am a student and just got into the vfx field (transitioning from character animation).
My only (constructive) criticism would be how flat the beginning portal looks. It doesn’t feel like there’s any depth to it. The smoke around the edges definitely helps though.
Aside from that, it looks fantastic! I kinda skimmed over what it was supposed to be and went straight to the clip and could tell right away what it was which is what I think is the most important thing to communicate ![]()
1 Like