Obviously you can do a clock face with just blueprint, but the fantasy genre always loves some old-school clockwork effect for time and space magic, so here is a quick tutorial about assembling a simple set of clock hands for an analog clock face in Niagara.
Happy New Year 2023
")
The hands (or pointers) material is an isosceles triangle pointing upward created from simple shearing transform of texcoord:
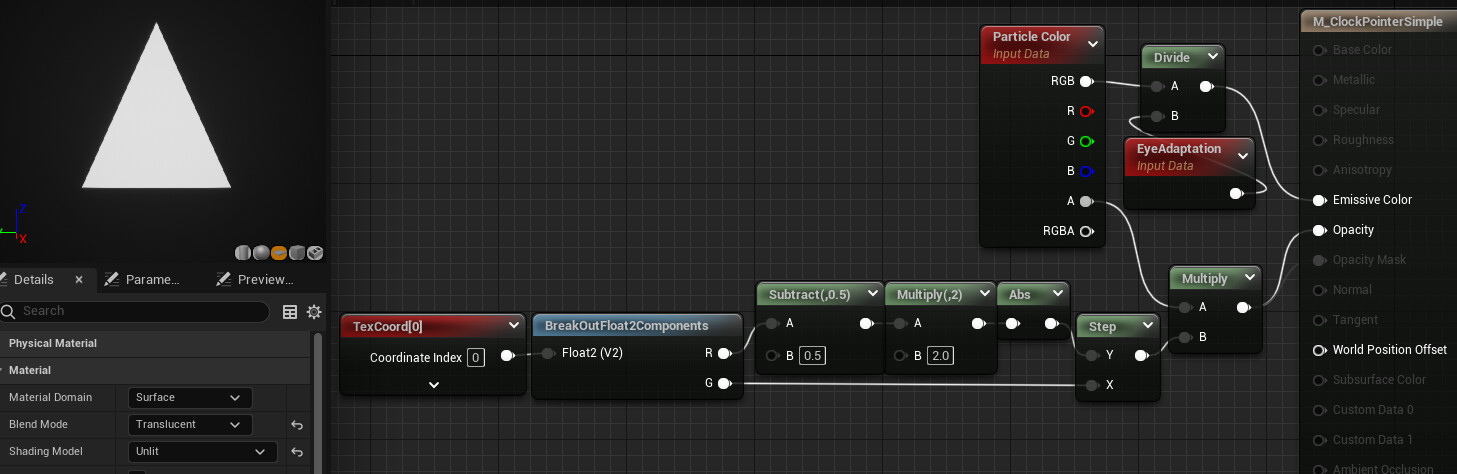
You can use whatever shapes you prefer.
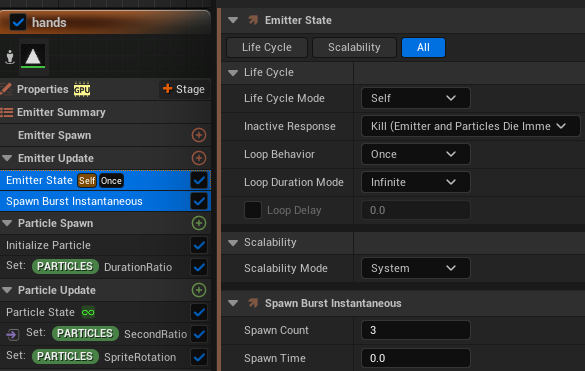
Because this is a “regular” clock, I set the emitter state with “once” loop behavior and “infinite” loop duration, then I burst 3 particles for second, minute and hour hands.
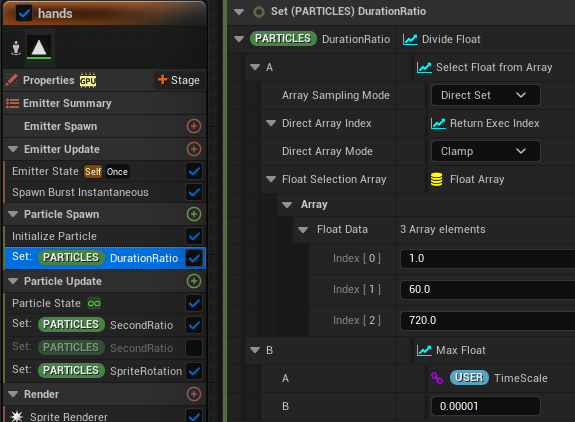
Then I set a new float attribute “DurationRatio” (I am not familiar with clockwork, so please bear with my poor etymology.) This is used to define how long it takes for 1 revolution of each hand. Execution Index 0, 1 and 2 are assigned to second, minute and hour hands respectively.
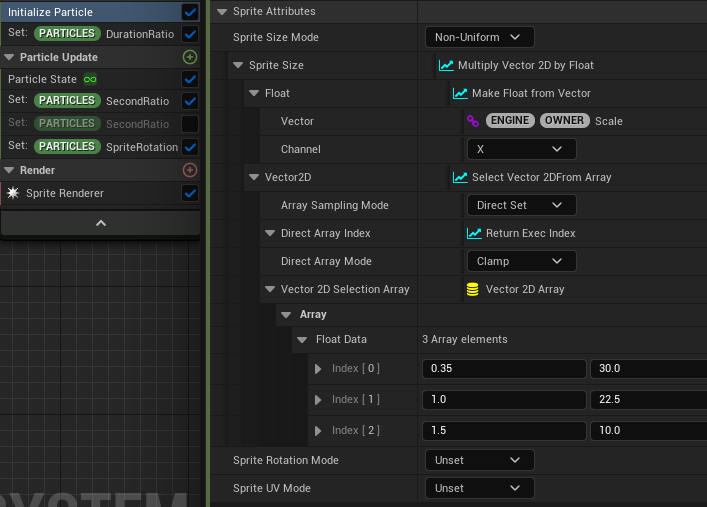
Same idea for the hand sprite size. All 3 hands use the same sprite renderer/material anyway.
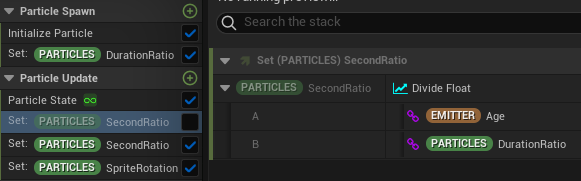
In Particle Update, I set another float attribute “SecondRatio” which is the product of the time (in second) and DurationRatio. We can use System/Emitter/Particle Age for the time.
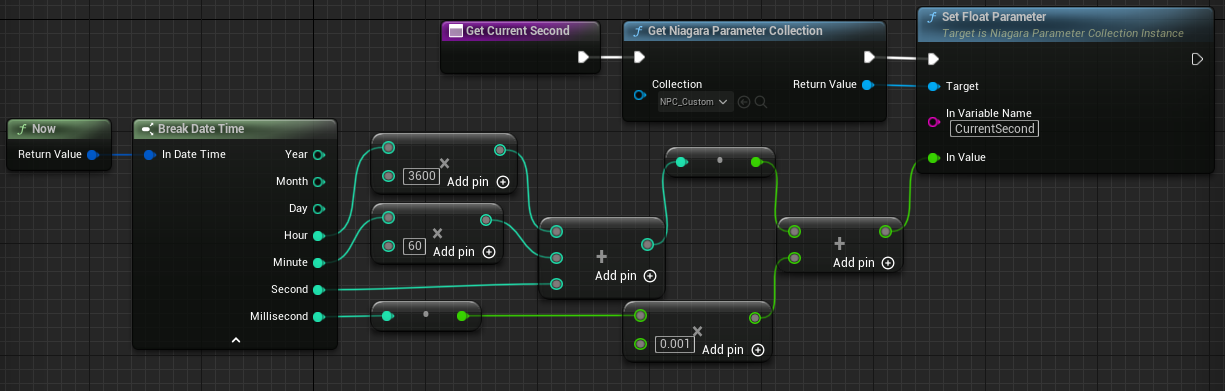
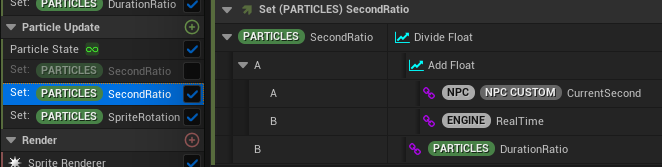
However, if you want to display your device’s actual clock, you can use a blueprint to get the current time (credit to Atheist91 on Epic Dev Community), then set to the Niagara Parameter Collection (courtesy of Niels for his quick NPC tutorial). My “CurrentSecond” is only updated at the beginning of PIE, so I add Engine.RealTime before the multiplication. You don’t have to do this if you update the current second every tick, I set it this way so I can preview it in edit mode. Please let me know if there is any better method to brute-force updating NPC during edit mode.
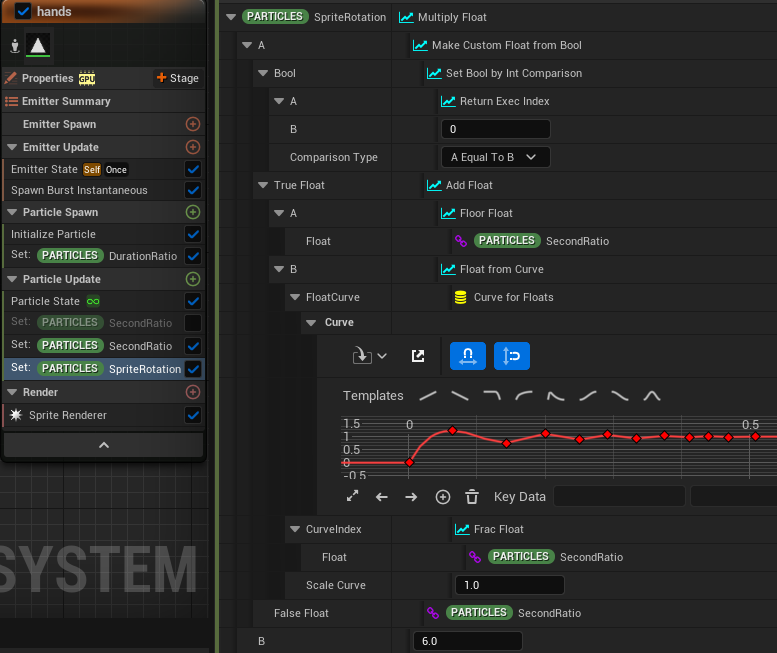
We have the necessary ingredient to rotate the hands. Because SpriteRotation is based on degree, that means the result needs to be multiplied by 360/60 = 6. Minute and hour hands can multiply their SecondRatio by 6 directly. For the second hand, I want to simulate the springy motion as a by-product of the stepper motor, so I split the SecondRatio by floor and frac and use a curve to recreate that springy motion.
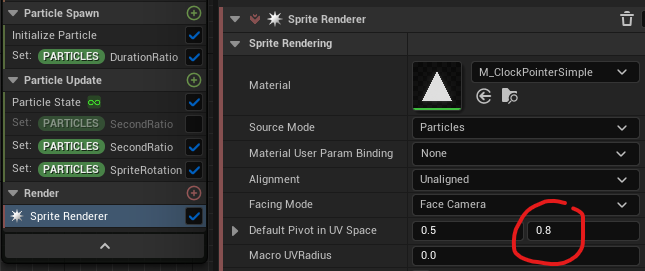
Last but not least just offset the sprite pivot in Sprite Renderer and we are done.
The dial can be done in so many ways, mine in the demo video just reuses the isosceles triangle material and another material with DebugScalarValue node for the numerals because I was too lazy to create a new numeral texture.